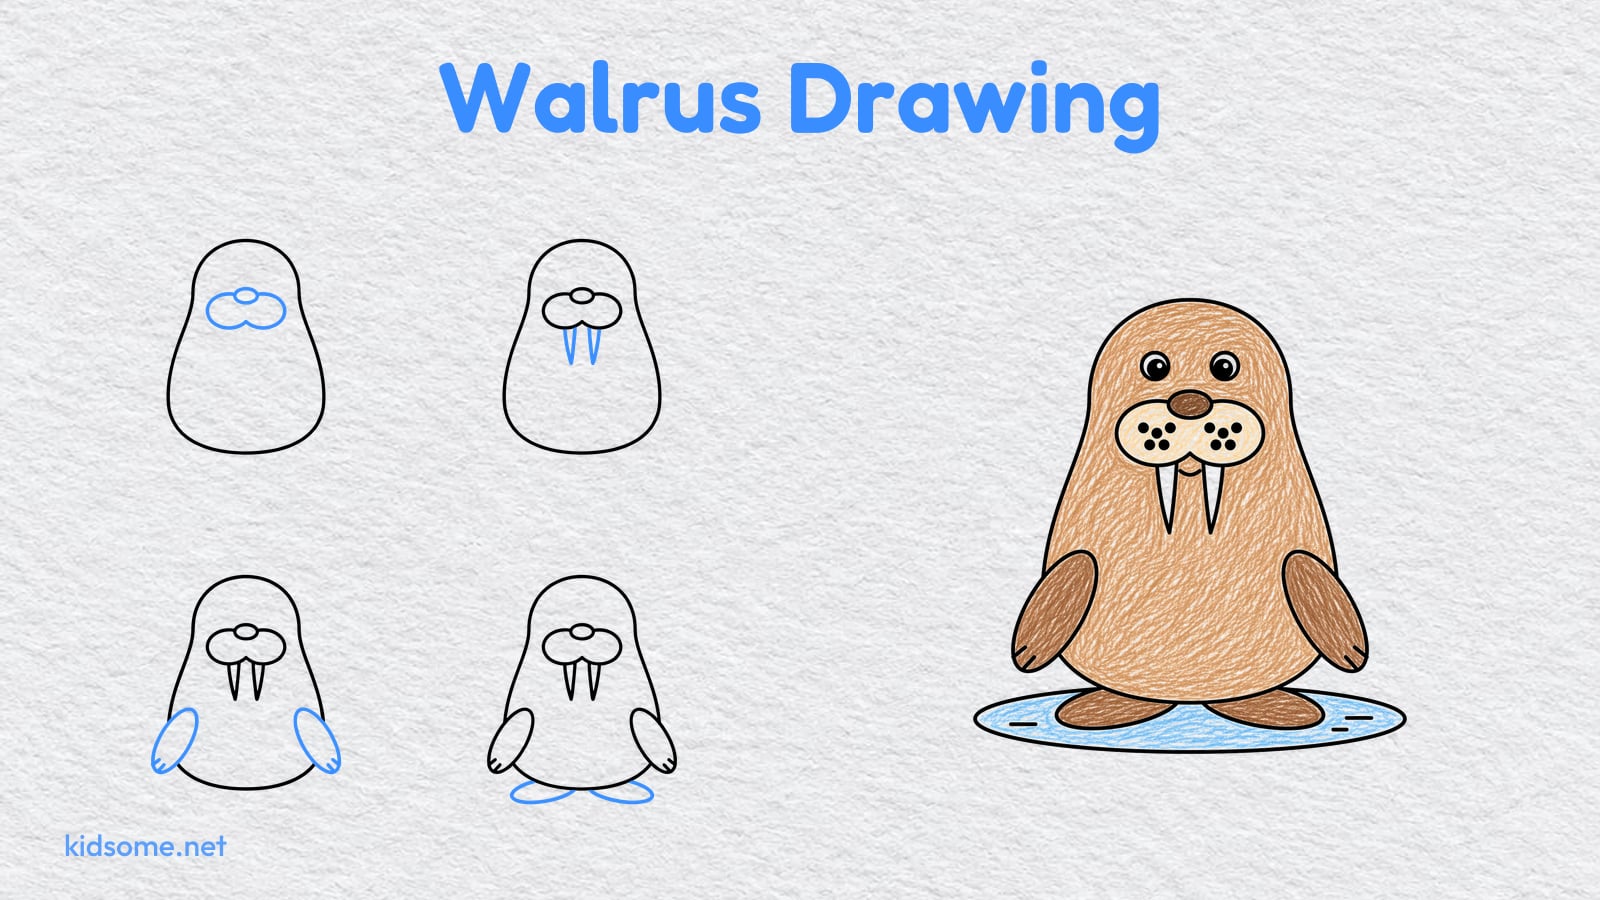
This walrus drawing guide shows kids ages 4 to 8, and the grown-ups drawing beside them, how to draw a walrus one easy step at a time. A walrus is a perfect winter animal for young artists, because its big body is really just one smooth pear shape. Add puffy whisker cheeks, two long tusks and a few flippers, and that simple shape turns into a cute, smiling walrus sitting on a little patch of ice. No special art skills are needed, just a pencil, an eraser and a little patience.
There are six steps. Each step shows the drawing so far in black and the new part in blue, so it is always clear what to add next. At the end there is a free printable outline of the finished walrus to trace or color, plus a crayon colored example to copy if you like. Kids who love it can try more of our animal drawing guides on the next snowy afternoon.
-
Step 1 : Draw the body

Draw one big pear shape in the middle of the page. Make it rounded and narrow at the top for the head and wide at the bottom, like a big soft drop of water.
-
Step 2 : Add cheeks and nose
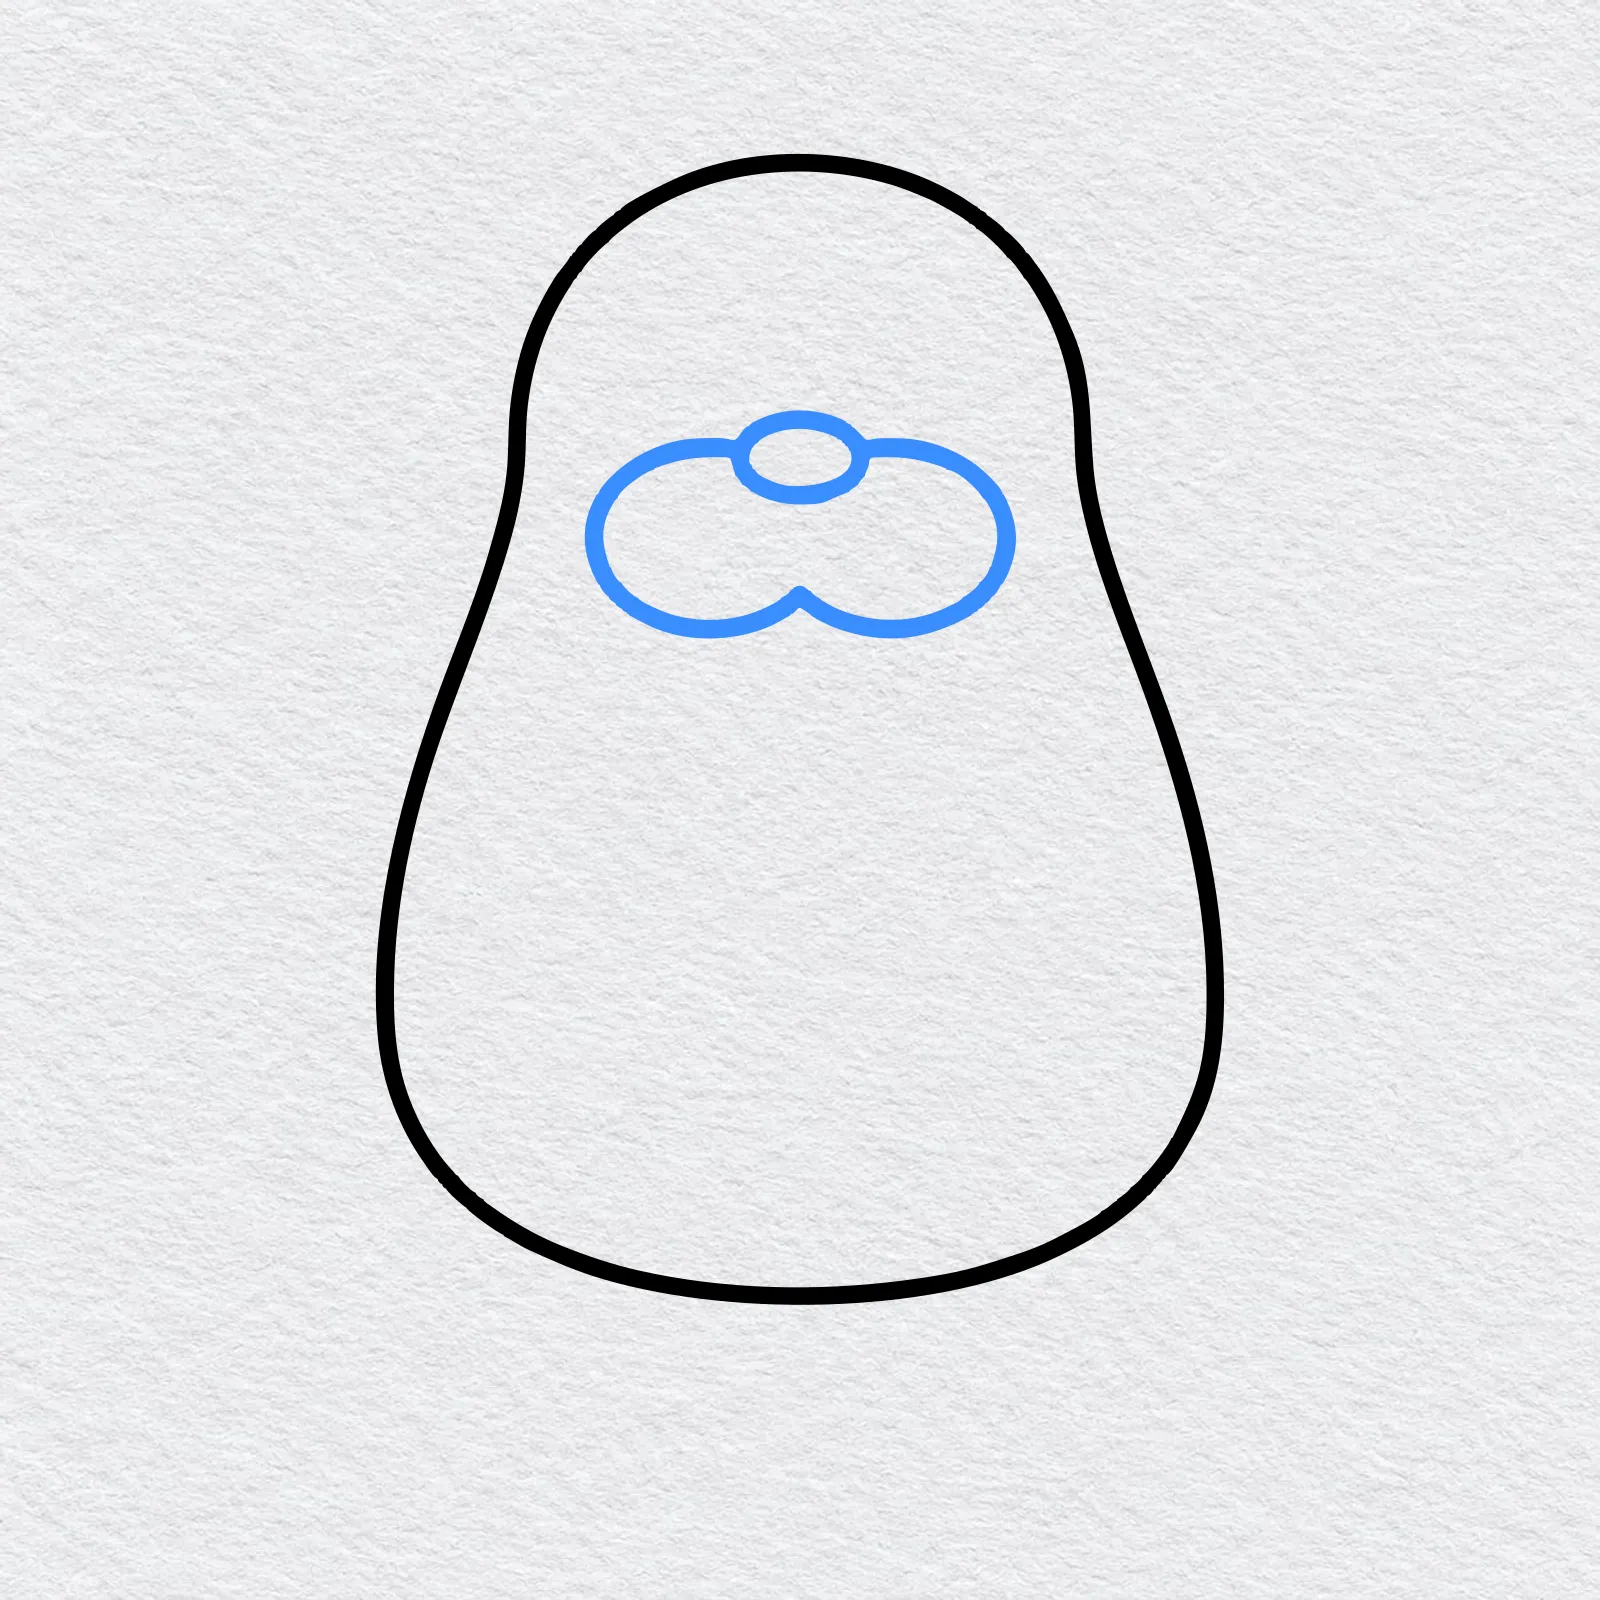
Near the top of the body, draw two puffy round cheeks side by side, touching in the middle. Draw a small oval nose sitting right on top of the cheeks.
-
Step 3 : Draw the tusks
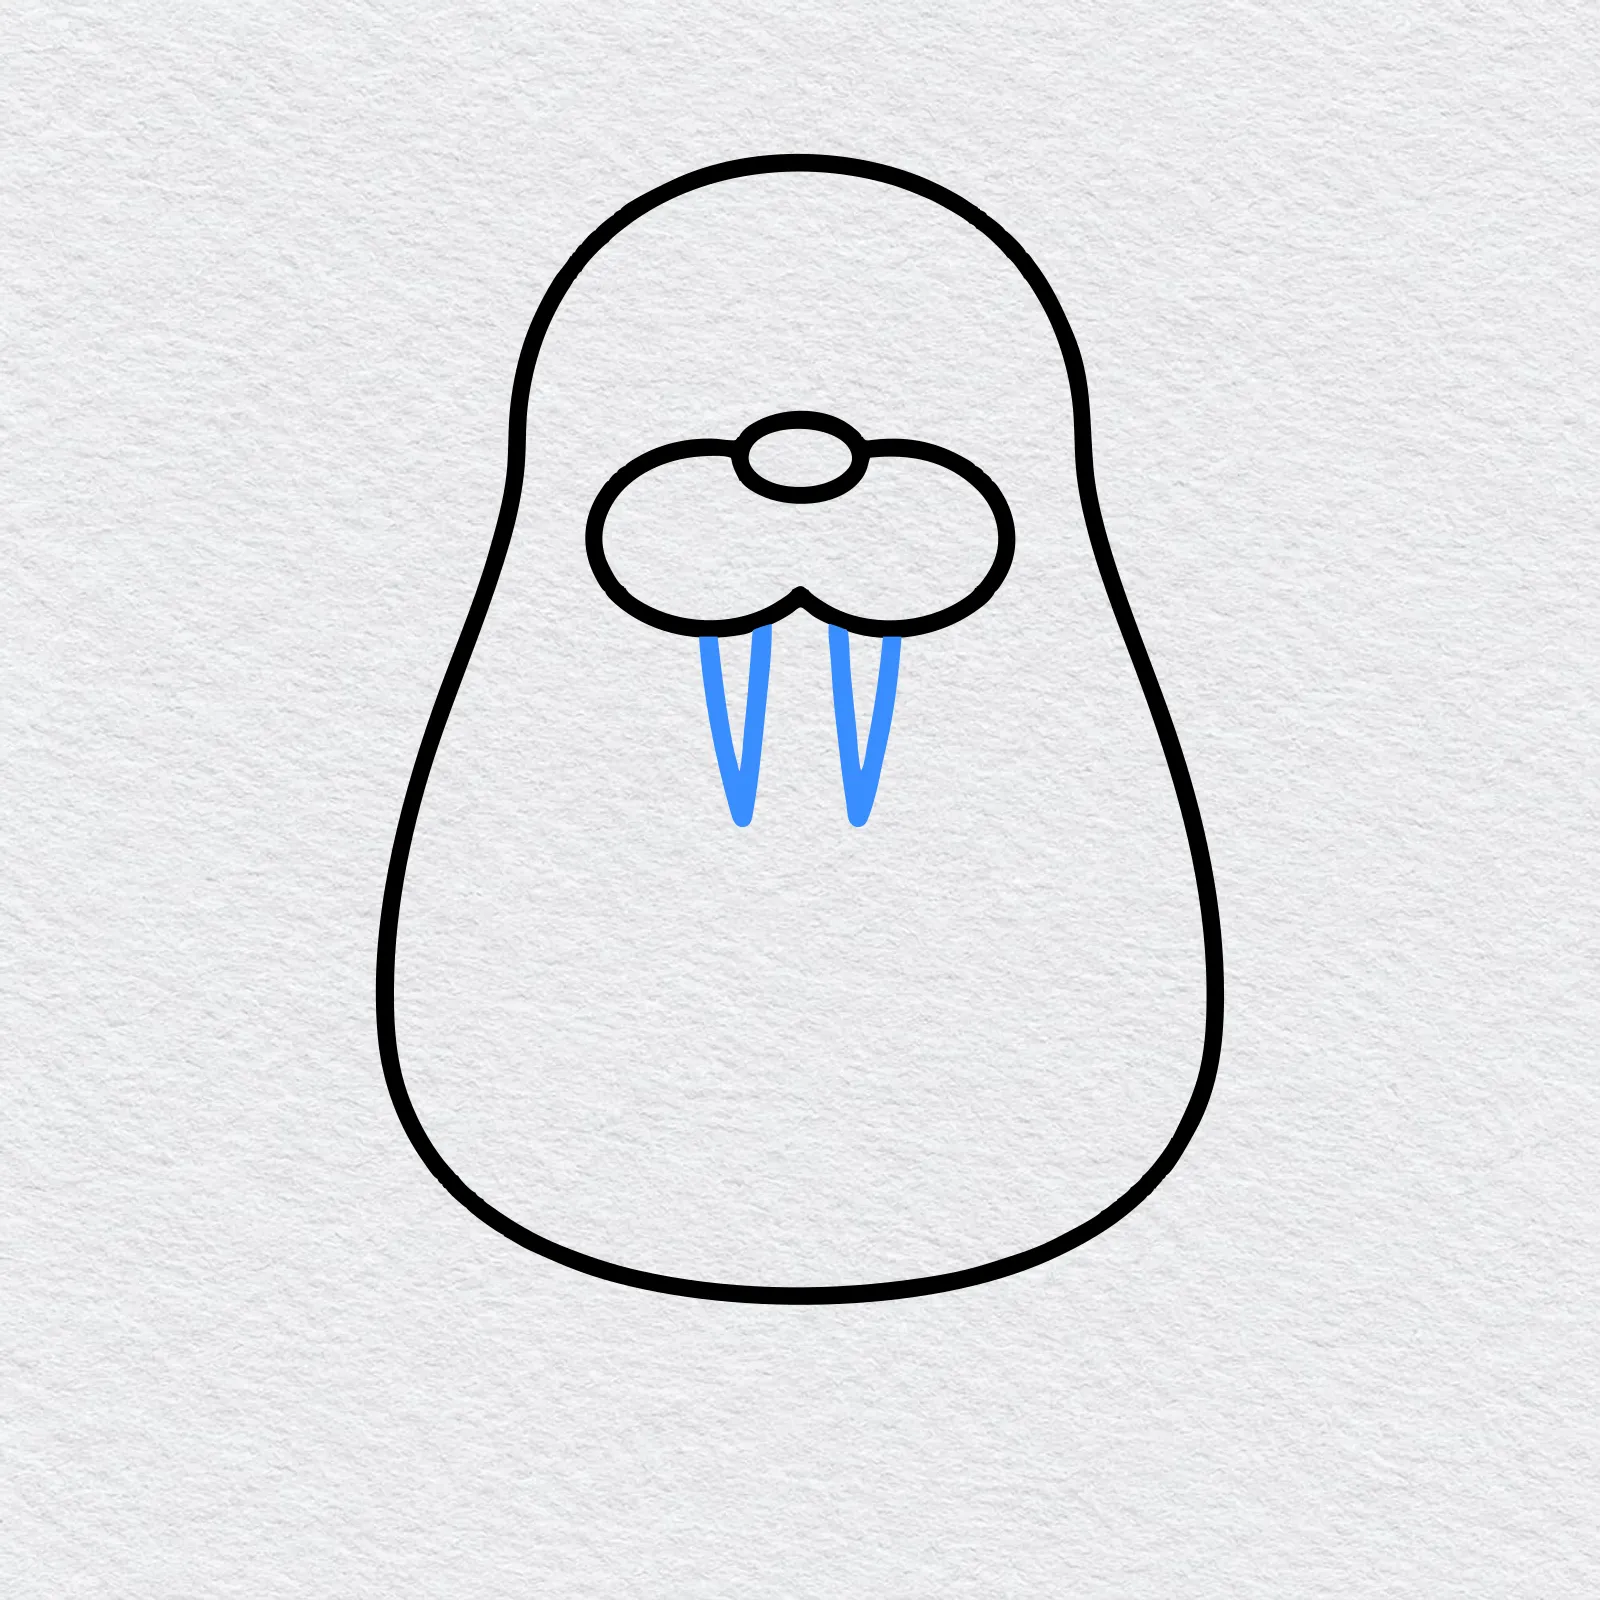
Under the cheeks, draw two long tusks pointing down. Make each one wide at the top and thin at the bottom, like a long, narrow triangle with a rounded tip.
-
Step 4 : Add front flippers
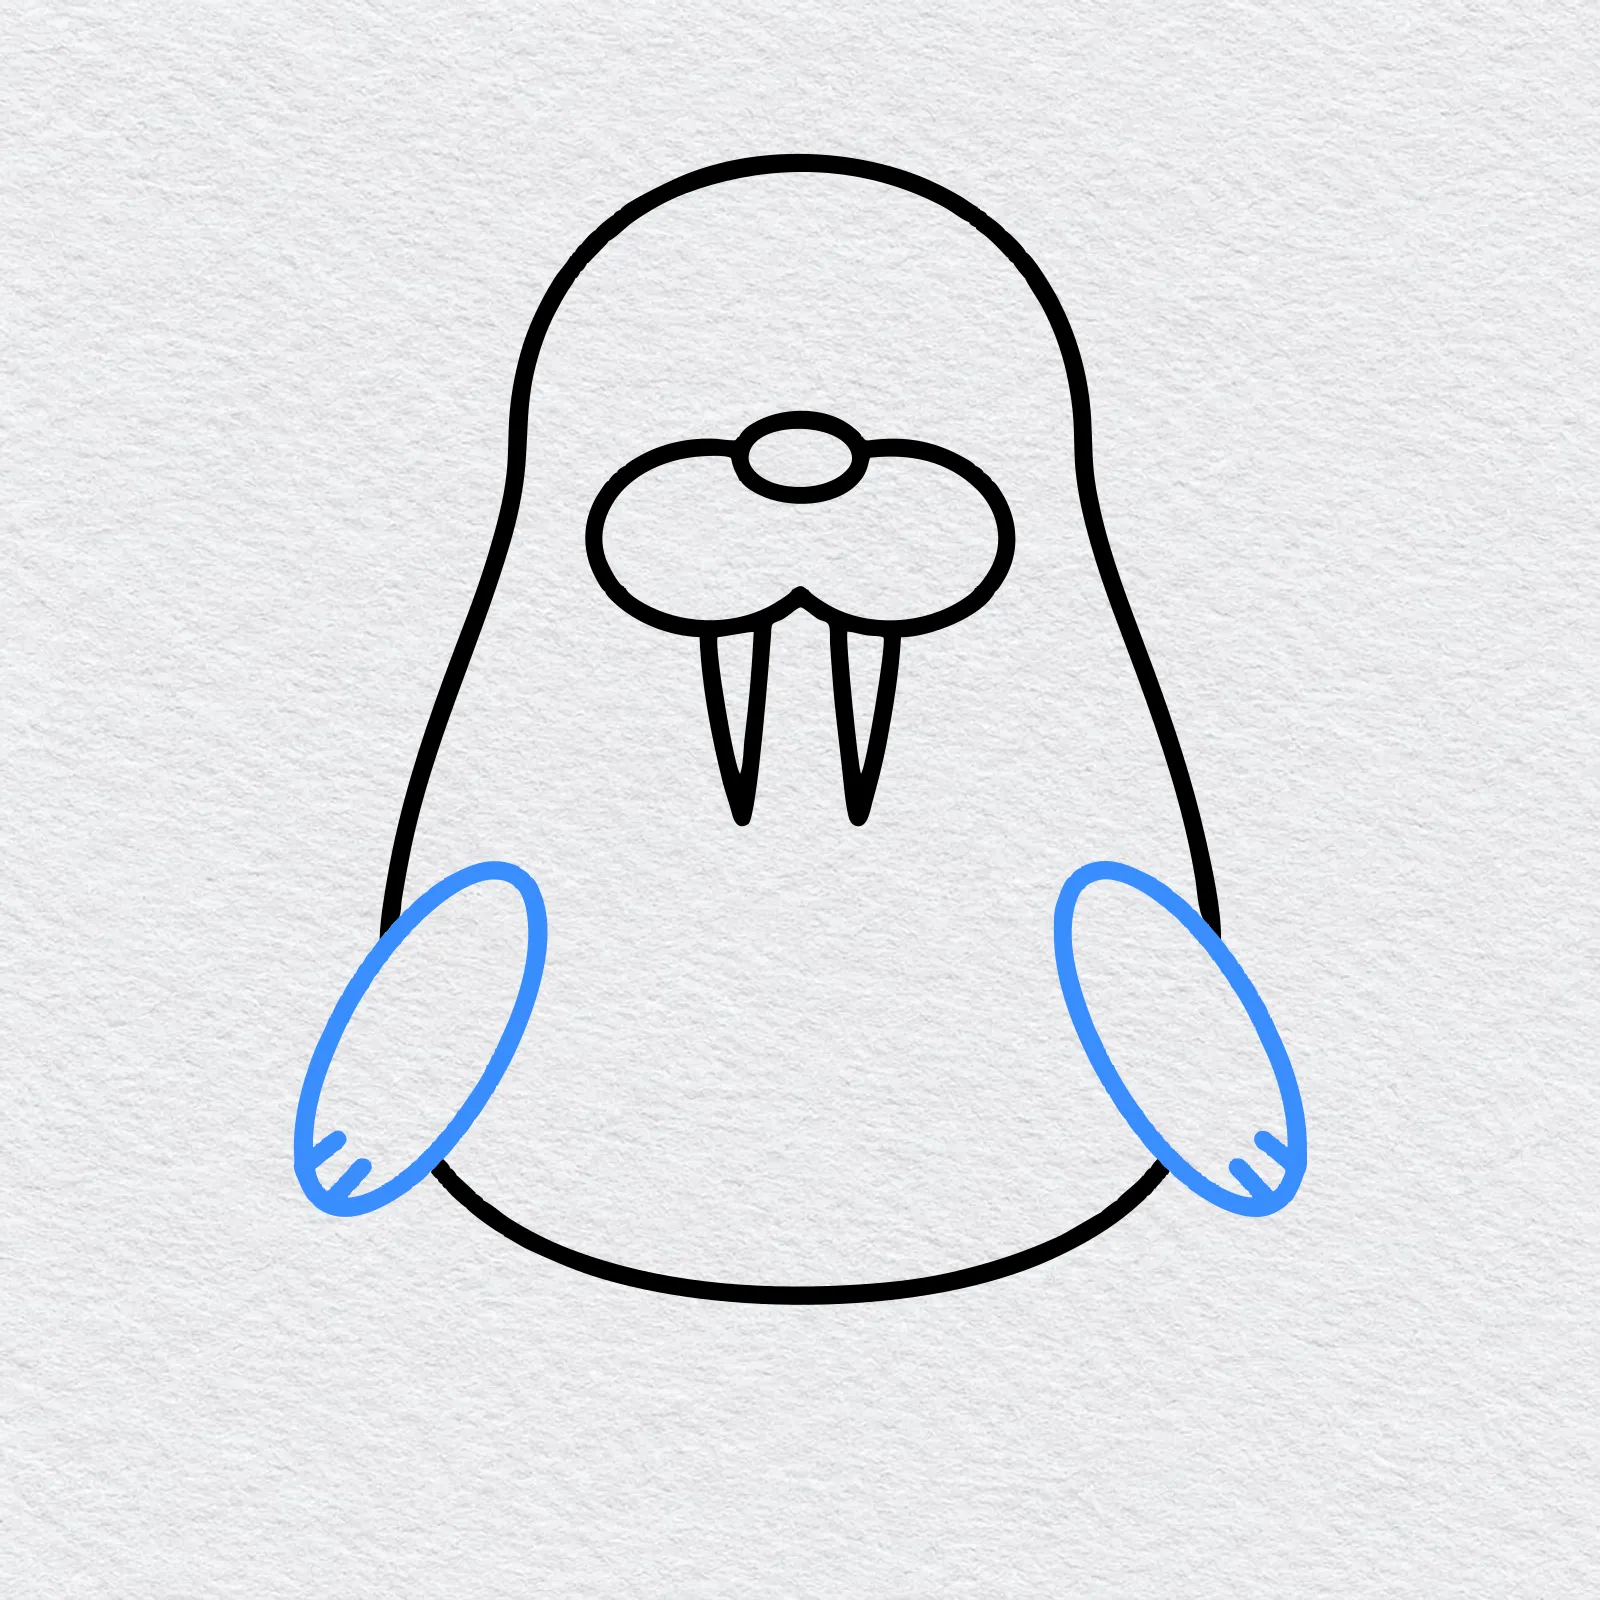
Draw a long oval flipper on each side of the body, leaning out a little at the bottom.
Add two short lines near the tip of each flipper for the toes.
-
Step 5 : Add back flippers
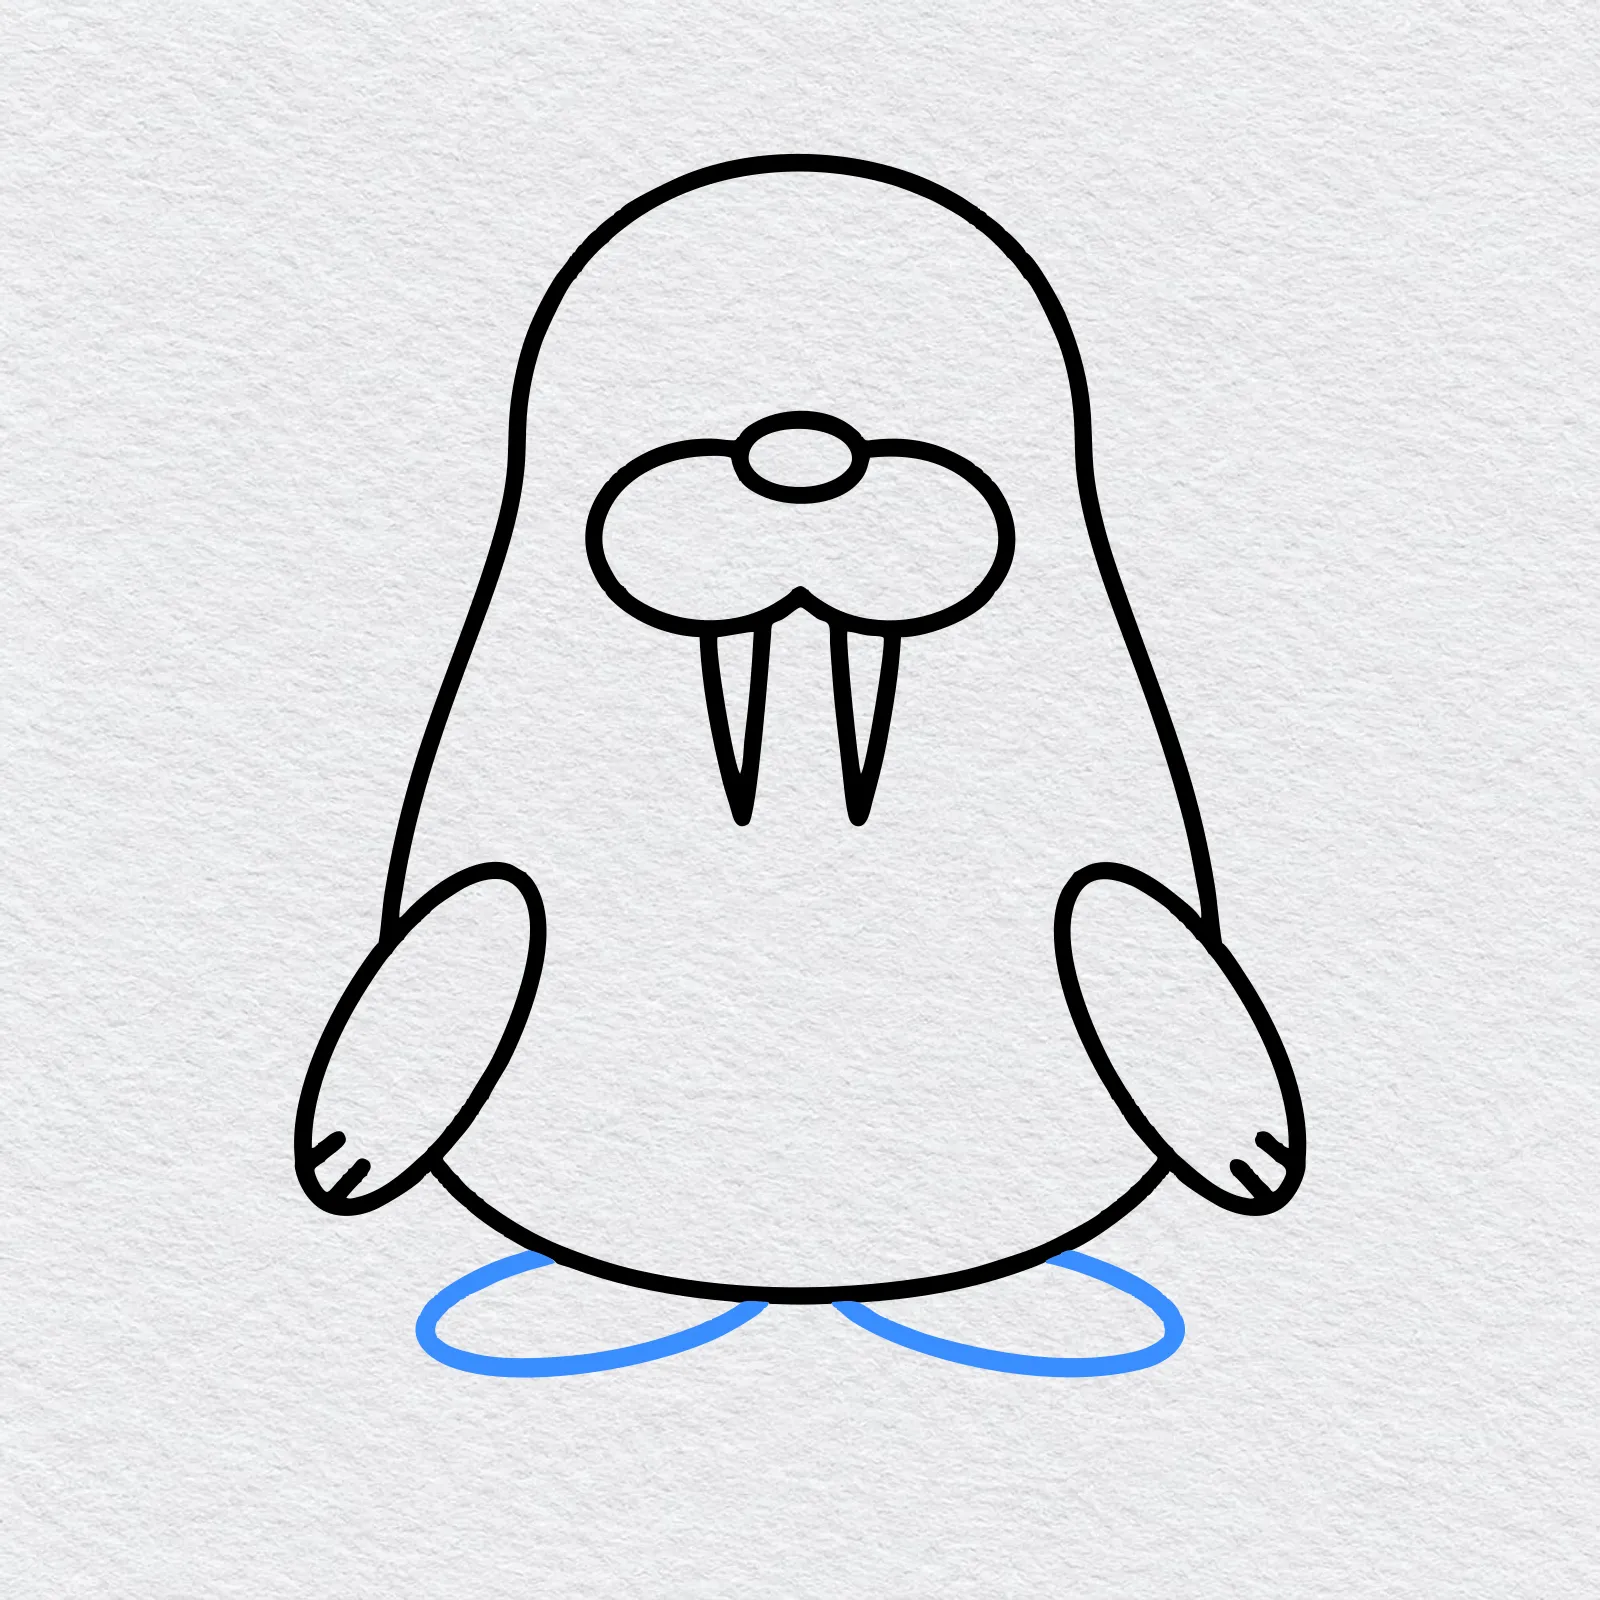
Draw two flat ovals under the bottom of the body, one pointing left and one pointing right. Only the ends show, as if the walrus is sitting on them.
-
Step 6 : Finish the walrus
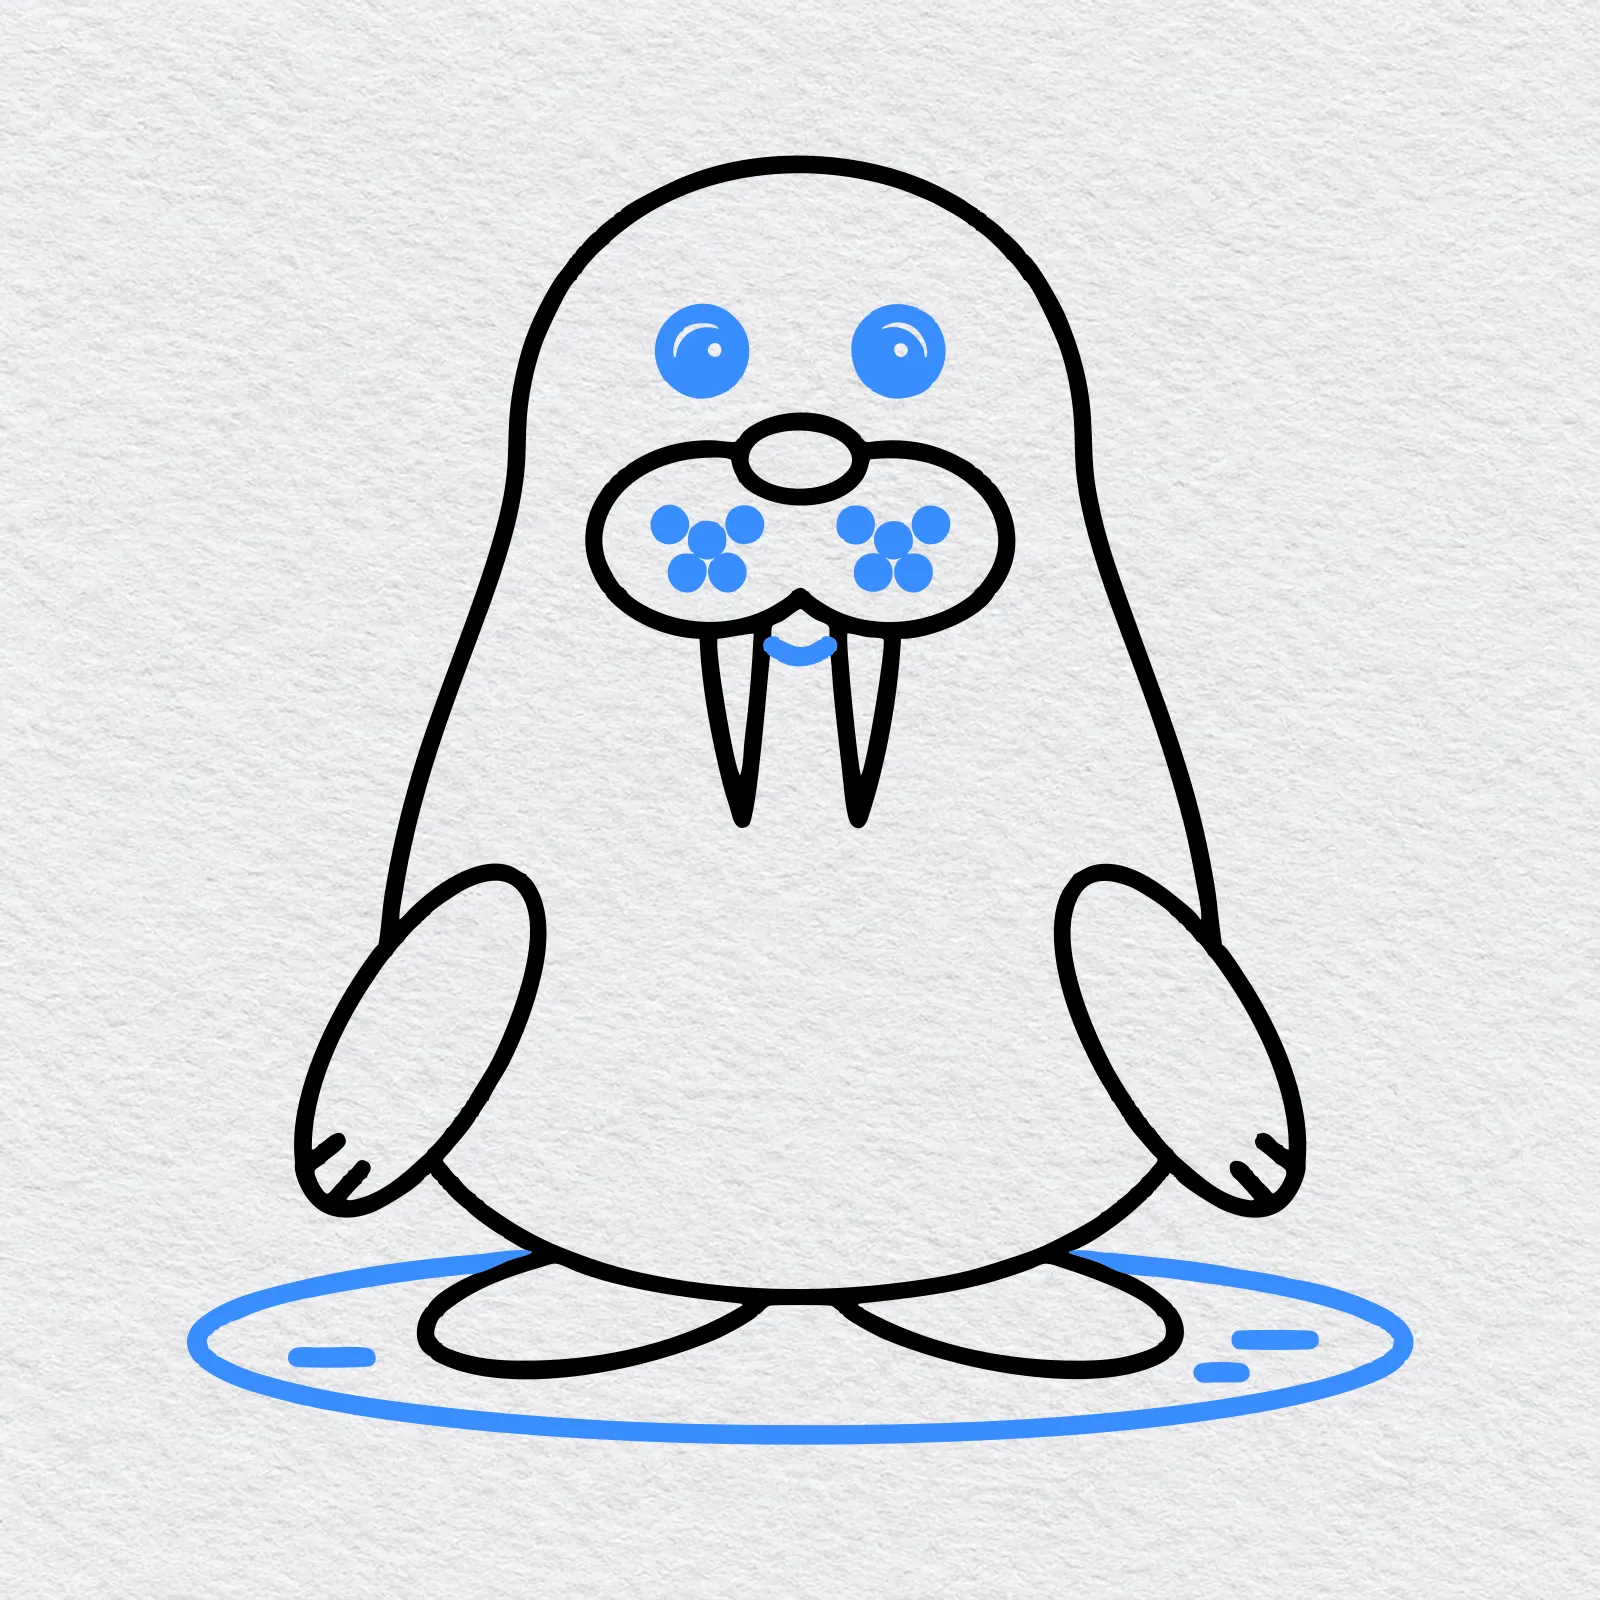
Draw two round eyes with big pupils and a shiny dot in each. Add five whisker dots on each cheek and a small smile between the tusks.
Draw an oval ice patch under the walrus with three short lines.
-
Step 7 : Color your walrus
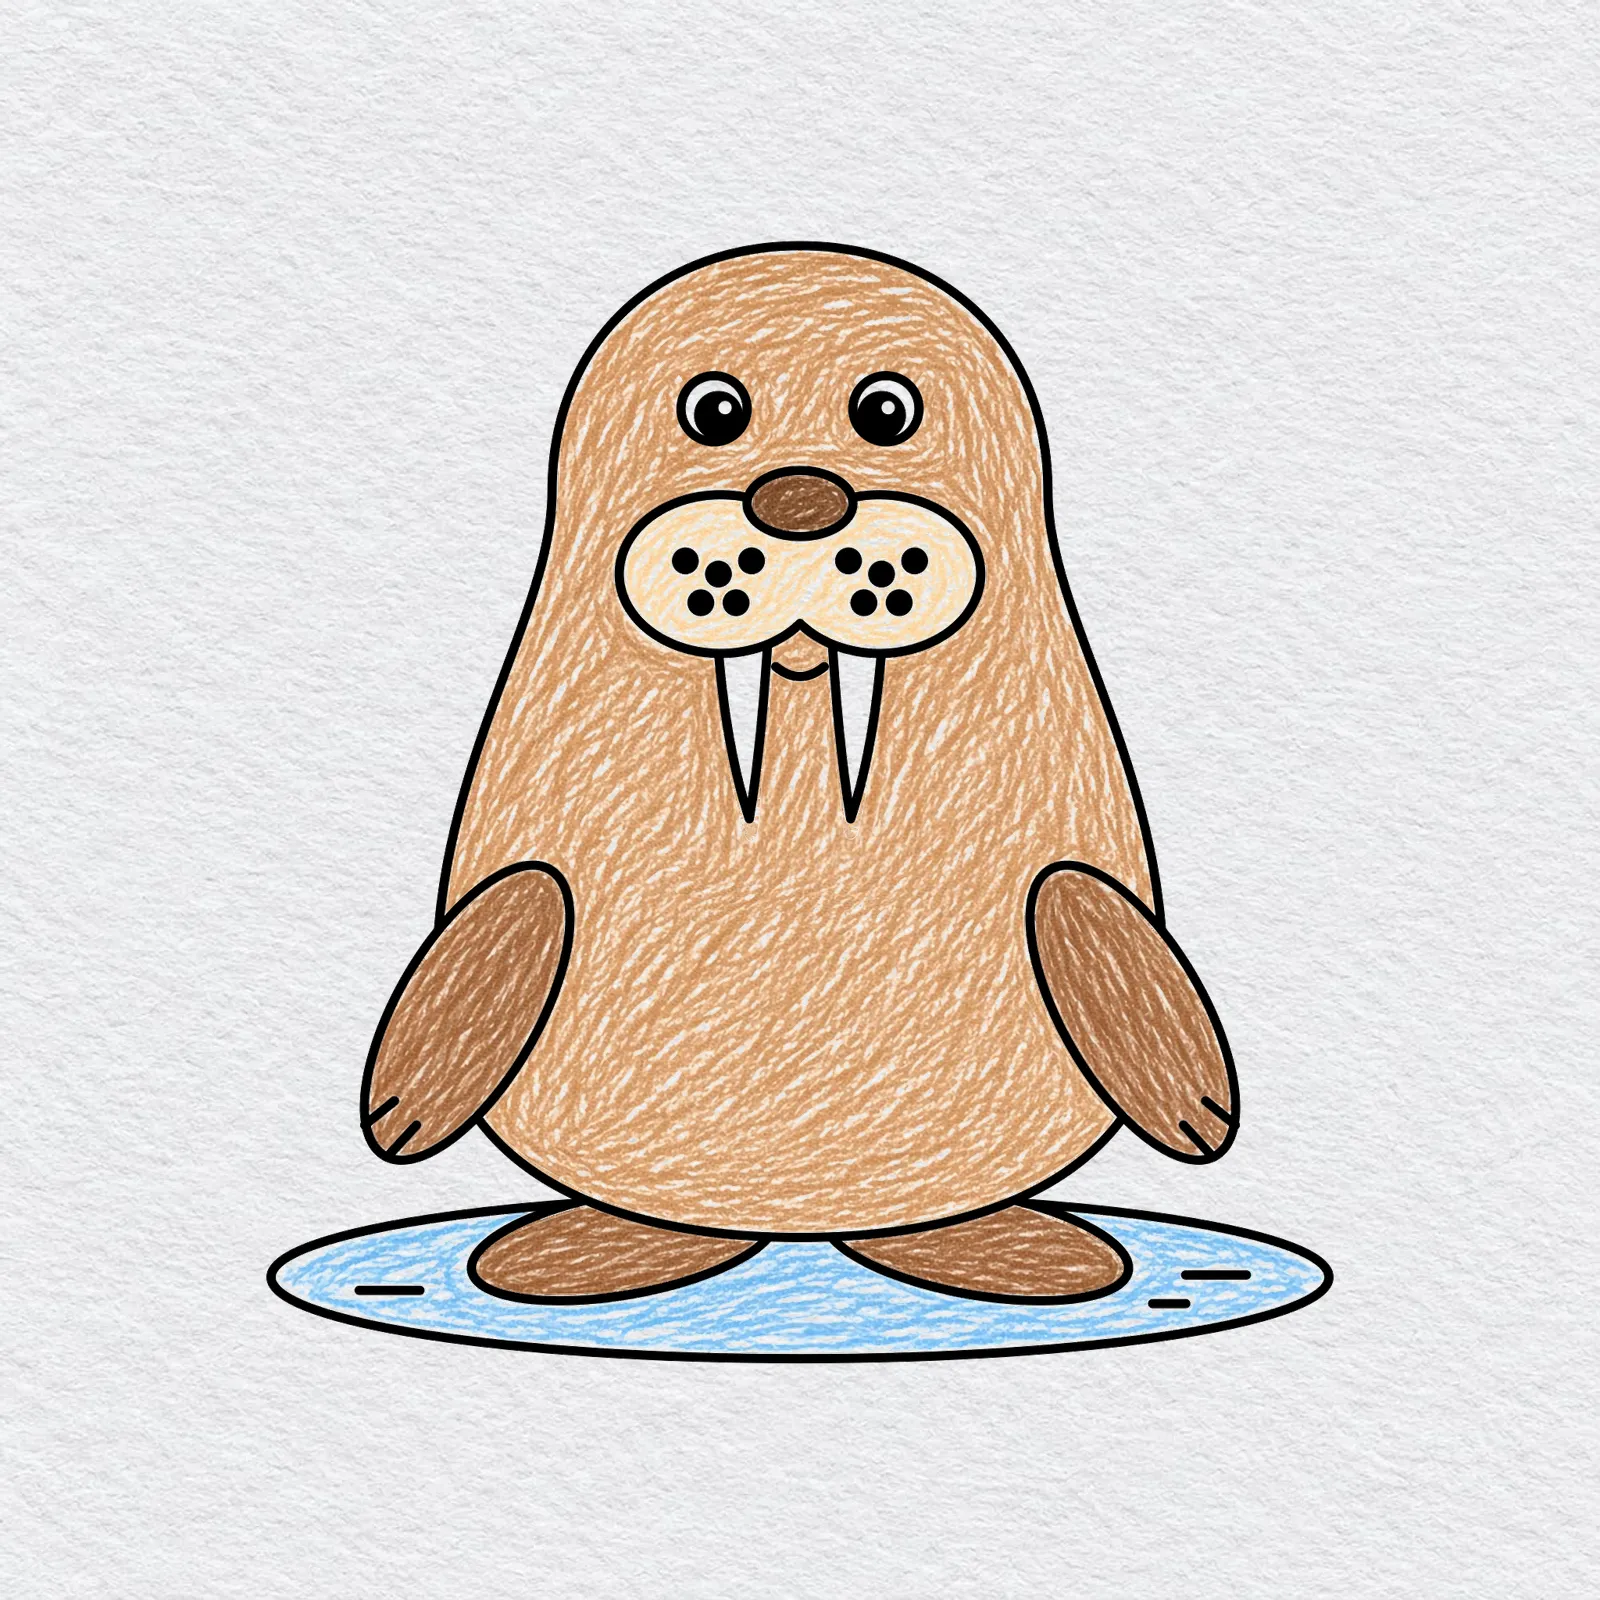
Color the body warm light brown with short strokes, and the flippers a little darker. Use light tan for the cheeks and dark brown for the nose.
Leave the tusks creamy white and color the ice pale blue.
Printable walrus drawing PDFs
 Save
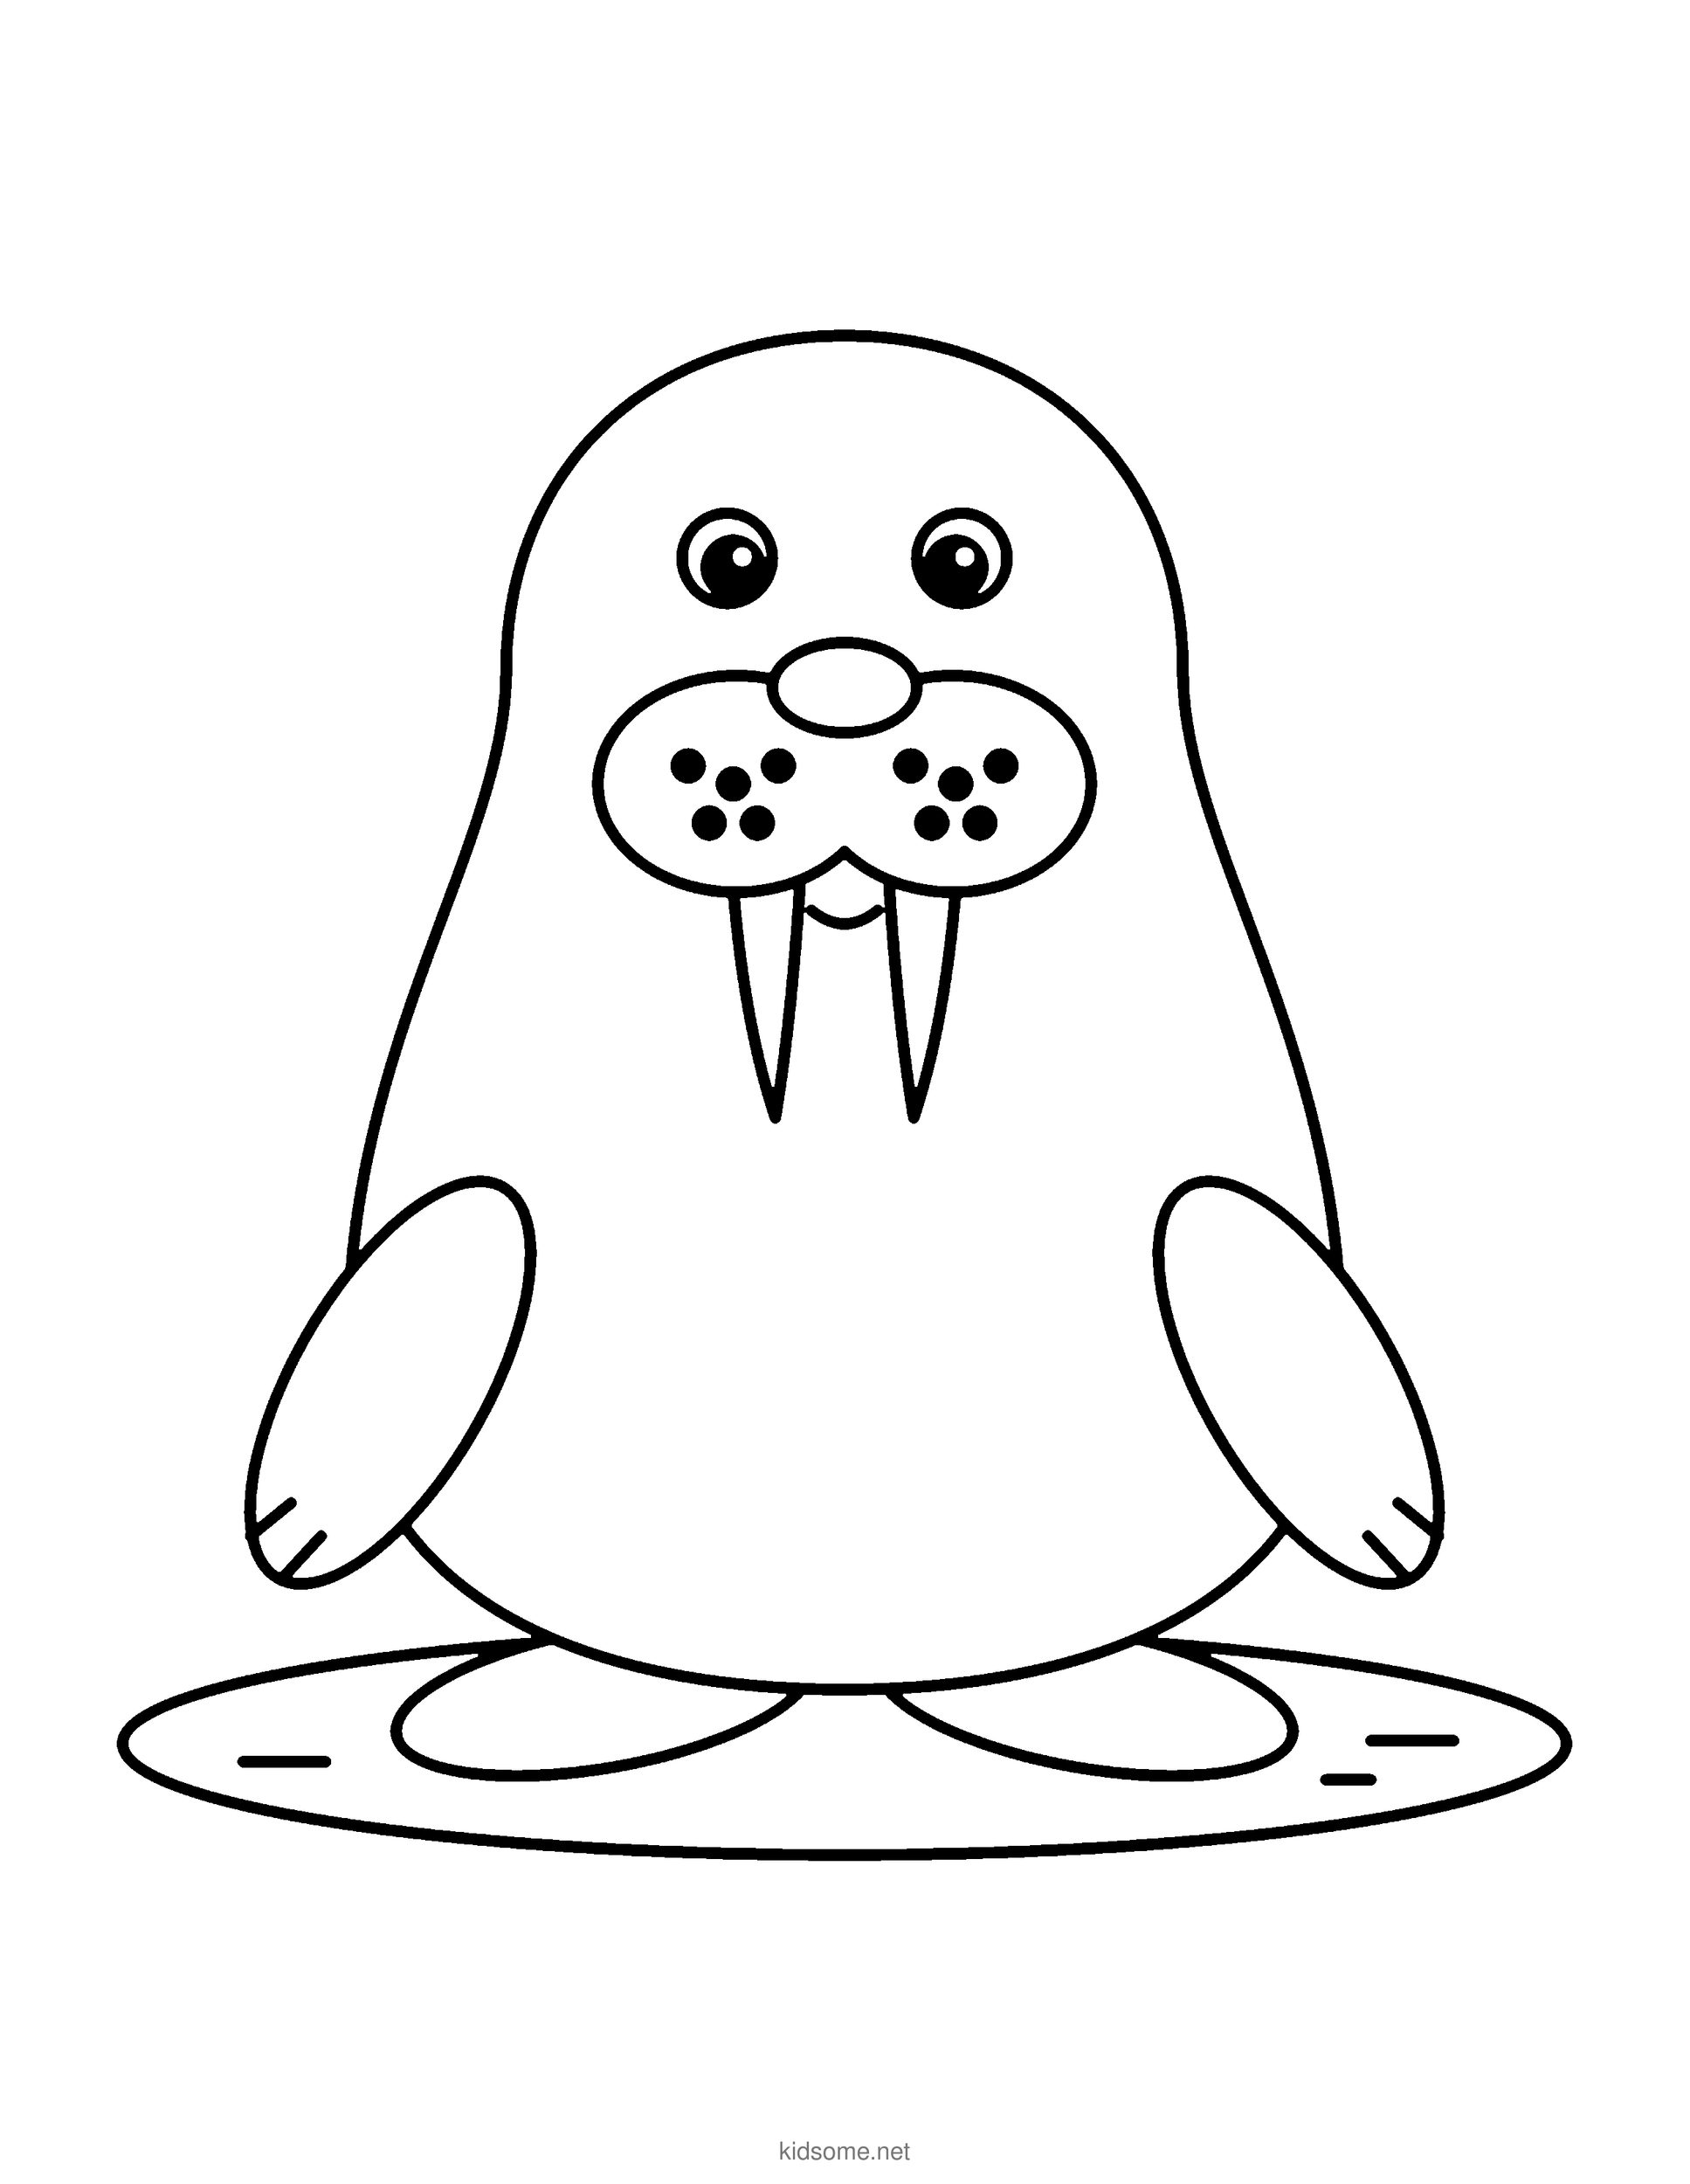
Walrus Outline to Color
The finished walrus sitting on its ice patch as a clean outline to print and color, with big open shapes that are easy to fill.
Download PDF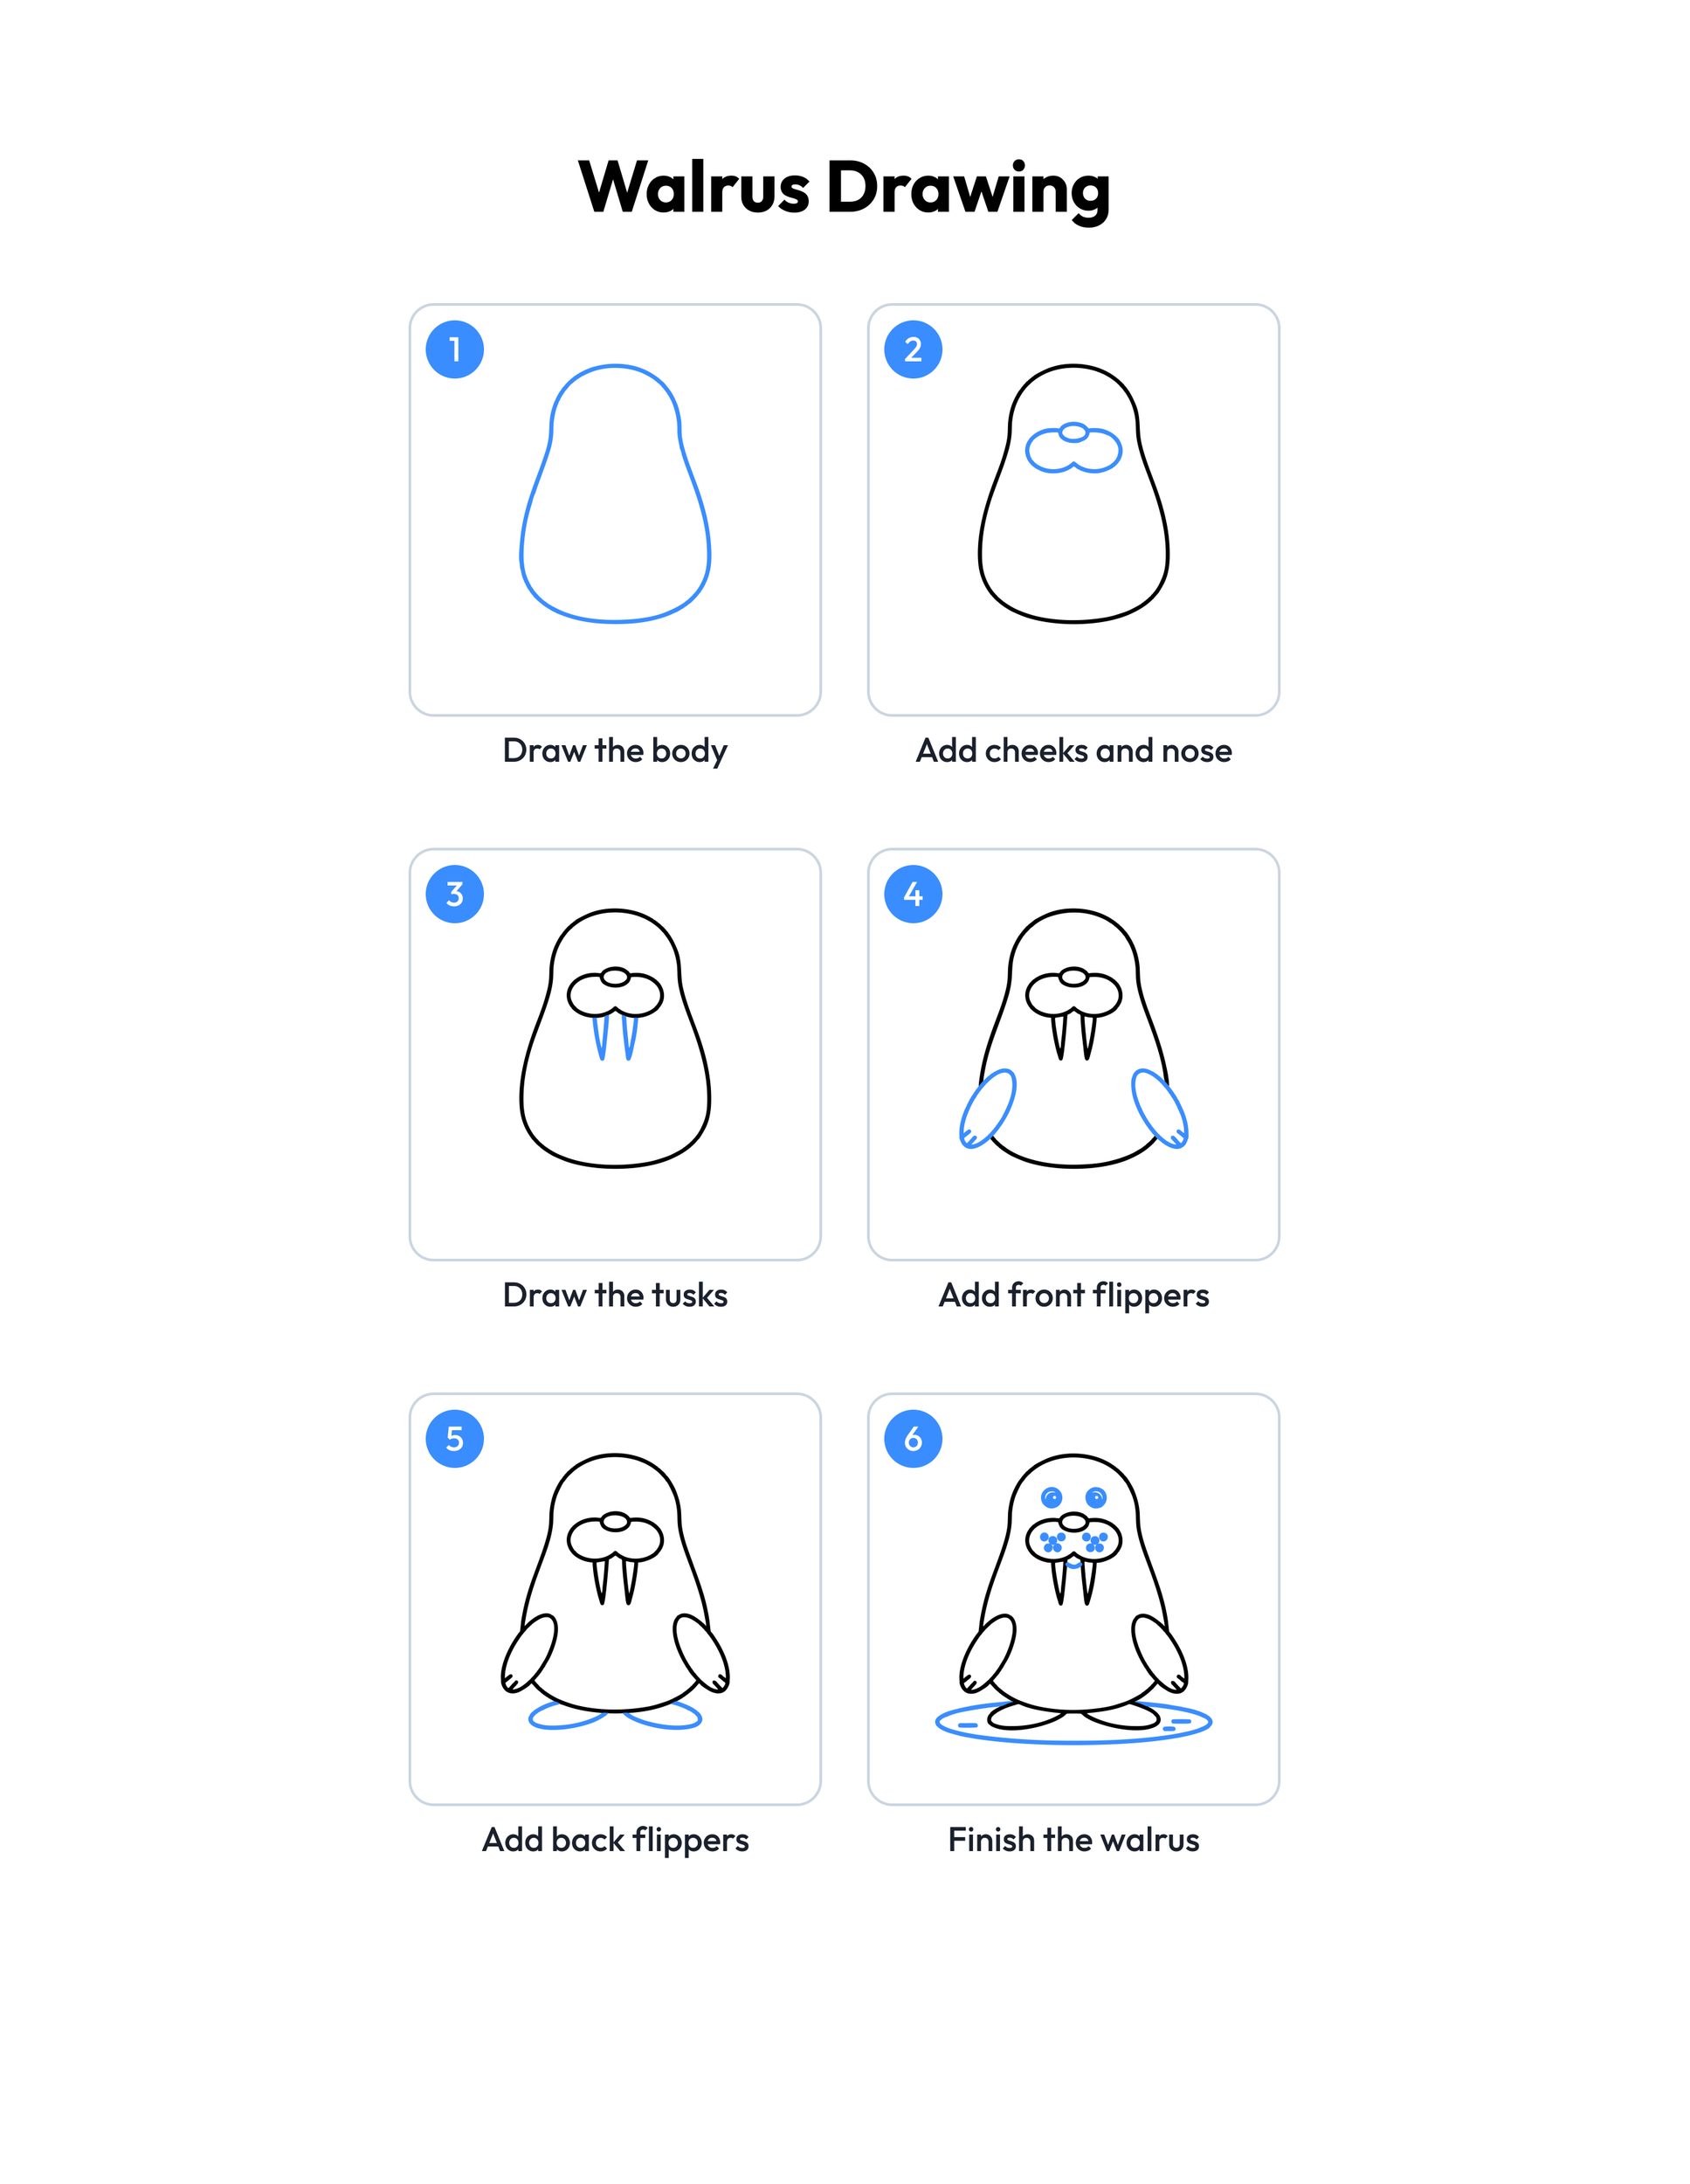 Save
Printable walrus drawing guide
Every step, two to a row, with the finished walrus drawing in color at the end.
Download PDFHow to use this guide
Print the outline at 100 percent, or choose Fit to page if your printer asks. The margins fit US Letter and A4, so the whole walrus and its ice patch stay on the sheet. Page one is the outline to color. Page two is the colored example, so print page one alone if you only want the picture to fill in.
For drawing, plain copy paper and a pencil with a good eraser work best. Sketch lightly at first, because the big pear shape often needs a second try to look smooth and even. When the walrus looks right, trace over the lines with a marker or a dark crayon and erase the pencil marks underneath. For markers or paint, choose cardstock so the color does not soak through.
Give each step plenty of time. Younger kids can draw the body, cheeks and nose, then take a break before the tusks and flippers. Older kids can draw the whole walrus in one go and then add icebergs, snowflakes or a friend on the ice. This walrus drawing easy version keeps every shape round and simple, so there are no tricky bits.
The whisker dots are a fun last touch. Real walruses have hundreds of stiff whiskers, so kids can add a few more dots, or draw short lines instead, to give their walrus a bushy mustache.
Ideas for your walrus drawing
- Polar bear neighbor: Draw a polar bear from our polar bear drawing guide on a nearby iceberg, waving hello to the walrus across the chilly water.
- Penguin pals: Add a few penguins from our penguin drawing guide on the ice patch. They live at the other end of the world, so call it a make believe meetup.
- Snowy hillside: Draw a snowman from our snowman drawing guide on a hill behind the walrus, then fill the sky with falling snowflakes for a winter scene.
- Sled team: Draw a husky from our husky drawing guide pulling a little sled across the snow, with the walrus watching from its ice patch.
- Mountain cat: Draw a snow leopard from our snow leopard drawing guide on a rocky ledge far away, so the picture shows two very different cold weather animals.
- Walrus family: Draw a big walrus and a smaller baby walrus beside it with tiny tusks, or no tusks at all, cuddled up together on one big ice floe.
- Fishing trip: Draw a few clams and shells on the sea floor under the ice, because walruses dive down and use their sensitive whiskers to find clams to eat.
- Winter coloring: After drawing, keep the cozy mood going with our winter coloring pages, full of snowy scenes, mittens and other chilly things to color.
- Walrus fact: Share a fact: walruses sometimes use their tusks like ice picks, hooking them onto the ice to help pull their heavy bodies out of the water.
What age is this walrus drawing guide for?
It is made for ages 4 to 8. Younger children can draw the body, cheeks and nose with a grown-up nearby, and older kids can draw the whole walrus alone and add icebergs or snow. Every step uses simple ovals, circles and curved lines, so no step is too hard.
How do I draw a walrus that looks cute?
Keep the head round and soft, and make the whisker cheeks big and puffy. Place the eyes a little apart above the nose, with a shiny white dot in each one. A small smile between the tusks and short, rounded flippers make the walrus look friendly instead of fierce.
Why do walruses have tusks?
Tusks are very long teeth that keep growing. Walruses use them to hook onto the ice and pull themselves out of the water, to make breathing holes, and to show off to other walruses. Both males and females have tusks, so every walrus in a drawing can have them.
Can I use the guide in my classroom?
Yes. The outline and the step guide are free for personal and classroom use, so teachers can print one for every child for a winter or arctic animal lesson. Please share a link to this page instead of the files, and do not sell the pages or post them on other websites.
What can we draw after the walrus?
Other cold weather animals make a great next drawing. Try the polar bear, the penguin or the husky next, then put them all together in one big snowy picture with icebergs, a snowman and plenty of falling snowflakes in the sky.