This guide shows kids ages 4 to 8 how to draw a husky with simple shapes they already know. A round head, two pointy ears, a face mask, a fluffy body and a curly tail come together, one step at a time, into a happy husky sitting in the snow.
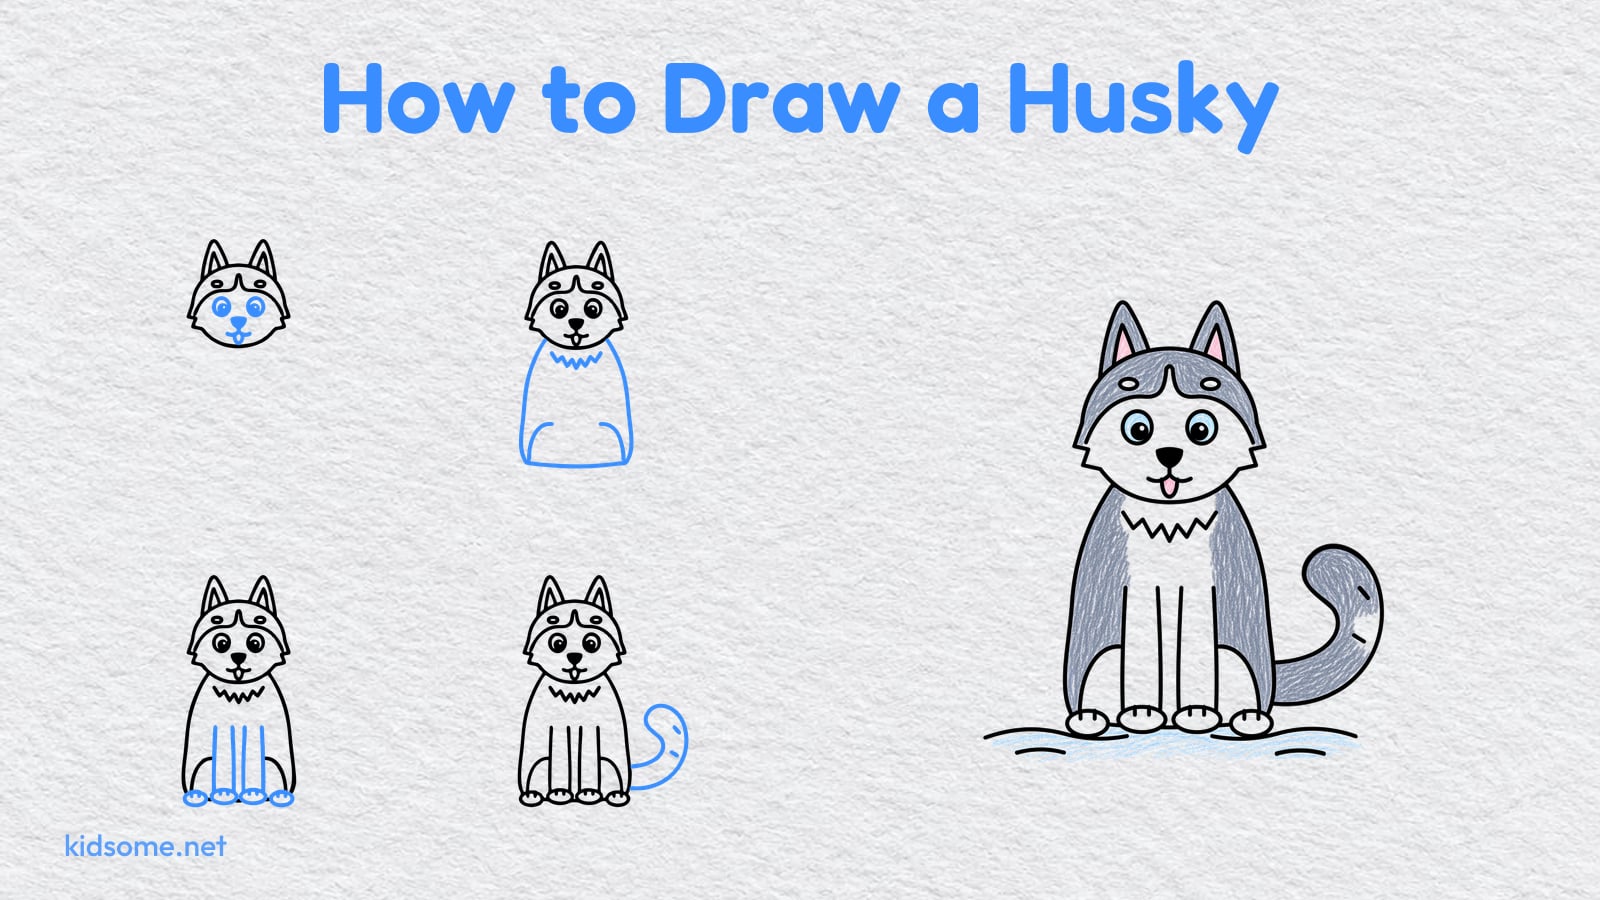
Each step adds one new part in blue, so it is easy to see what to draw next. First come the head and ears, then the mask with its little eyebrow spots, then the eyes, nose and a smiling mouth with a tiny tongue. After that kids add the fluffy chest and body, the front legs and paws, the curly tail and a few lines of snow. The last step shows the husky colored in, grey and cream with blue eyes, ready to copy or change.
The finished outline is a free PDF that prints on US Letter and A4 paper, with no sign-up, so kids can color their husky drawing too. It is a cosy pick for a snow day, an art center or a quiet afternoon at the kitchen table.
-
Step 1 : Draw the head and ears
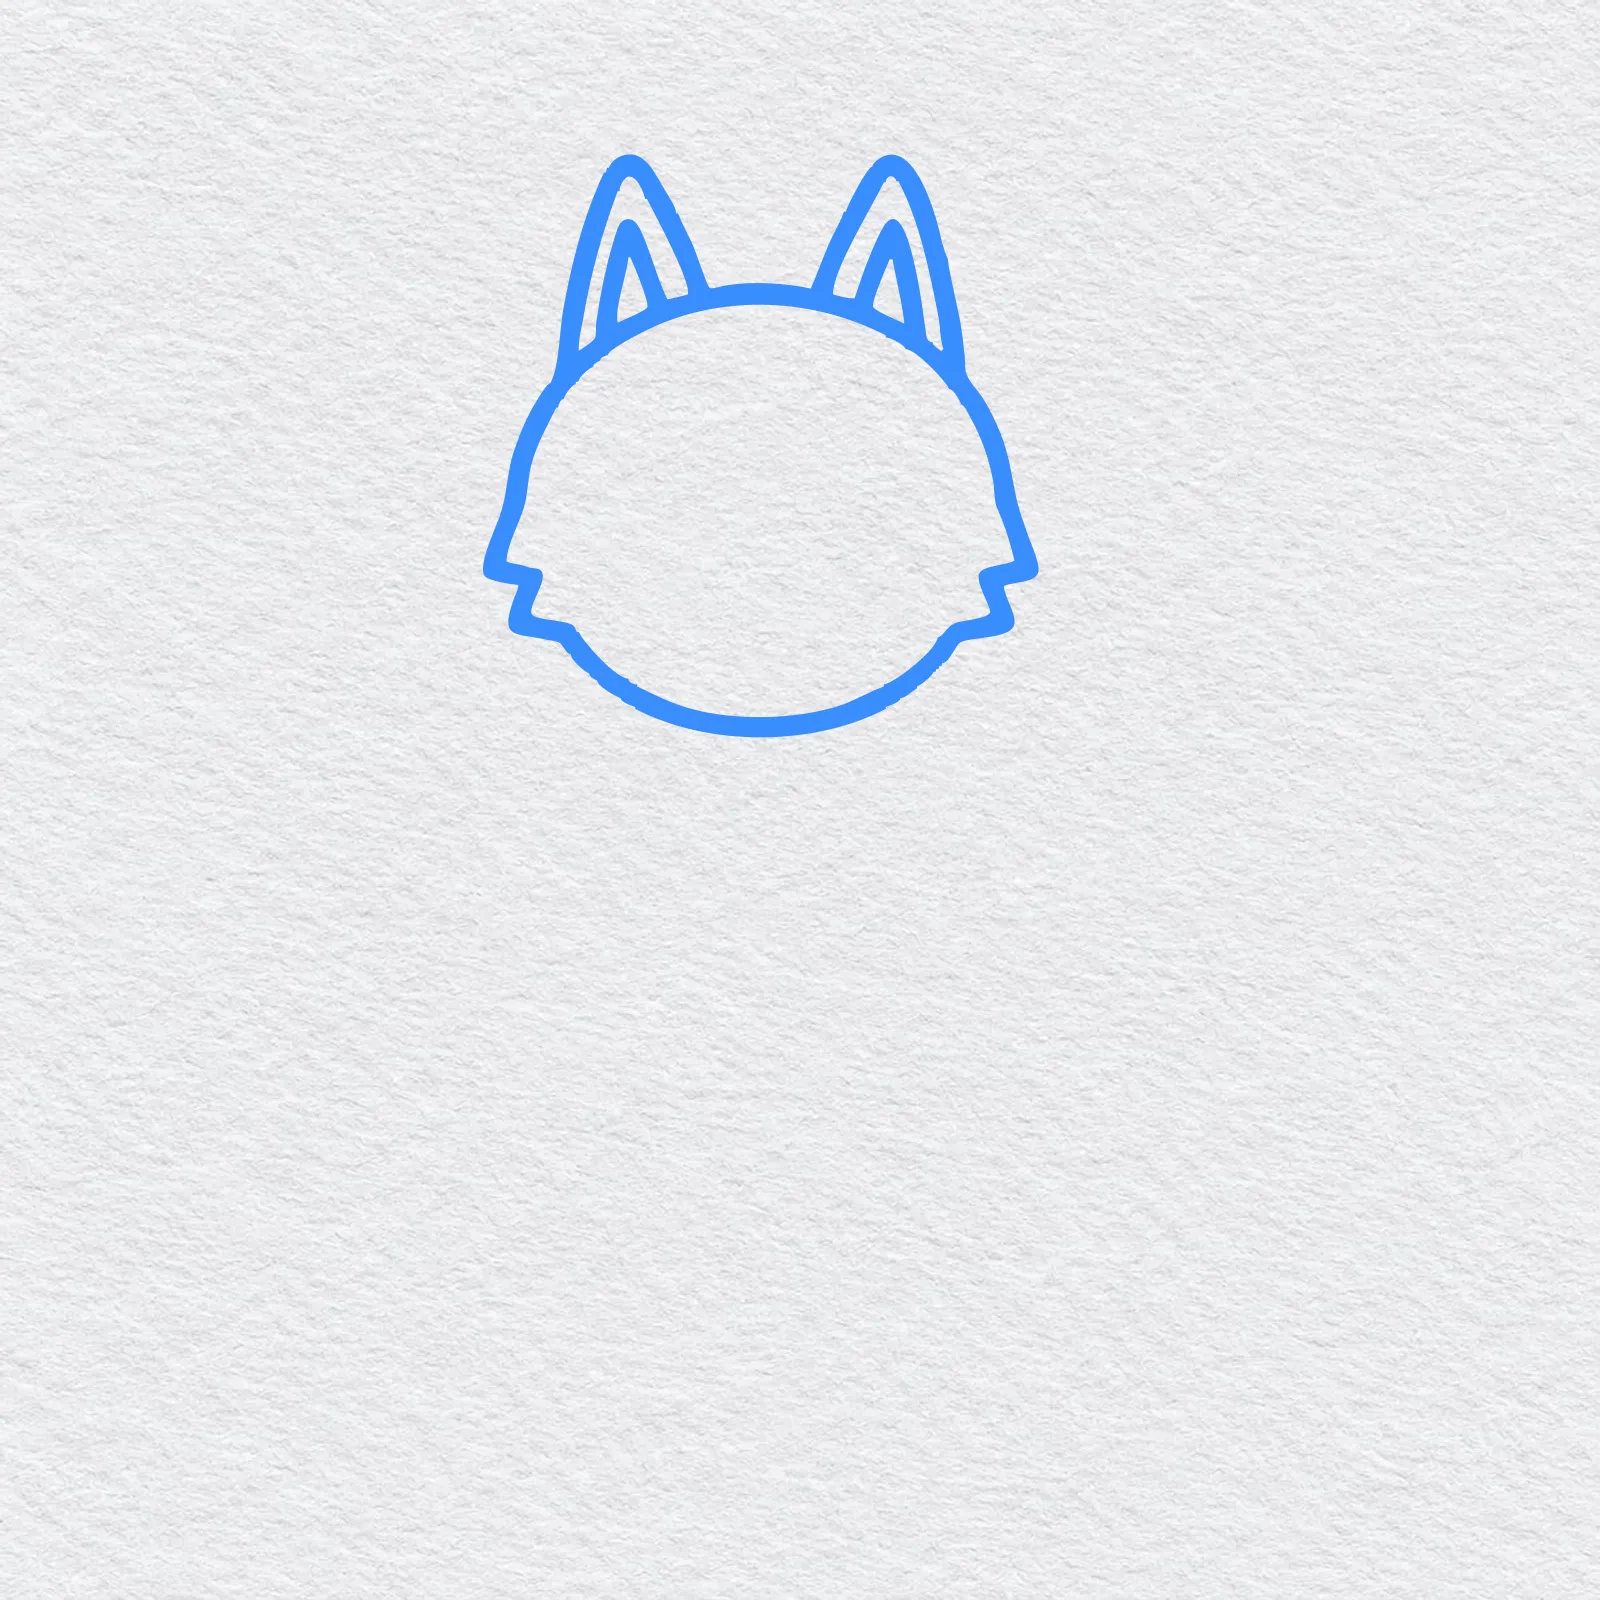
Start near the top of your paper with a big round head. On top, draw two tall pointy ears with a smaller triangle inside each one.
Add a few pointy bumps on each side for fluffy cheeks.
-
Step 2 : Draw the face mask
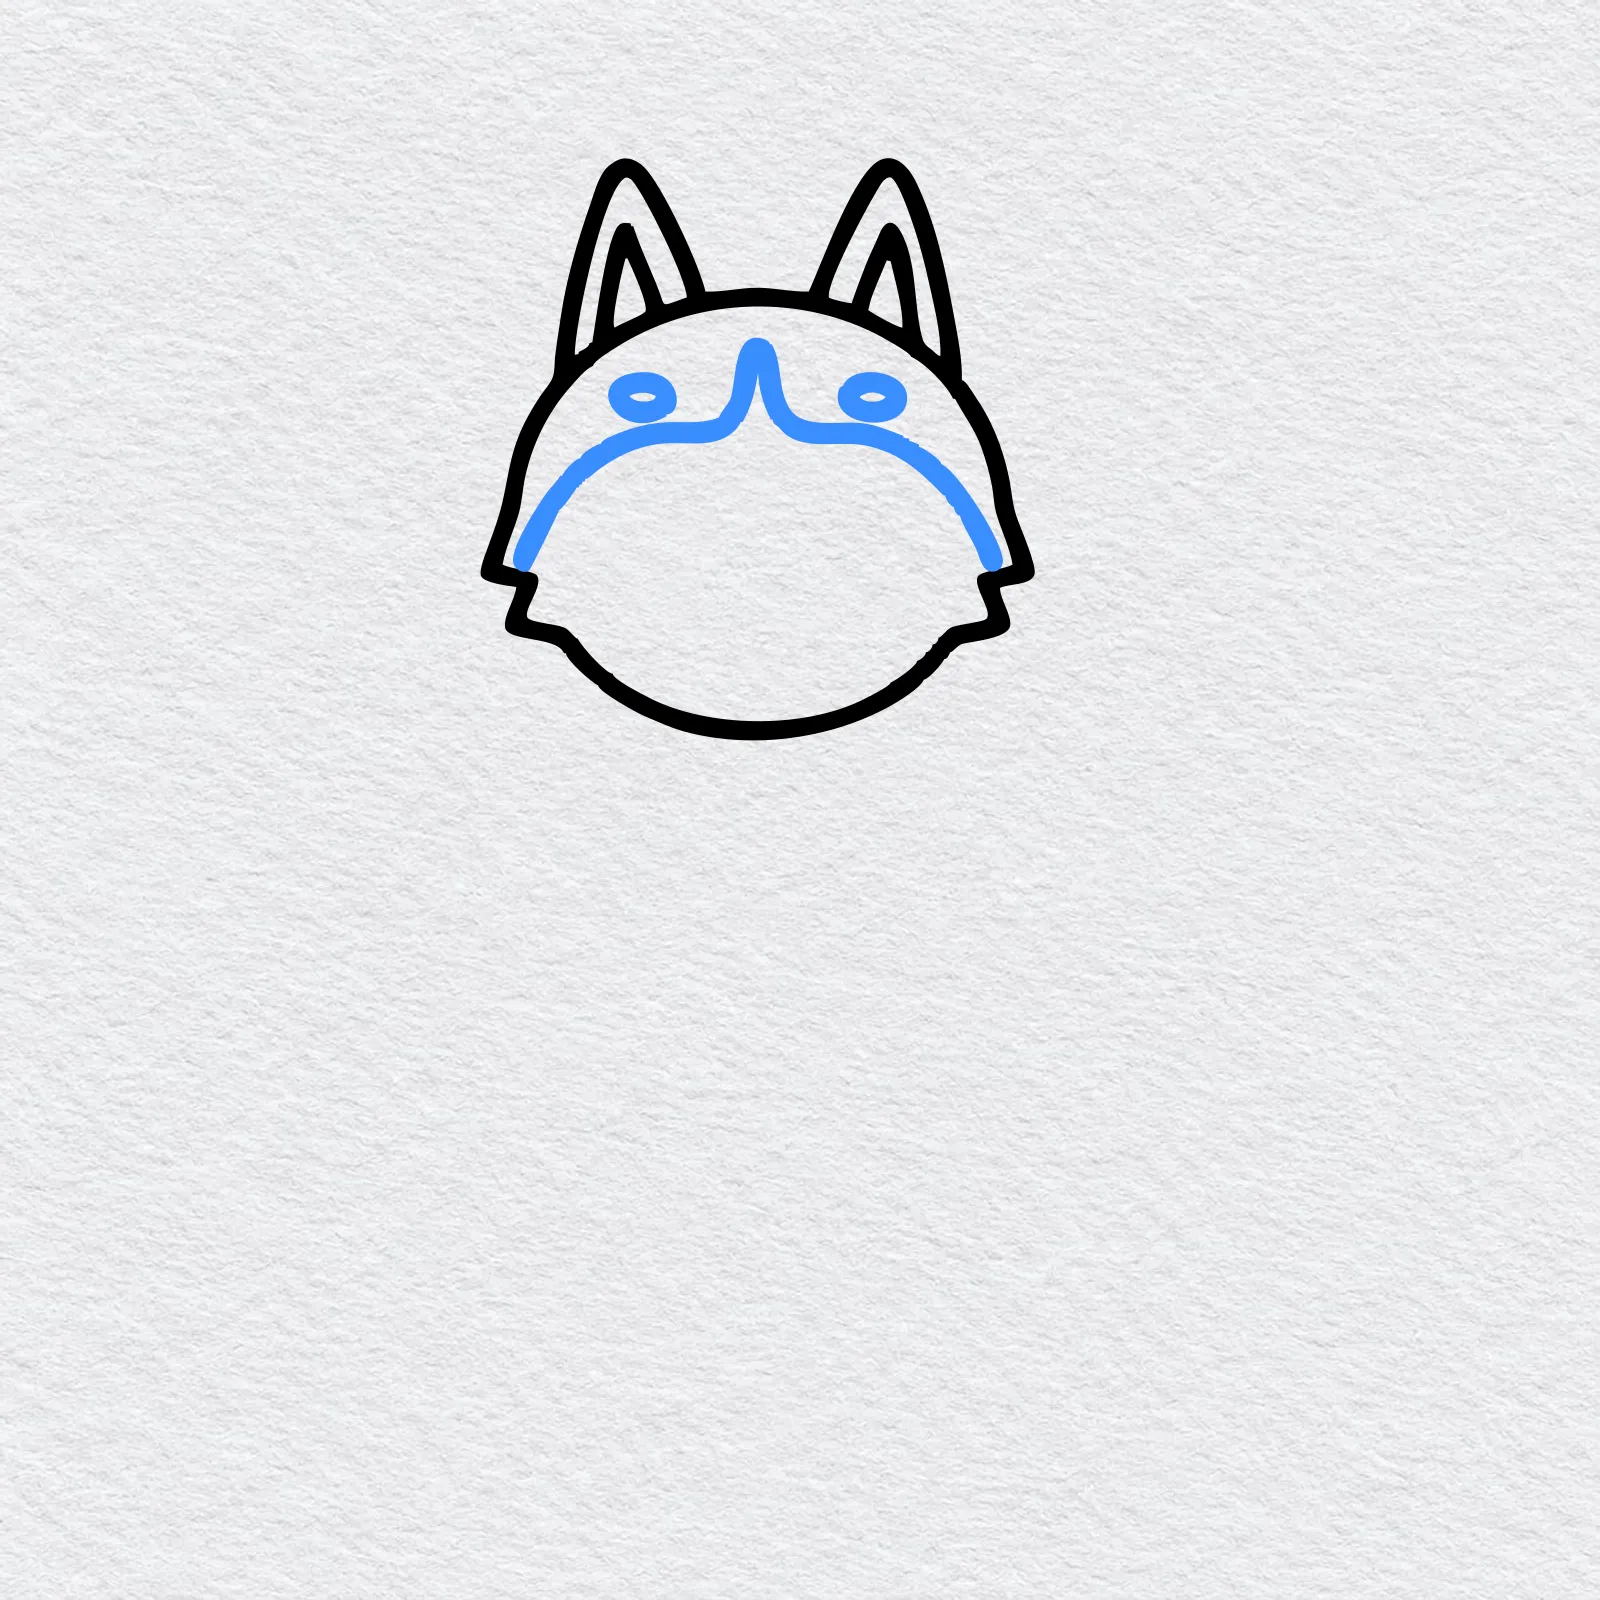
Draw a curved line across the head from cheek to cheek. In the middle, let it rise into a little point, like a stripe up the forehead.
Above it, draw two small ovals for eyebrow spots.
-
Step 3 : Draw the eyes, nose and mouth
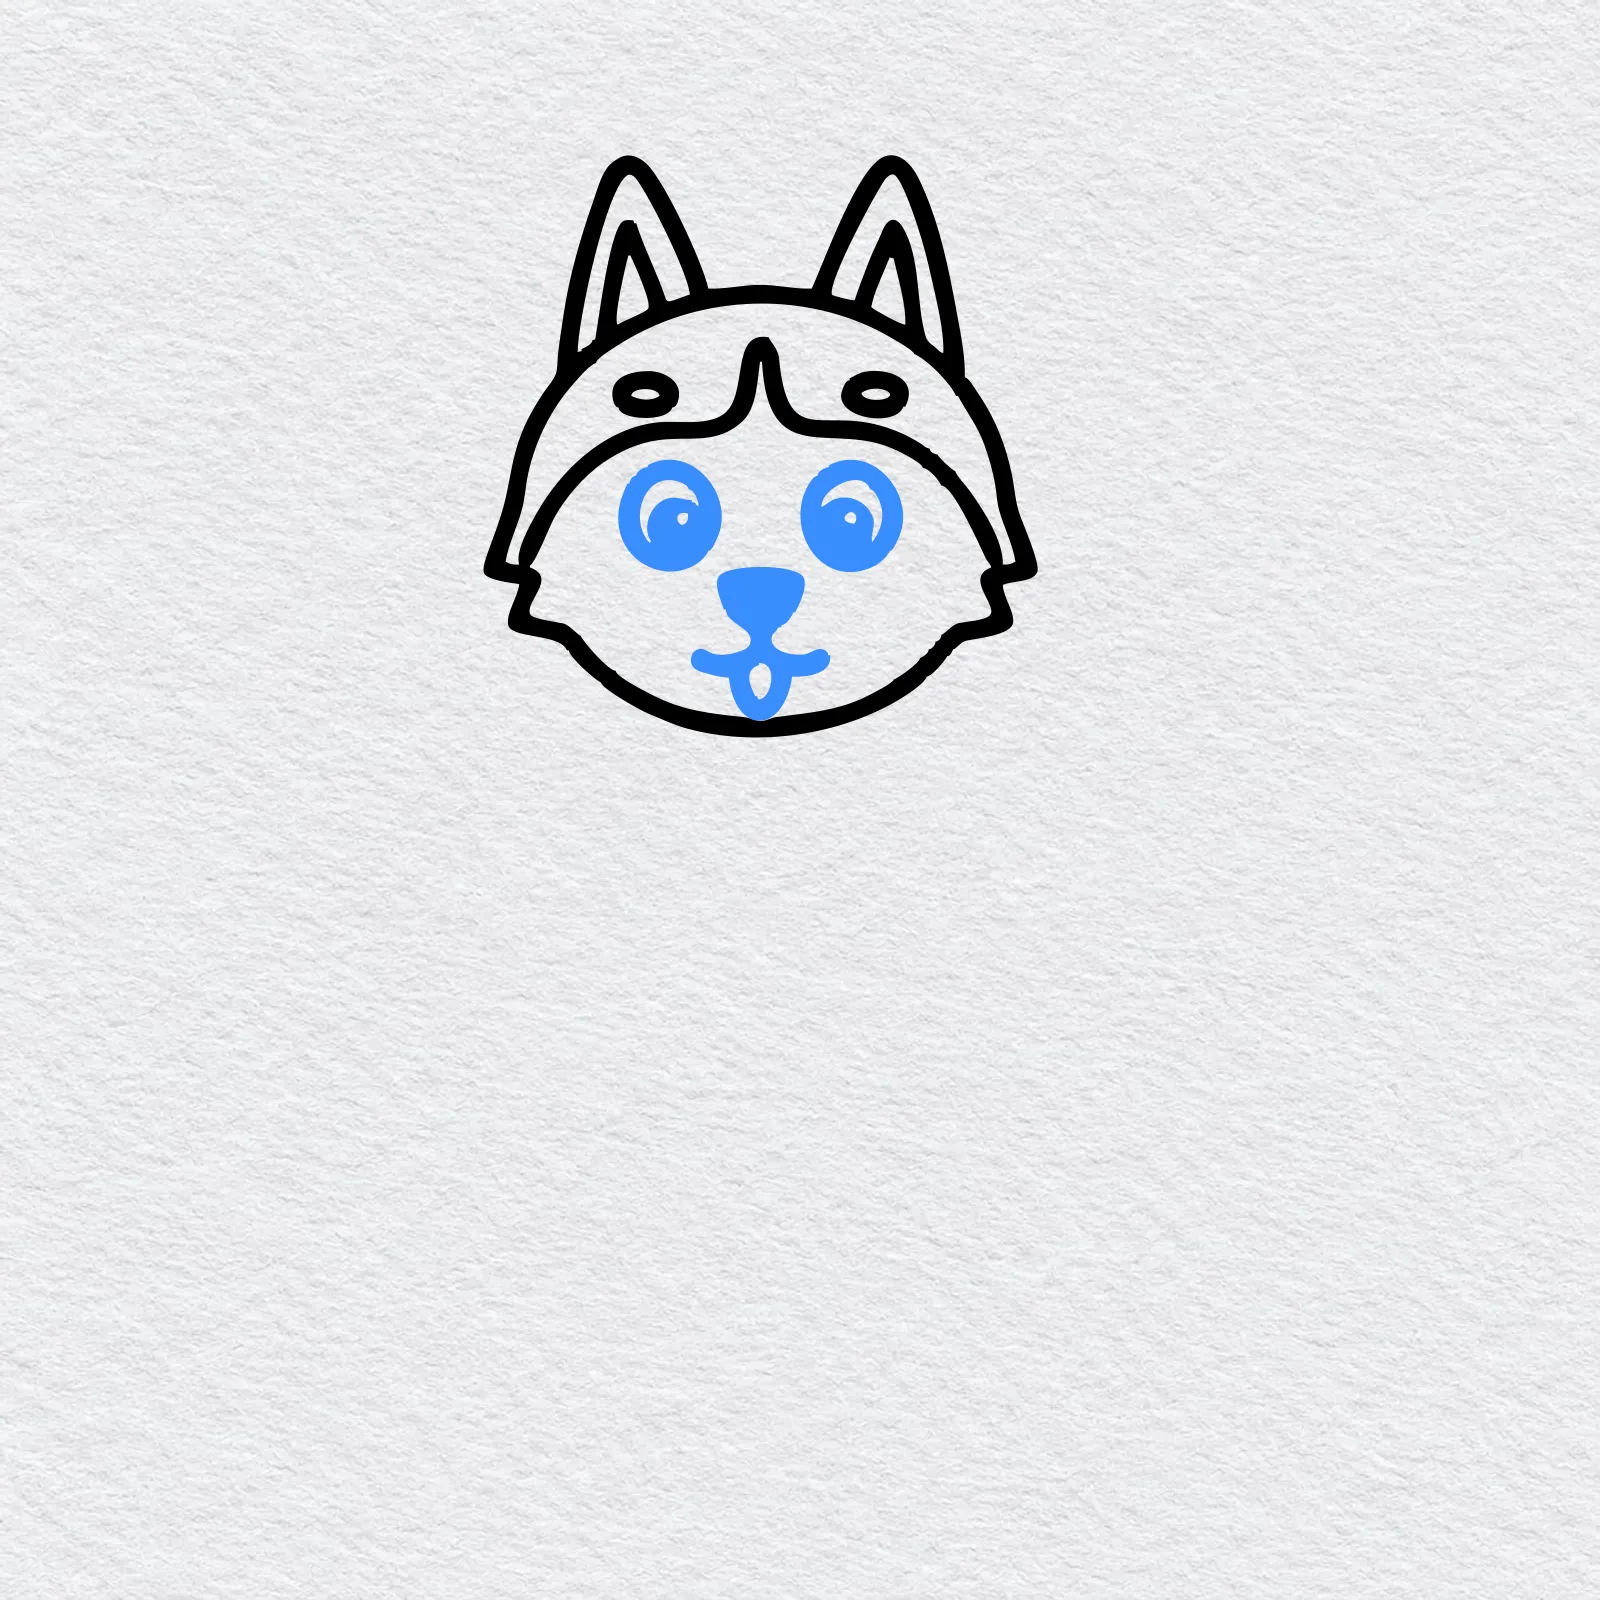
Draw two round eyes under the mask with a tiny white shine in each. Below them, draw a small triangle nose and color it in.
Add a smile like a wide letter w and a little tongue.
-
Step 4 : Draw the chest and body
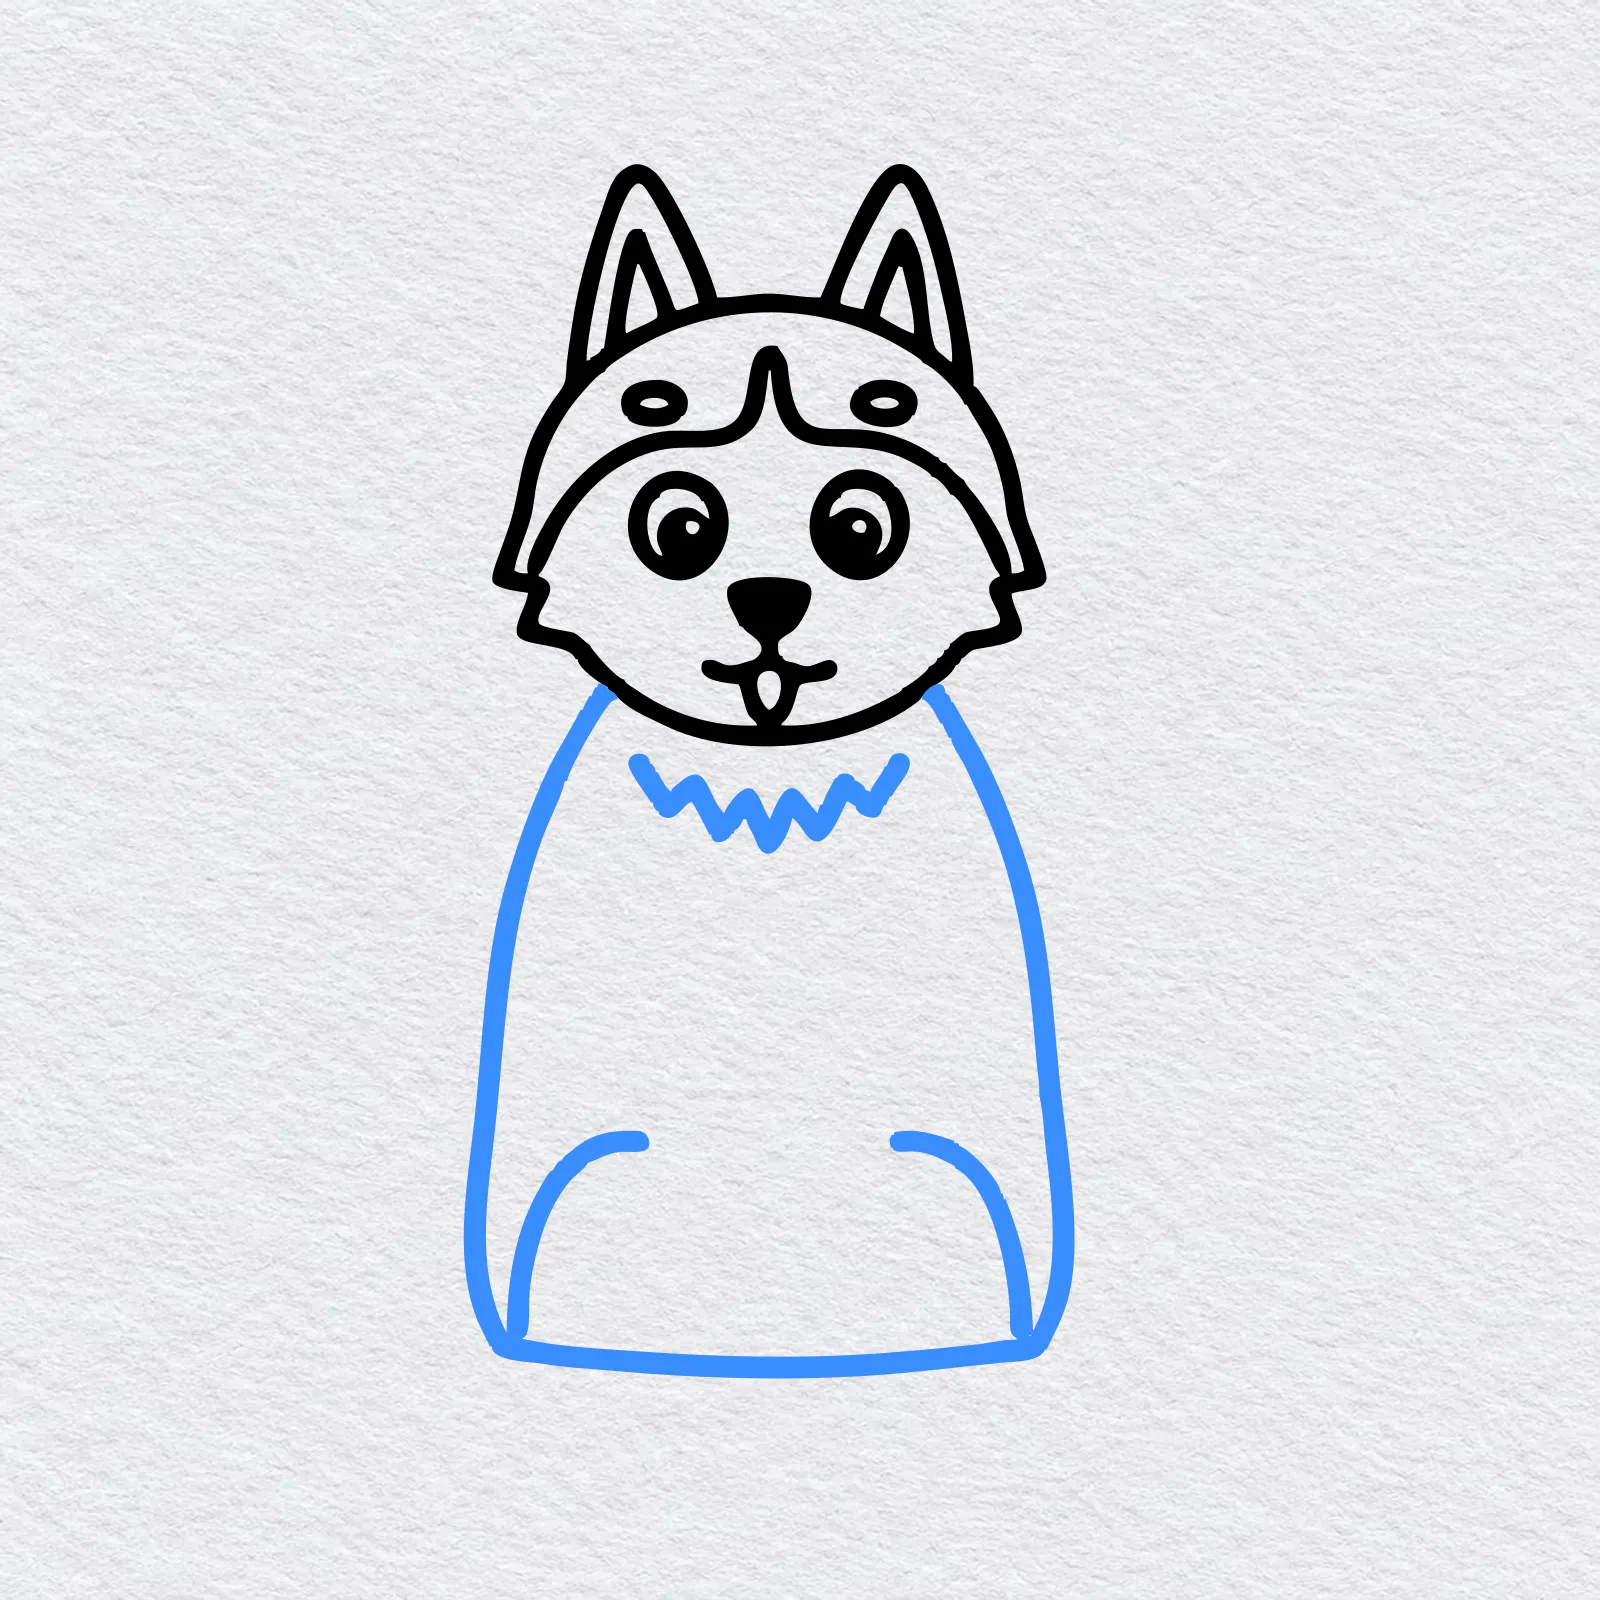
Under the head, draw a tall rounded body that gets wider at the bottom, like a bell, with a flat line along the bottom.
Draw a zigzag under the chin for chest fur and two curves for the back legs.
-
Step 5 : Draw the front legs and paws
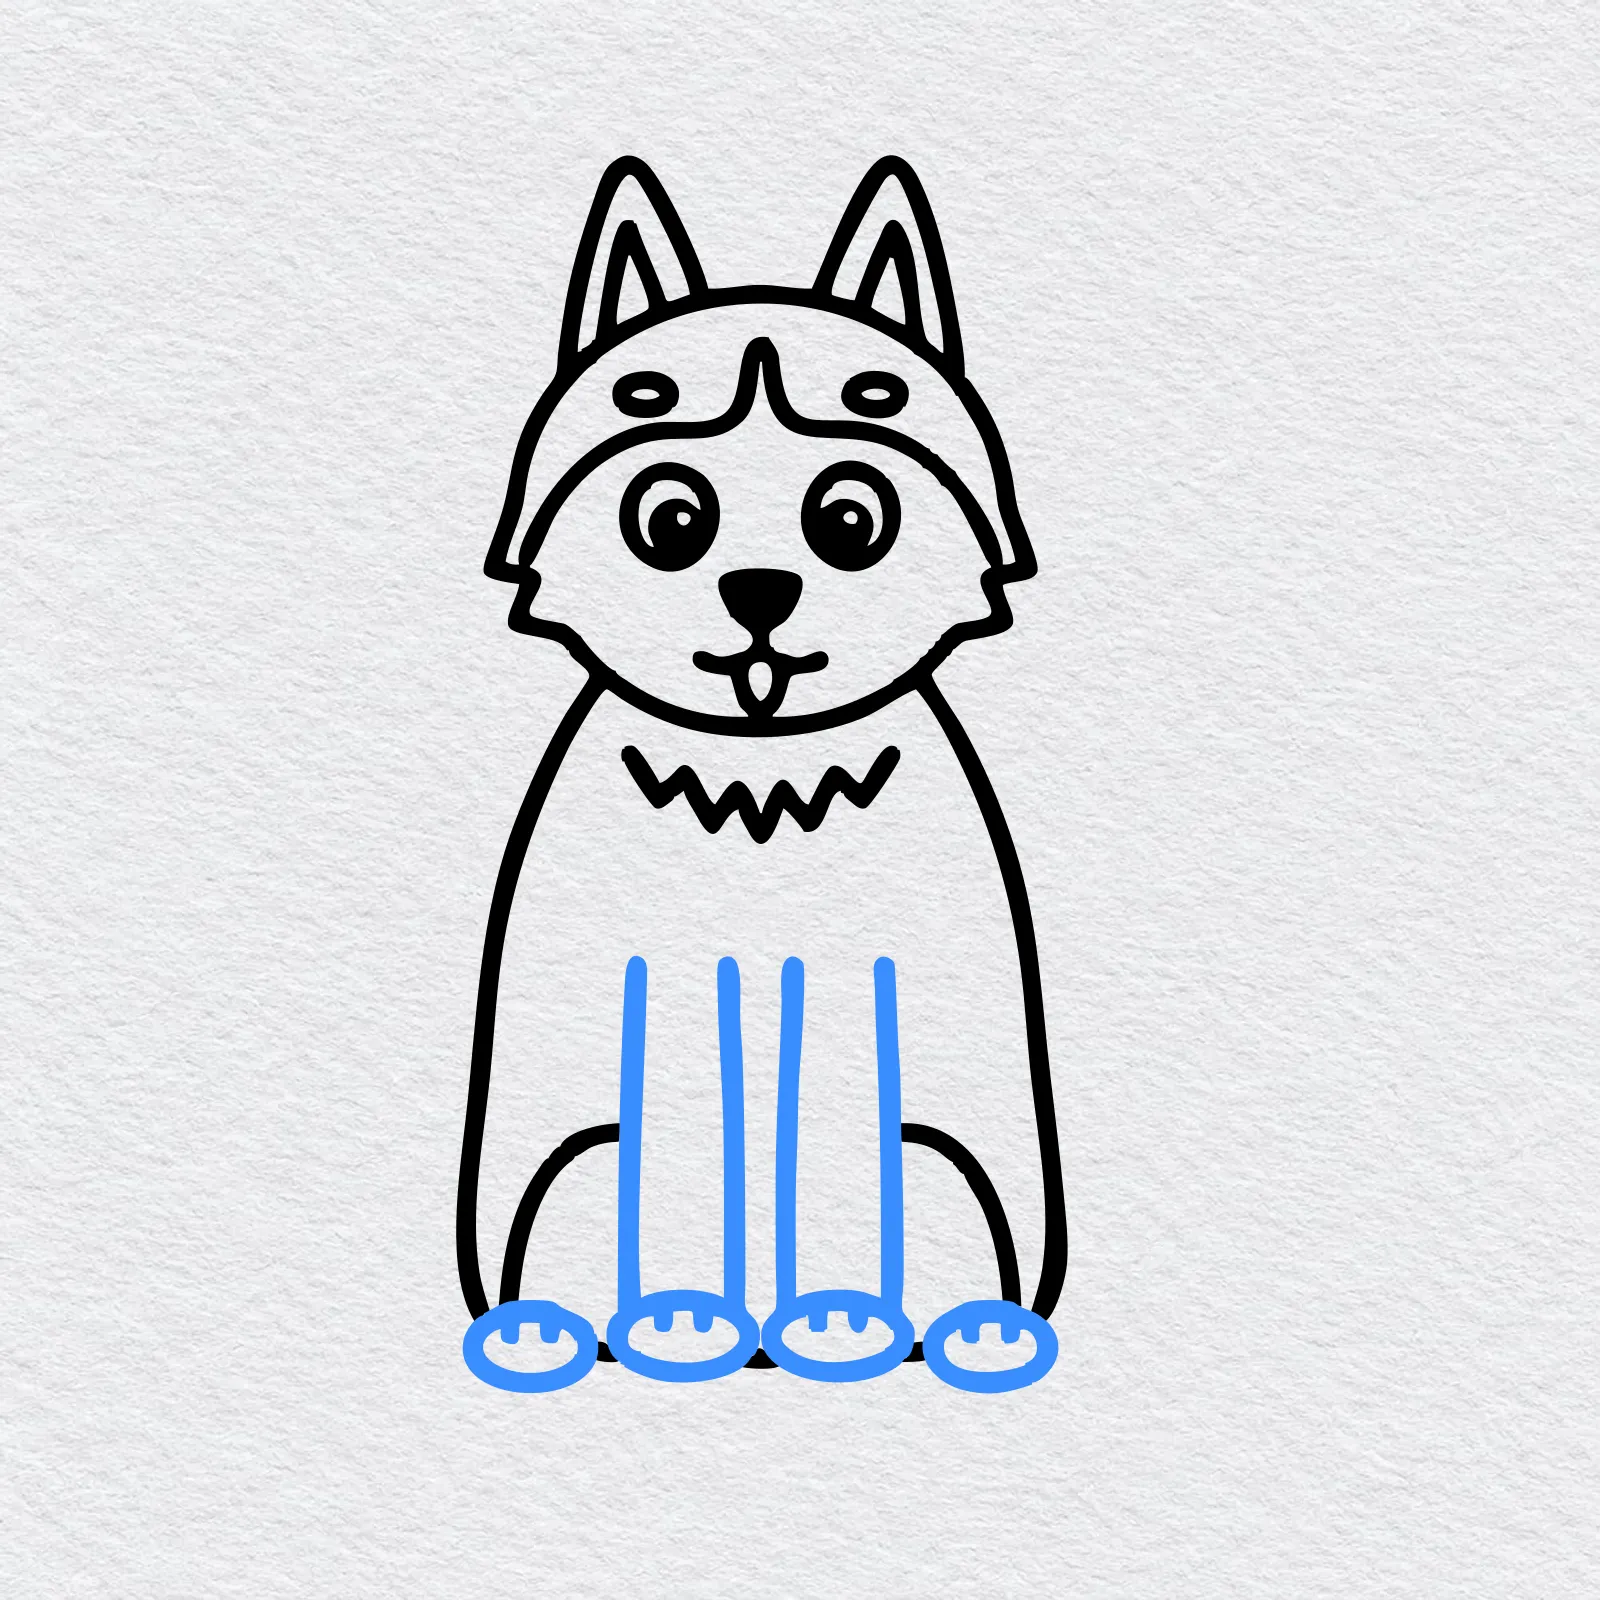
Draw two long front legs down the middle of the body, each made of two straight lines.
At the bottom, draw four small round paws in a row and add tiny toe lines.
-
Step 6 : Draw the curly tail
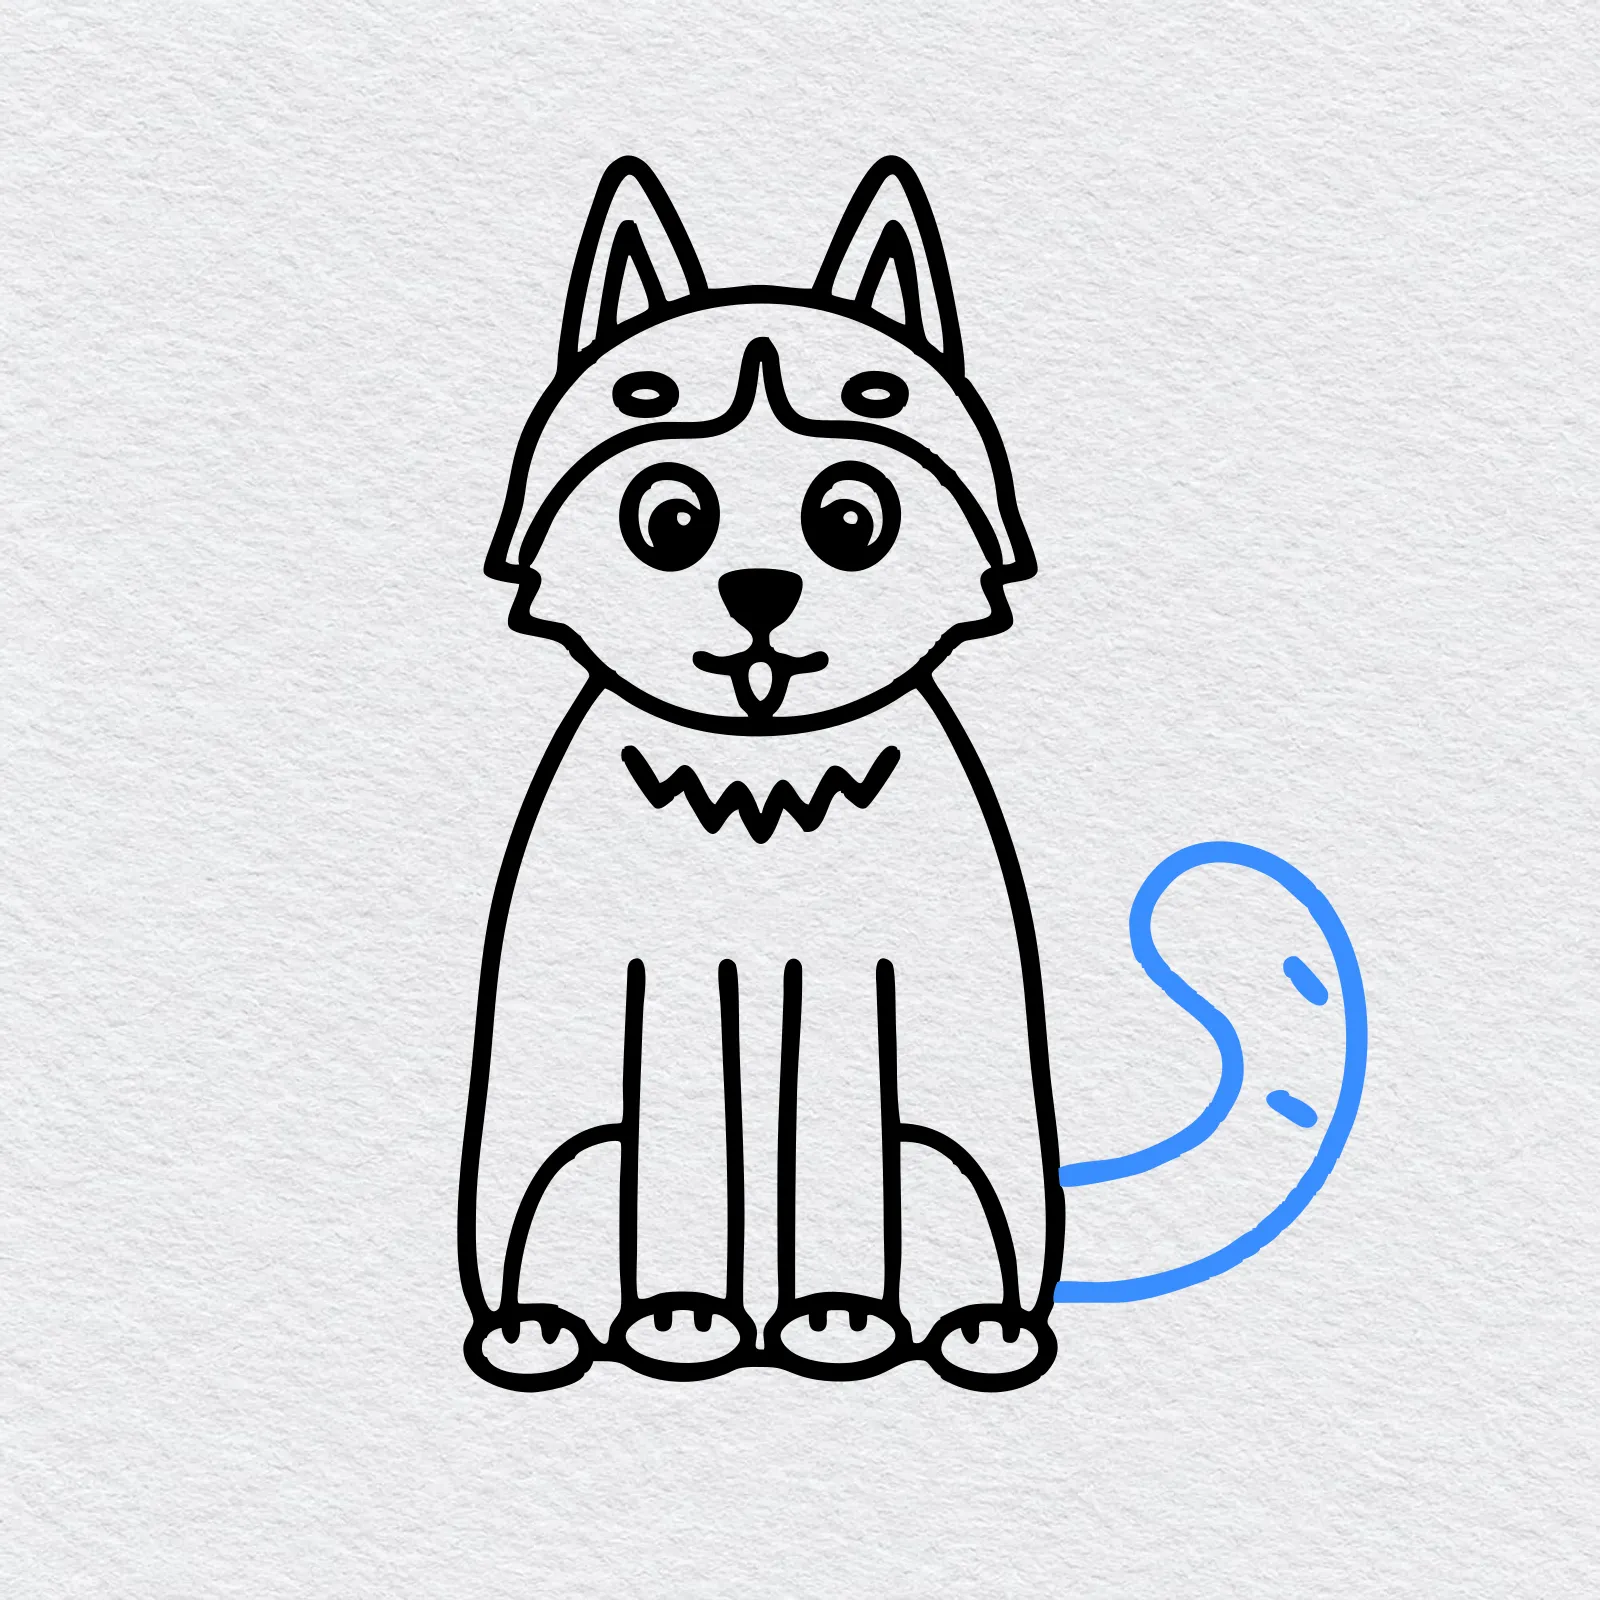
From the side of the body, draw a thick tail that sweeps out and curls up high, like a big hook. Keep the two lines the same distance apart.
Add two short lines near the tip.
-
Step 7 : Draw the snowy ground
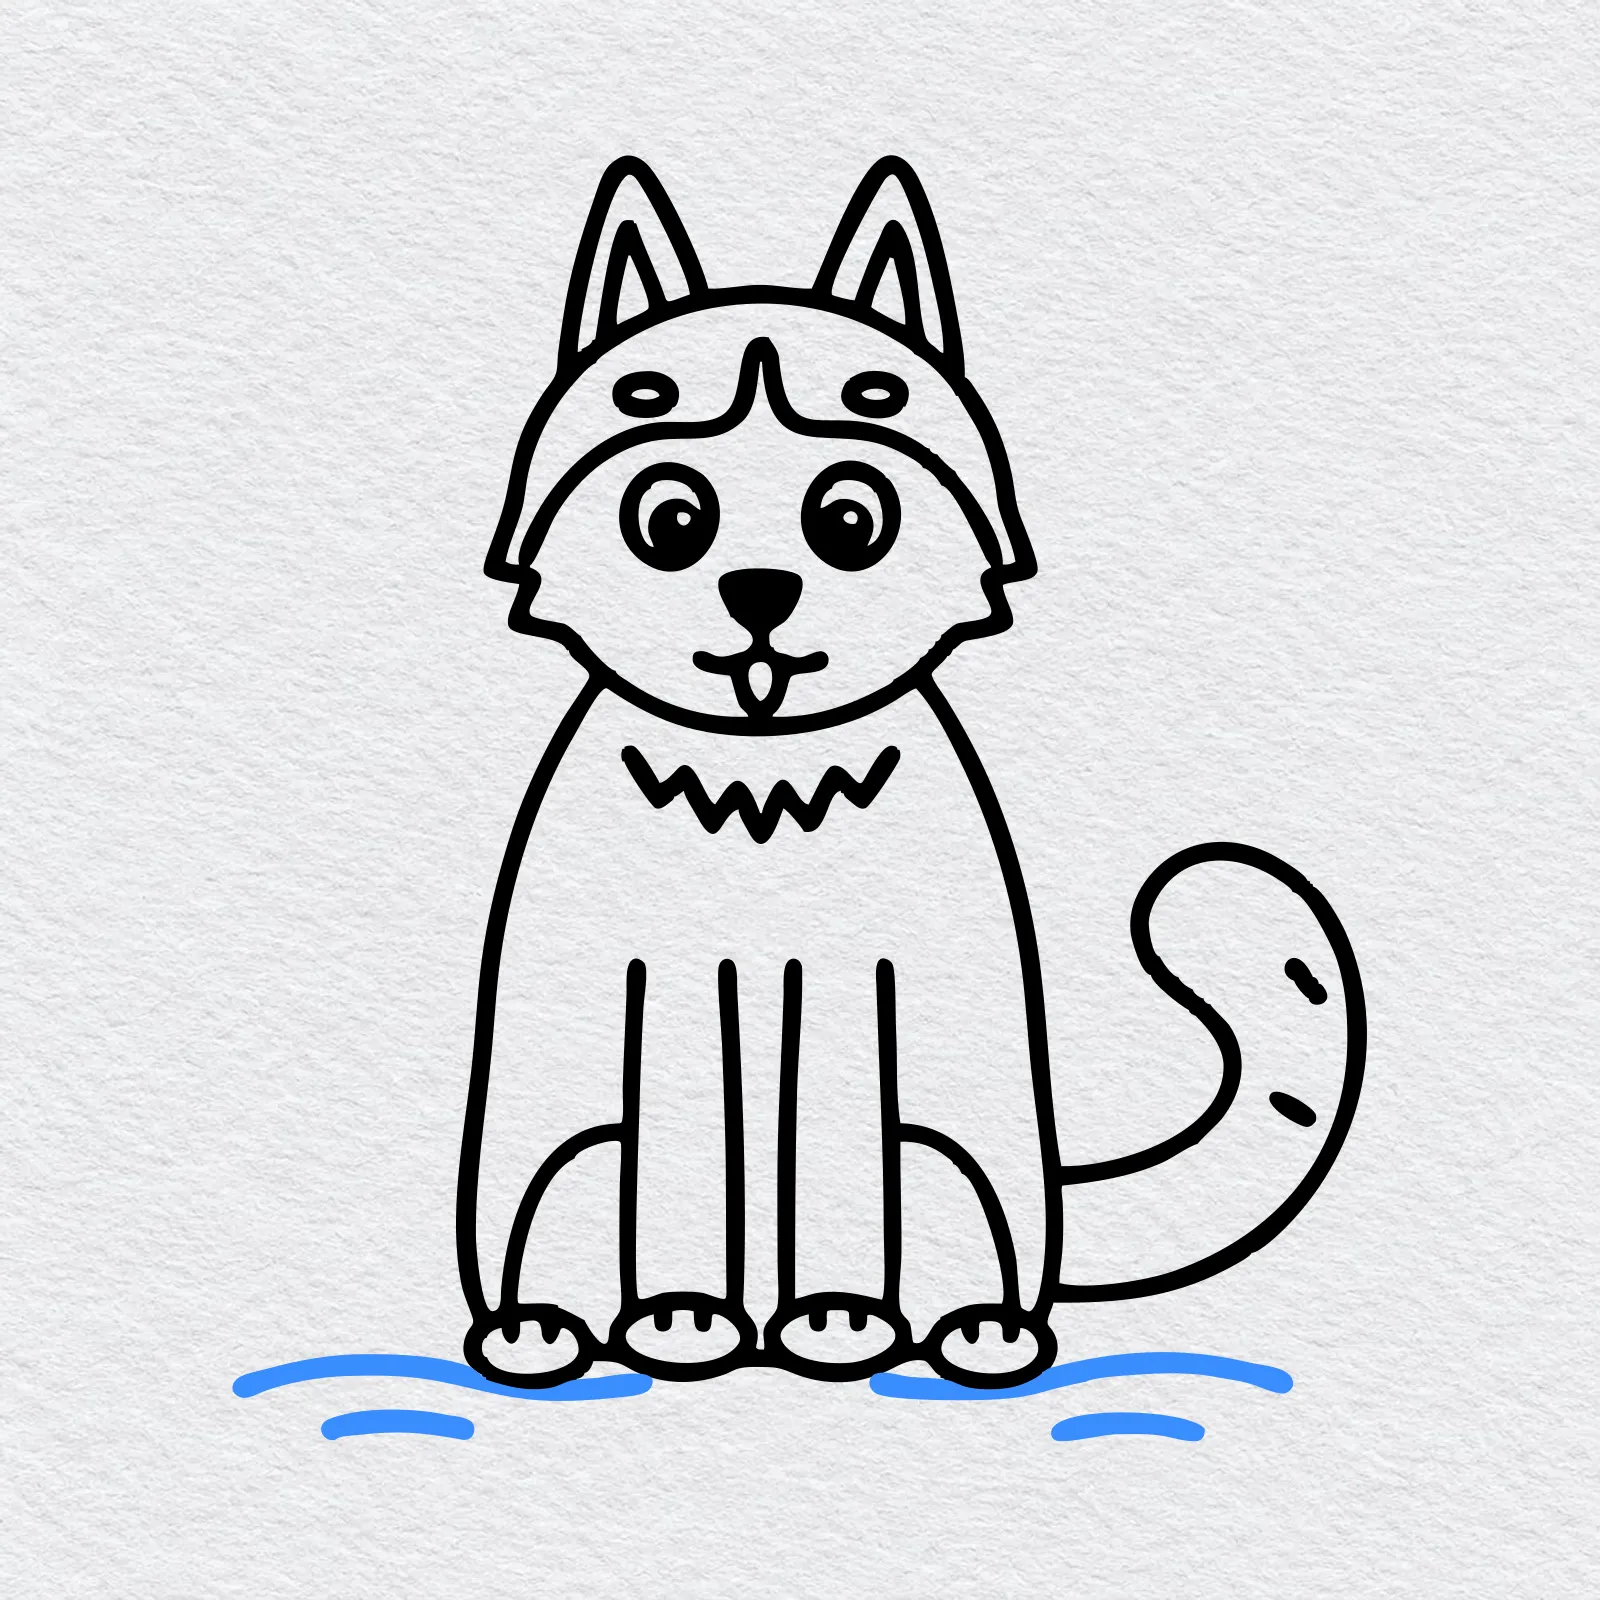
Under the paws, draw a long wavy line on each side for the snow. Add a few shorter wavy lines below them.
Now go over your best lines with a marker or a dark crayon and erase the extra pencil marks.
-
Step 8 : Color your husky
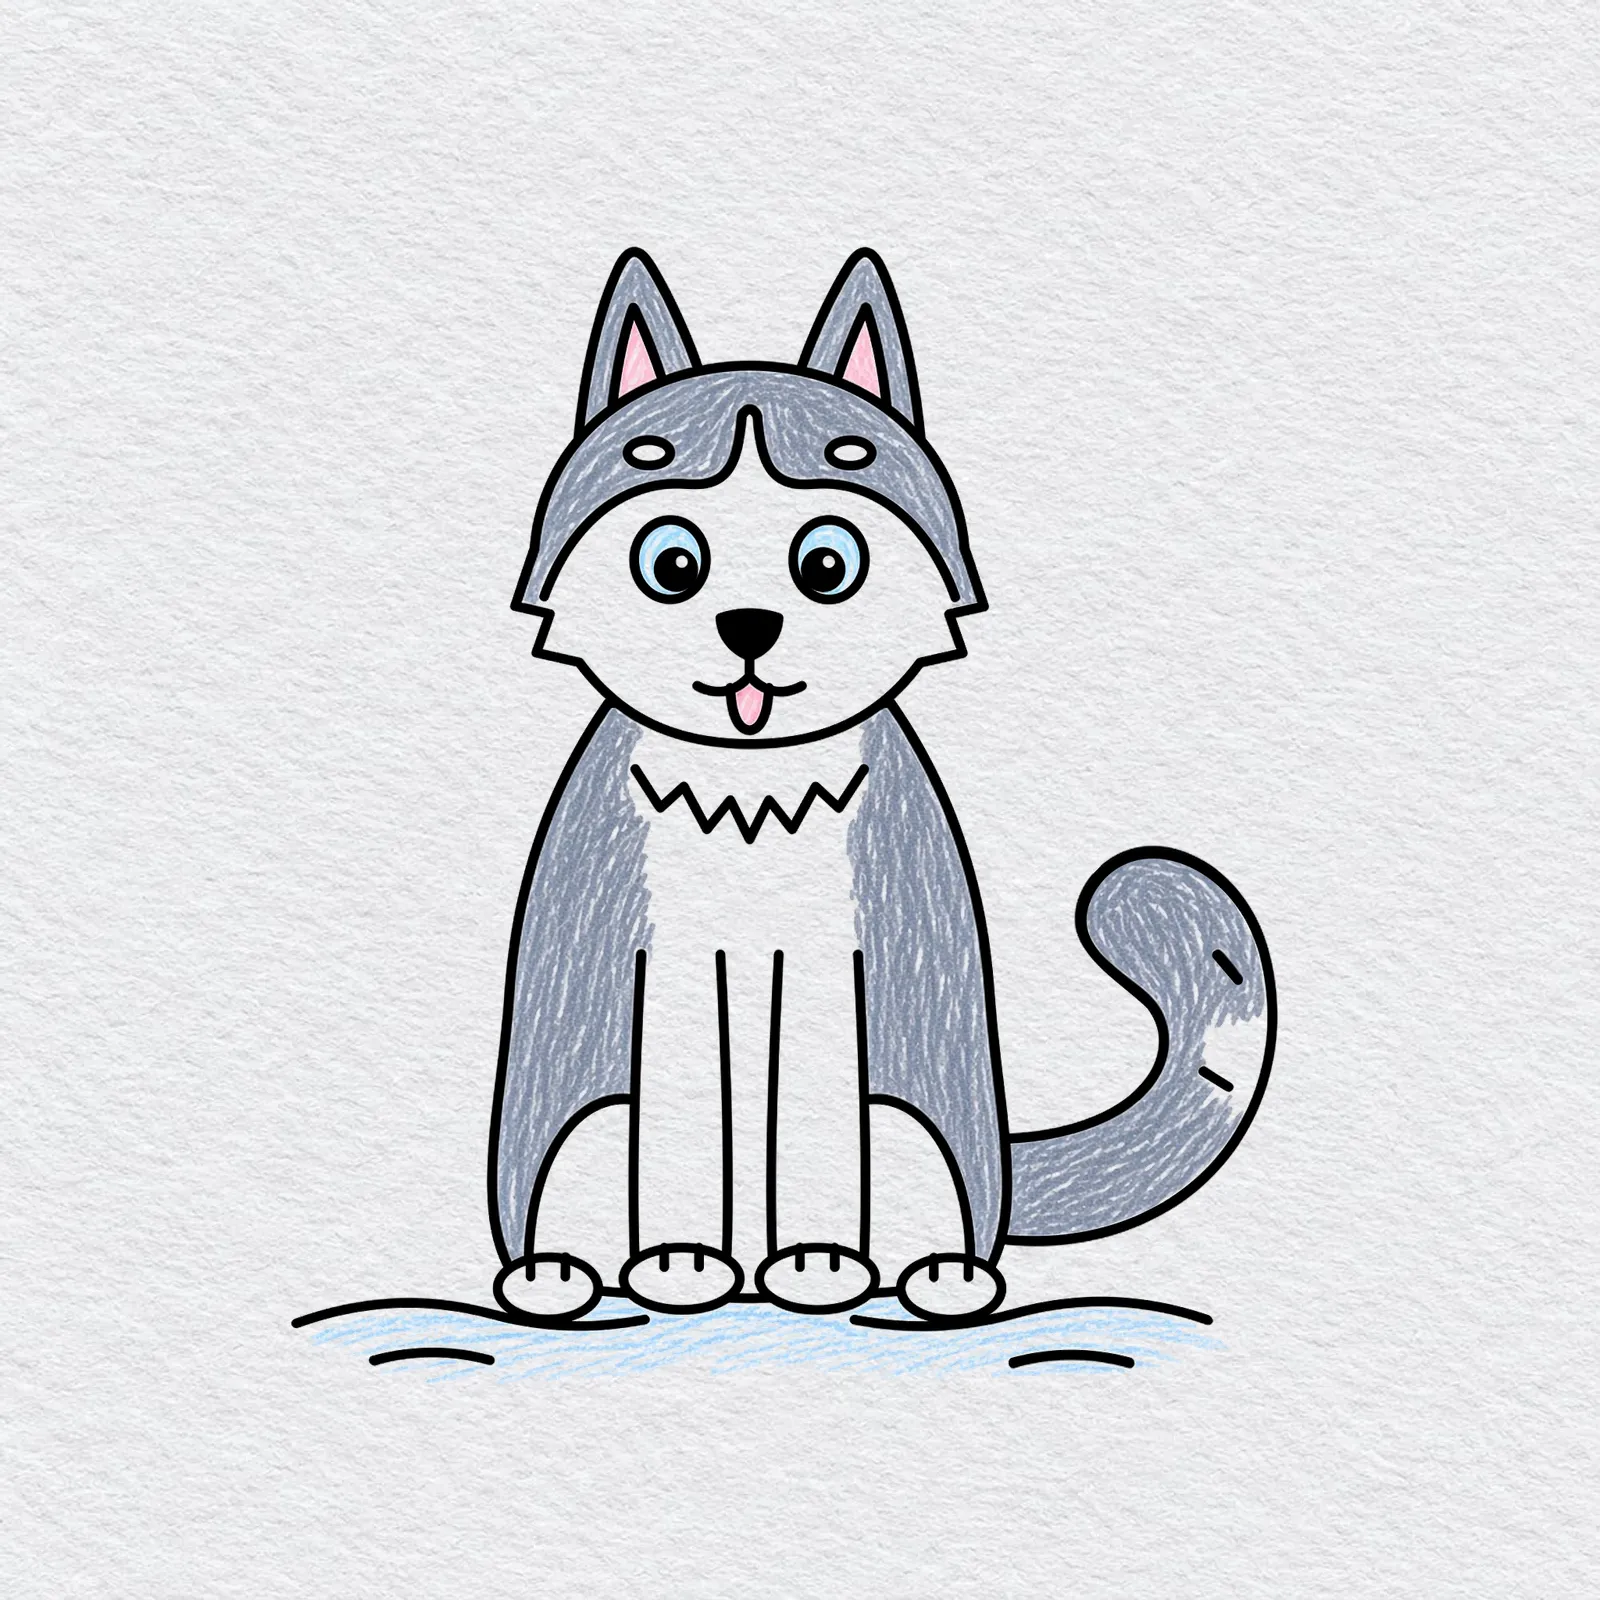
Many huskies are grey on the back and cream or white on the face, chest and legs. Color the mask and body grey, the face, chest and paws cream, the ears and tongue pink and the eyes light blue. Add pale blue to the snow.
Color in small strokes and press lightly first. You can always add more color later.
Printable husky drawing PDFs
 Save
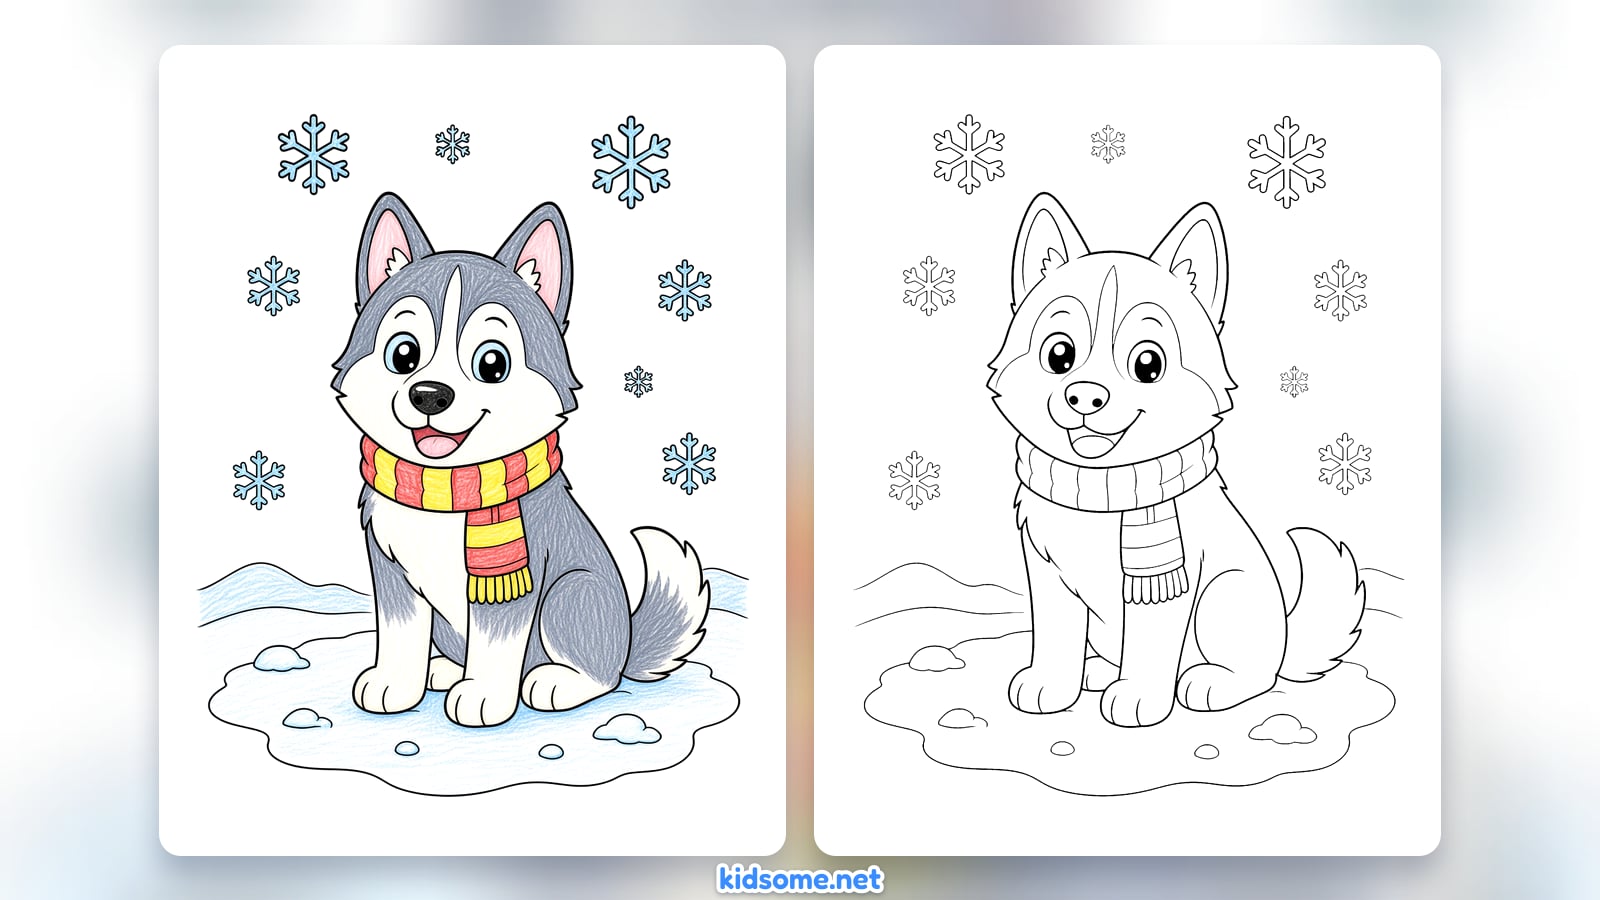
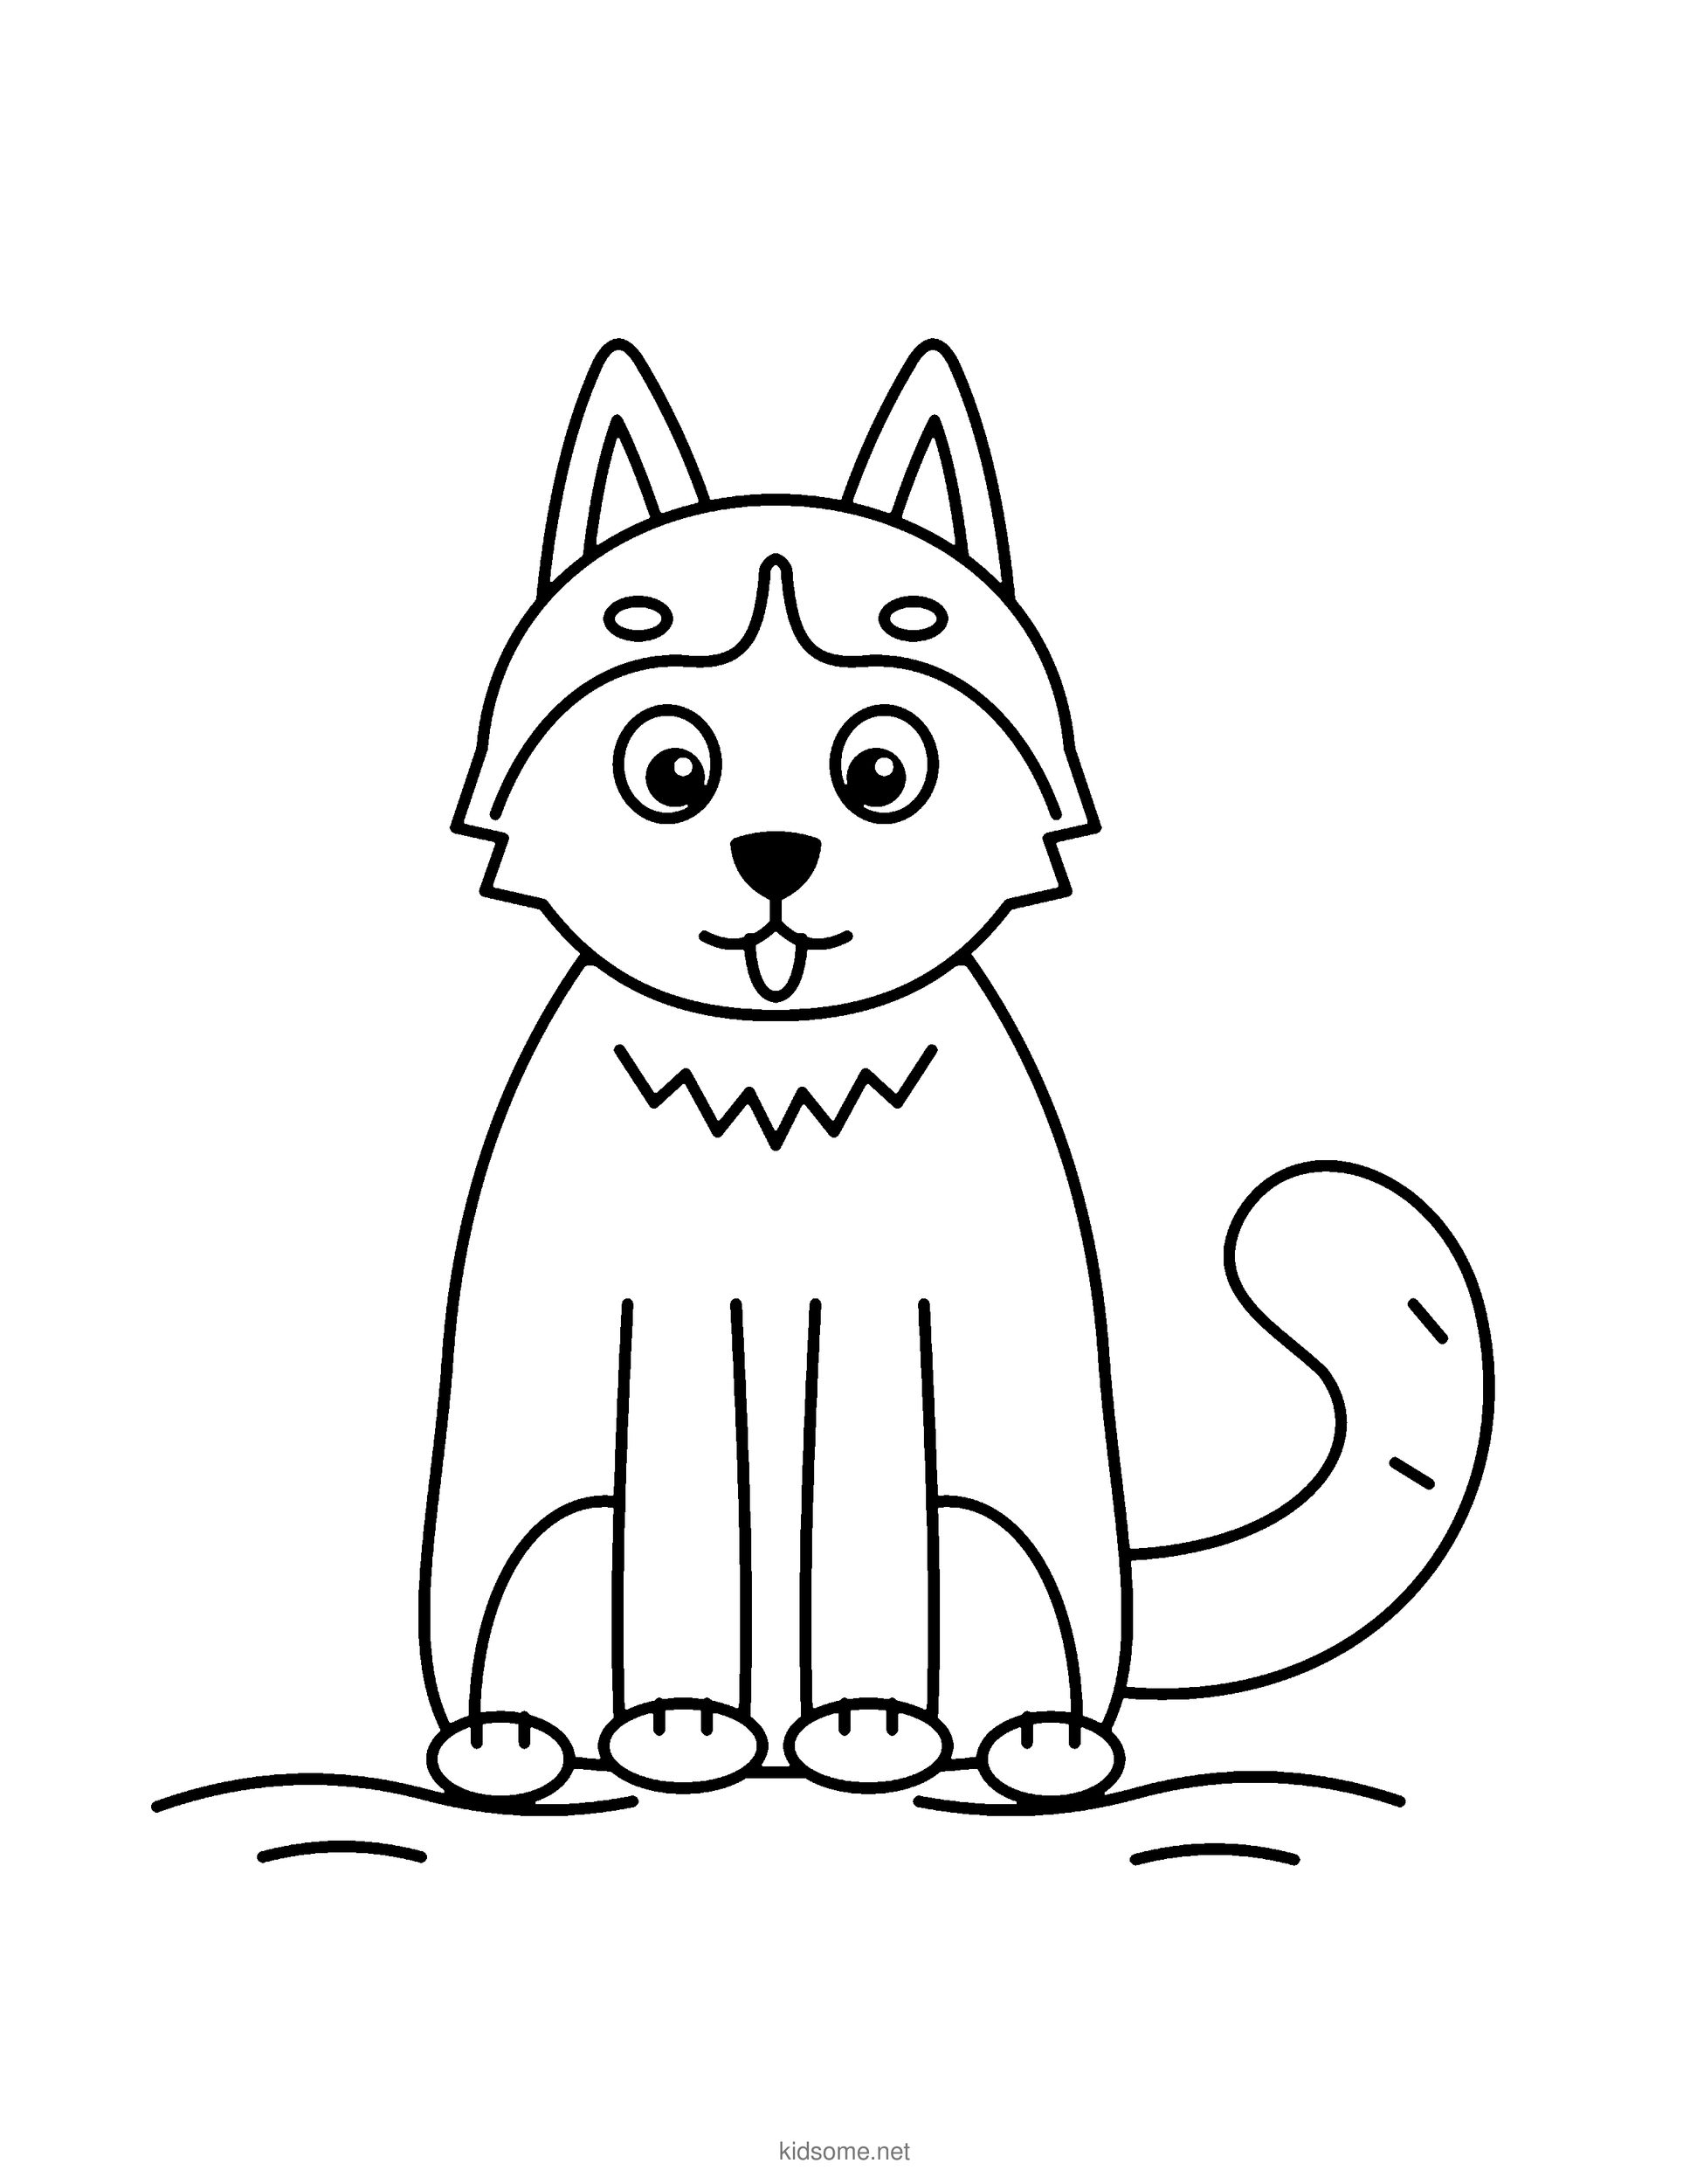
Husky Outline to Color
The finished husky sitting in the snow as a clean outline to print and color, with big open shapes for crayons.
Download PDF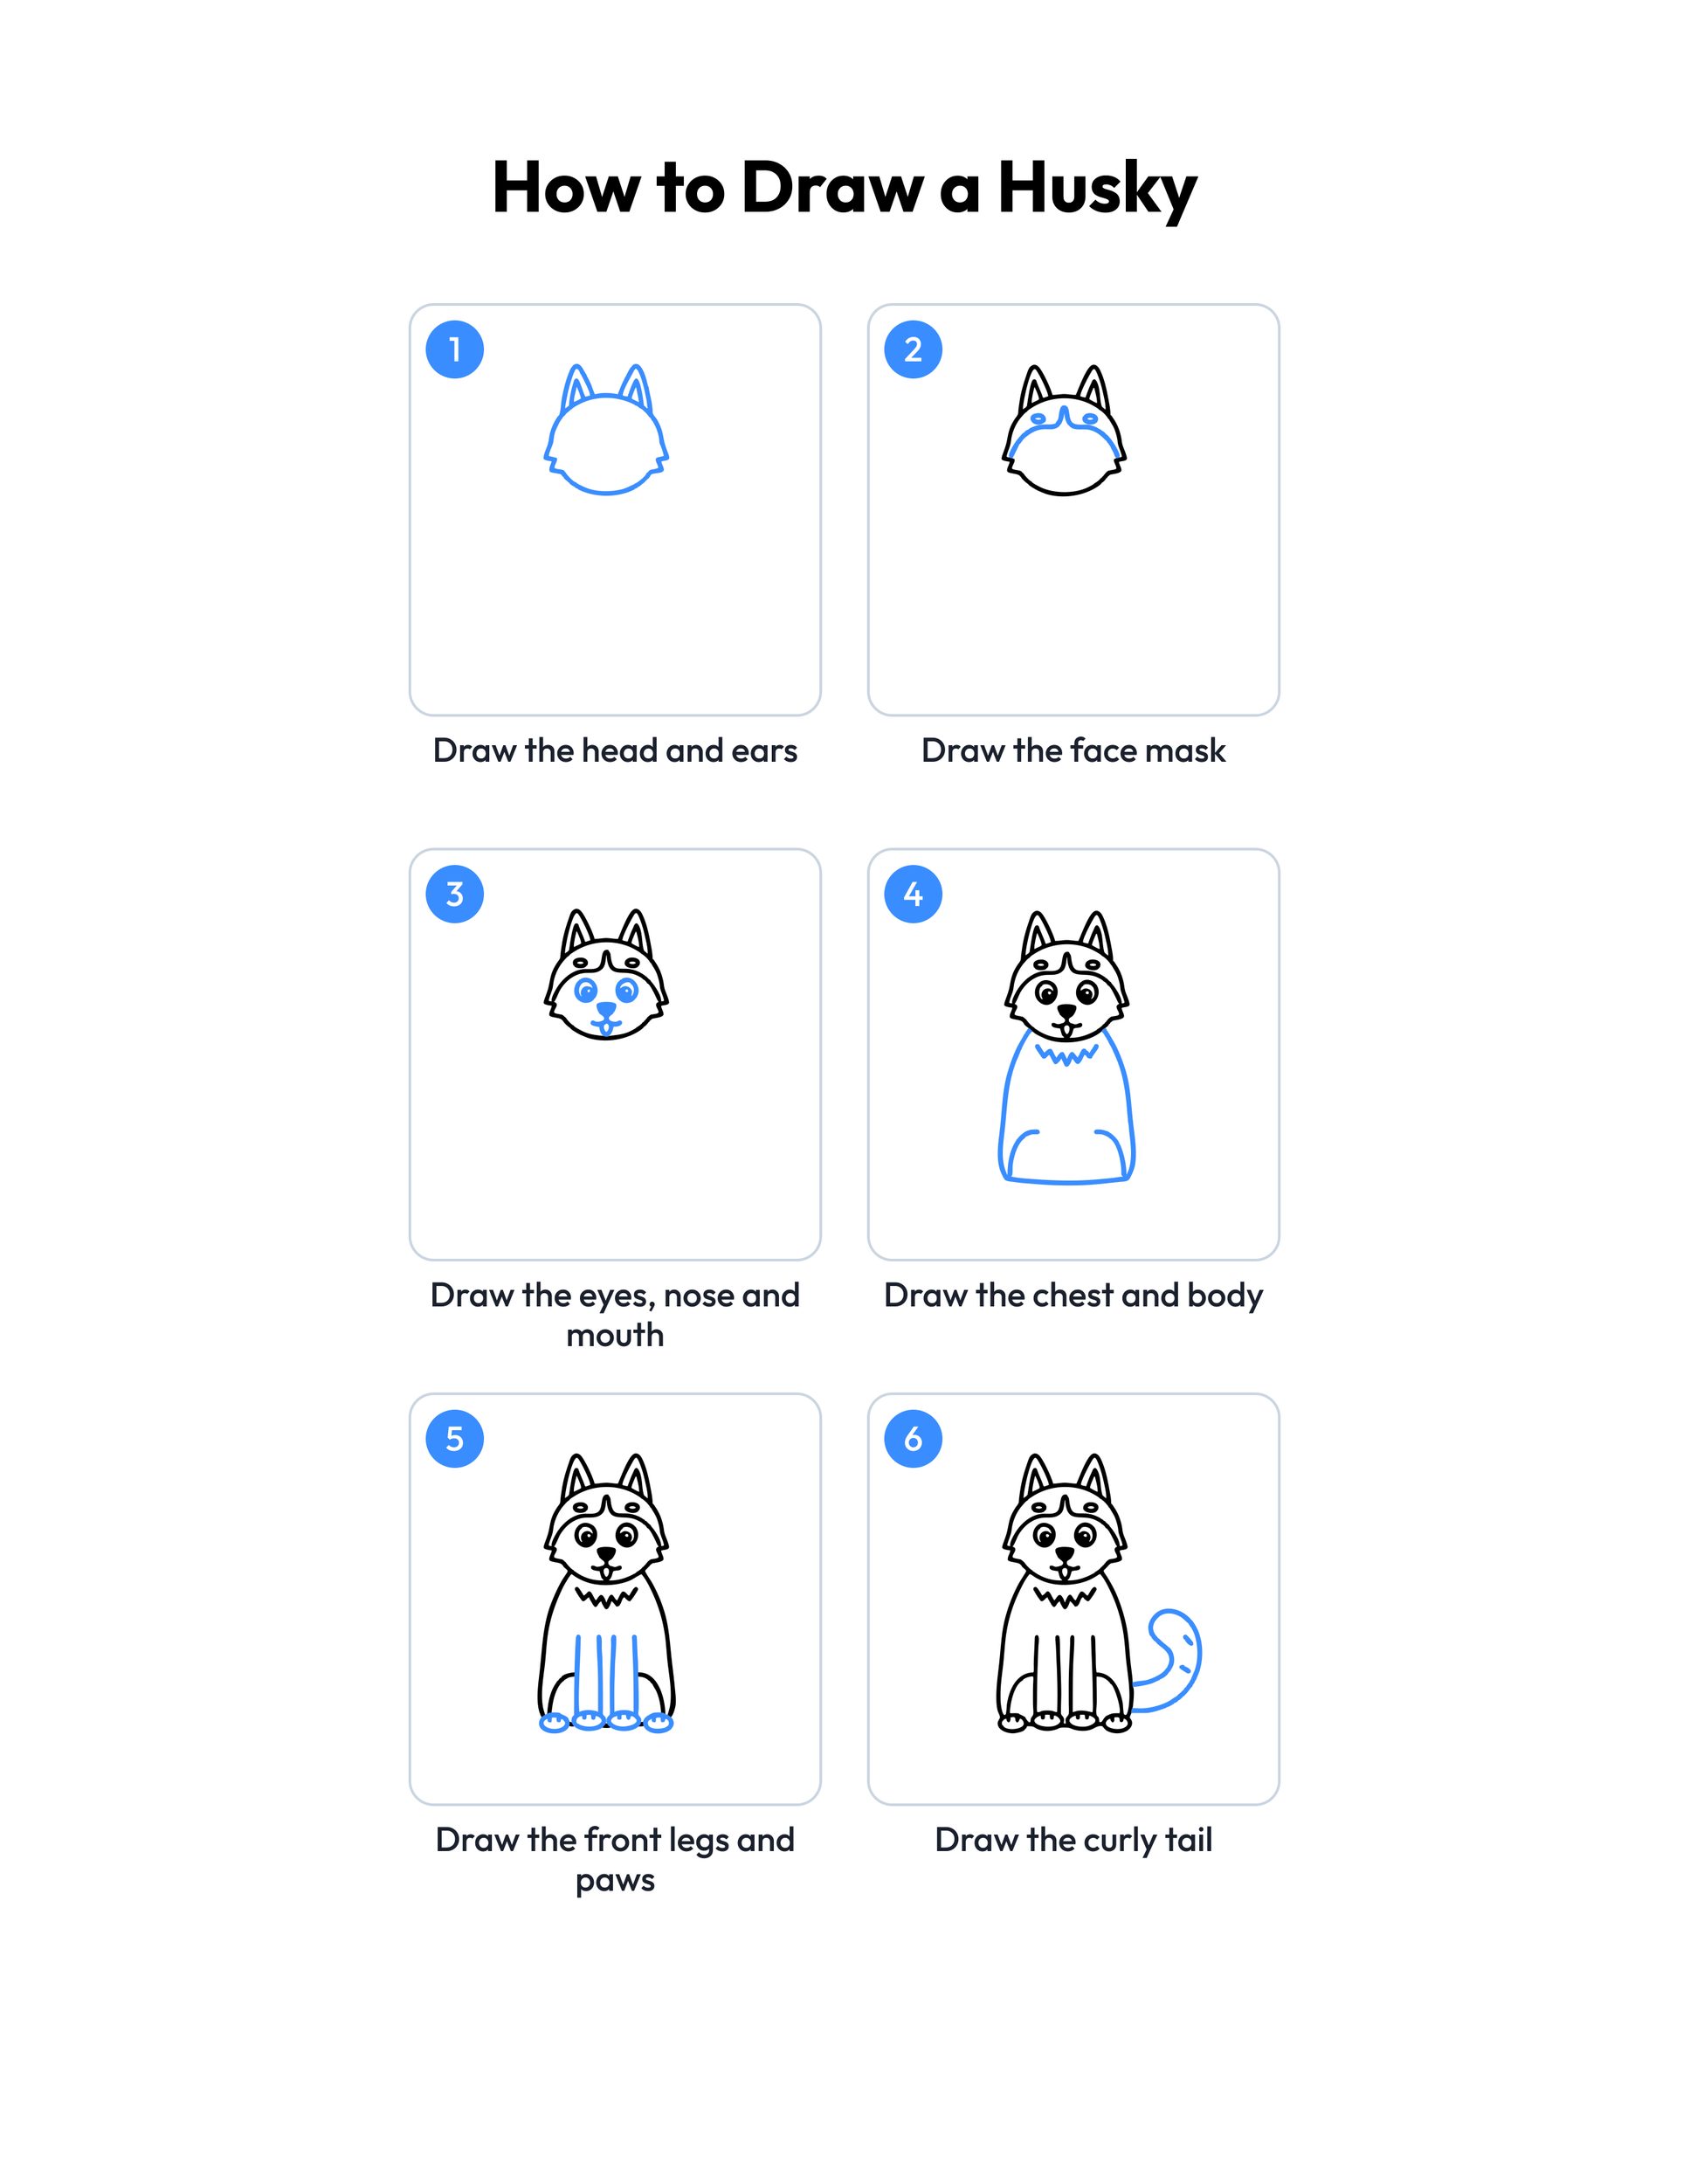 Save
Printable husky drawing guide
Every step, two to a row, with the finished husky in color at the end.
Download PDFHow to use this guide
Print the outline at 100 percent, or choose actual size in your print settings, so the lines stay clear. Plain printer paper is fine for pencils and crayons, and cardstock is better for markers. The PDF fits US Letter and A4.
For a first try, give your child a pencil and a sheet of plain paper and keep this page open beside them. Go one step at a time and look only at the blue lines, since those are the new part. Draw lightly at first, because it is easy to erase a soft line and try again. When the husky looks right, trace the best lines with a black marker or a dark crayon.
The first three steps are the easiest, since they use circles, triangles and short curves. The mask in step two takes the most care: go slowly so the forehead stripe sits right in the middle. The tail in step six is a good place to practice drawing two lines that stay side by side.
Younger kids can skip the drawing and color the printed outline instead, then try drawing the husky again another day. Older kids can make it their own by giving the husky a scarf, a ball or a puppy friend. For more to try, our animal drawing guides use the same simple shapes.
Ideas for your husky drawing
- Draw a husky family. Kids draw one big husky, then try a smaller one beside it with a rounder head and bigger paws, which is an easy way to learn how to draw a husky puppy.
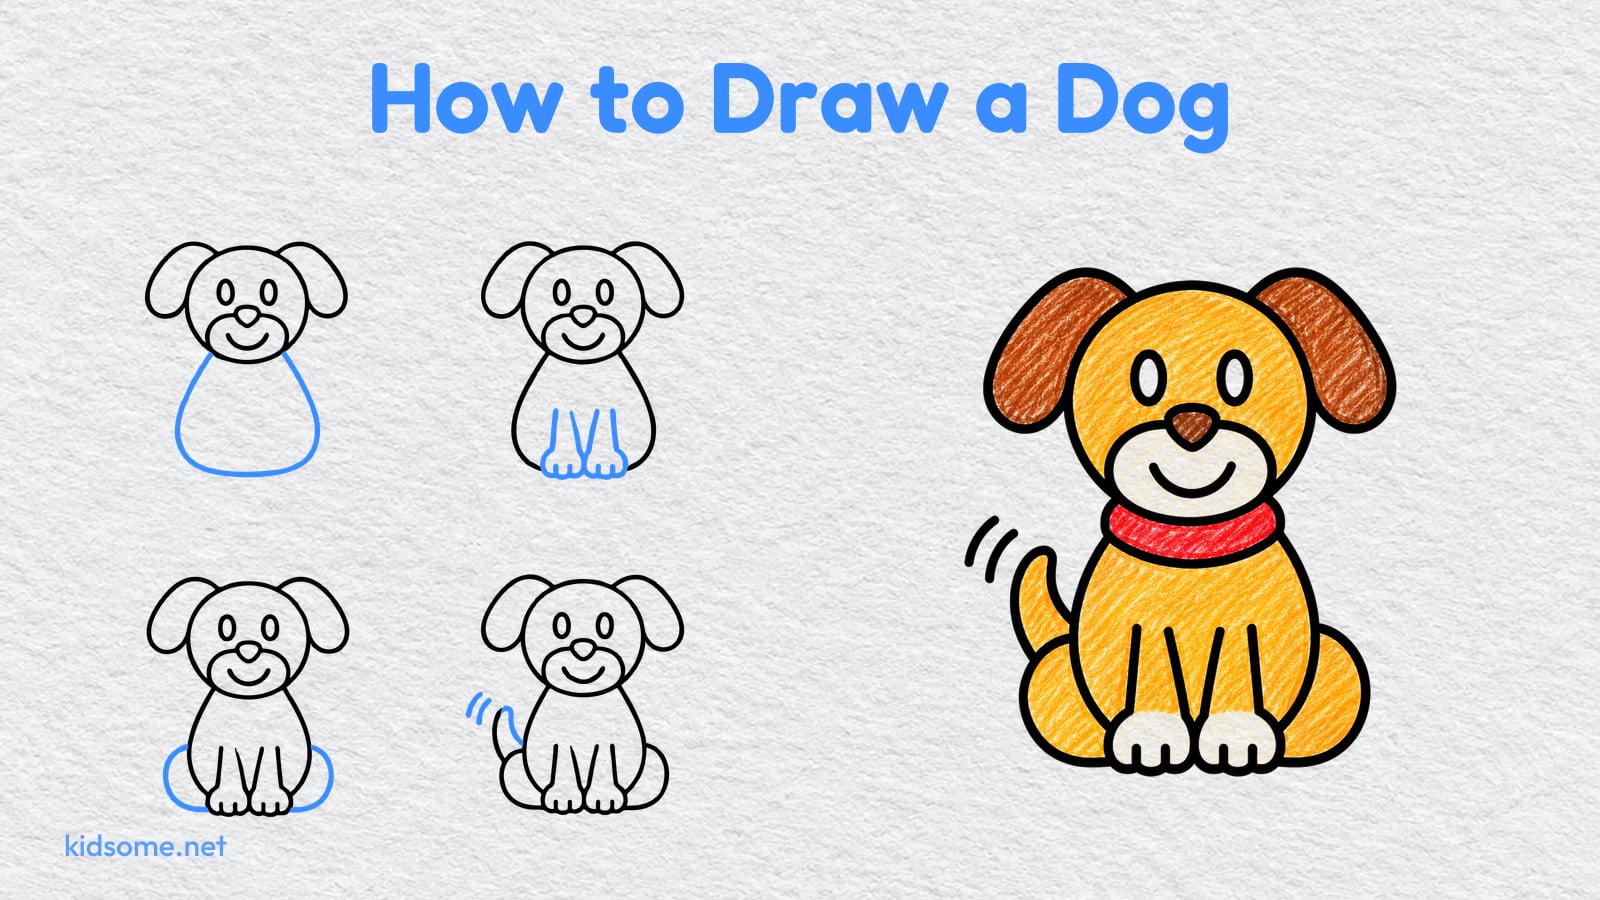
- Pair this guide with our dog drawing guide and ask kids to spot what is the same and what is different between the two dogs.
- Set up a winter art center with this page, plain paper, pencils and crayons, and let kids add a snowman from our snowman drawing guide next to their husky.
- Read a picture book about sled dogs, then let each child draw a husky and give it a name, a job and one fun fact to share with the class.
- Practice shapes with younger kids. Point to the circle head, the triangle ears and the oval paws, and count each shape together before they start drawing.
- Make winter cards by drawing the husky on folded cardstock, coloring it in and writing a short warm message inside for a friend or family member.
- After drawing, look for dog words together in our dog word search, a calm way to finish an art lesson or a rainy afternoon.
- Use these seven steps as a warm up before a writing lesson, then ask kids to write two sentences about where their husky lives and what it likes to do.
Is this husky drawing easy for young kids?
Yes. Every step adds one simple part, drawn in blue, so kids ages 4 to 8 always know what to draw next. Younger children may need help with the face mask and the curly tail, while older kids can usually follow all seven steps alone and then add their own details around the husky.
What do I need to draw a husky?
A pencil, an eraser and a sheet of plain paper are enough to start. A black marker or a dark crayon helps to trace the best lines at the end. For coloring, grey, cream, pink and light blue crayons or colored pencils will give the classic husky look shown in the last step.
How do I make my drawing look like a husky and not another dog?
The face mask does most of the work. Draw the line across the face with the stripe rising up the forehead, add the two eyebrow spots, and keep the ears tall and pointy. A fluffy tail that curls up high and blue eyes in the colored picture finish the husky look.
Can I print this guide for my class?
Yes. The outline is free for personal and classroom use, so teachers can print one for each child in an art lesson, a winter animal unit or an indoor recess box. Please share a link to this page instead of the file itself, and do not sell the pages or add them to paid products.
What should we draw after the husky?
Kids who enjoyed this guide can try another furry friend next, like our guide on how to draw a cat, which uses a round head and pointy ears too. Keep the same light lines and slow strokes, and soon kids can draw a whole row of pets.