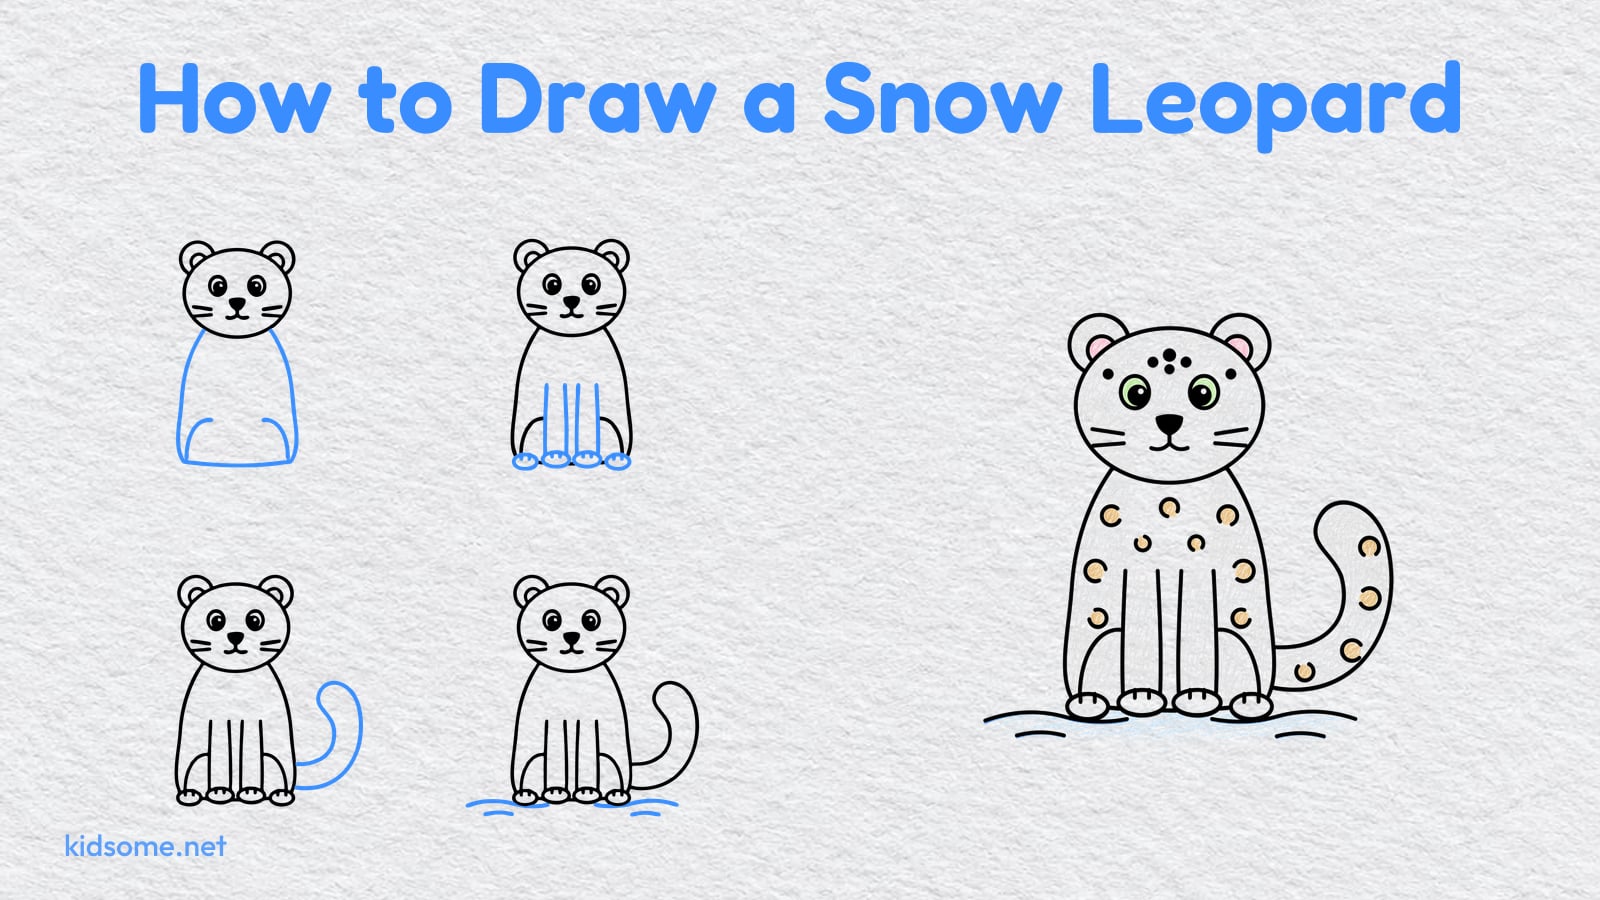
This guide shows how to draw a snow leopard in seven easy steps, made for kids ages 4 to 8 and the grown-up drawing beside them. The snow leopard sits in the snow facing you, so there are no tricky side views. It starts as a round head with two round ears, and every step after that adds one simple part in blue so a child can see exactly what is new.
After the head comes the face, then a soft body, then the front legs and paws, a long fluffy tail, a little snowy ground and last of all a sprinkle of spots. That is all it takes to make a snow leopard drawing easy enough for a first try and cute enough to hang on the fridge. A final step covers coloring it in.
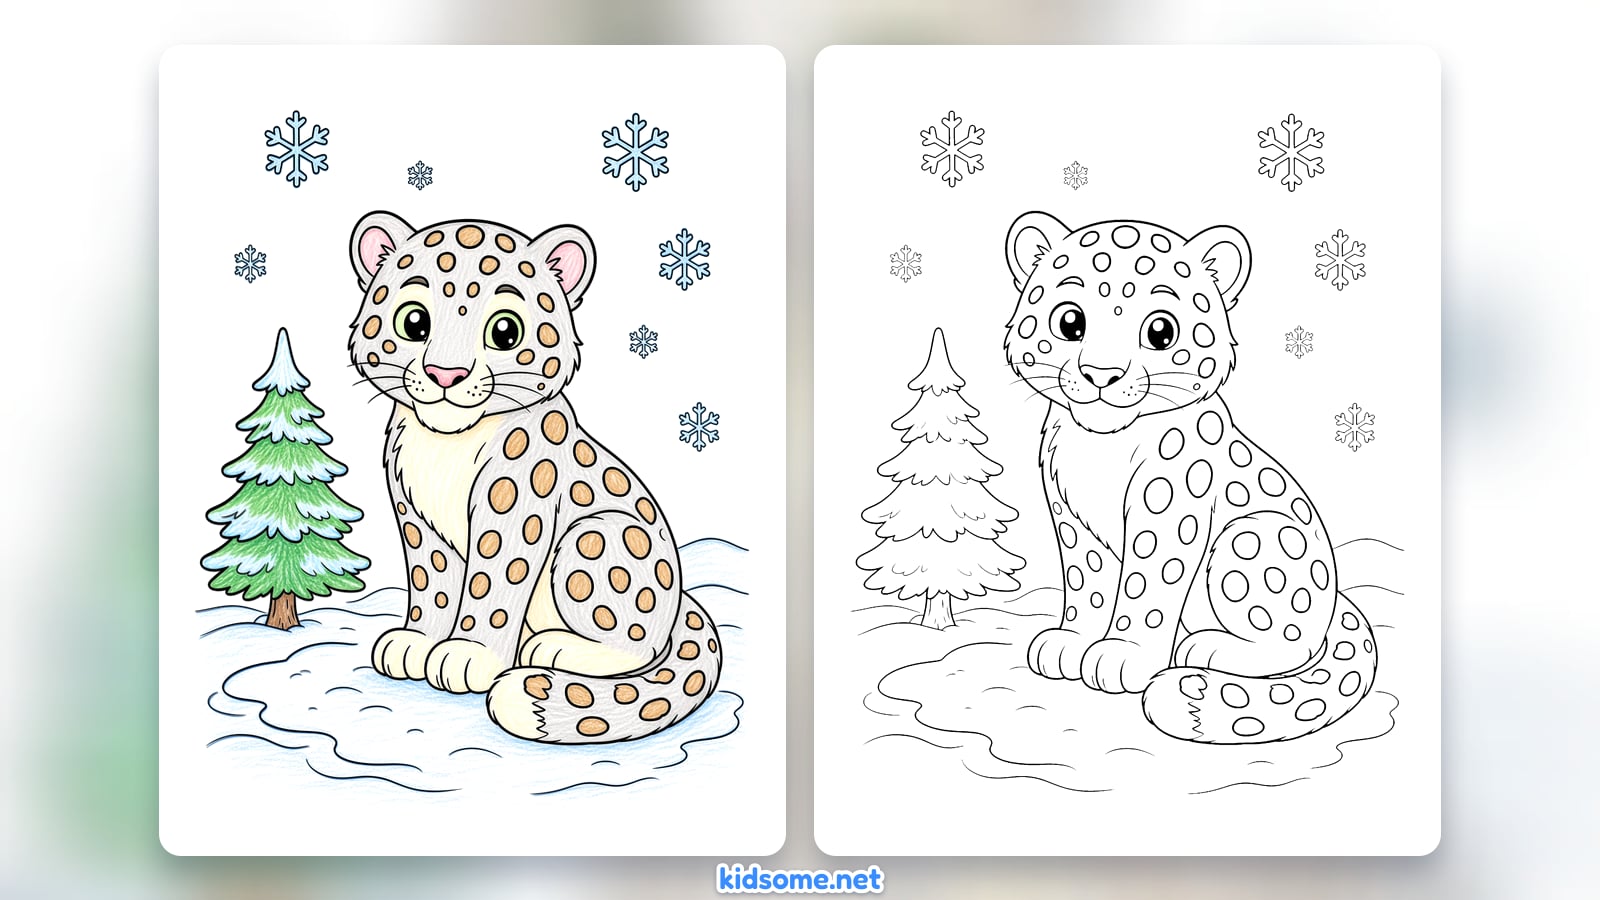
The finished snow leopard is also a free PDF outline that prints on US Letter and A4, with the colored snow leopard on page two as an example. There is no sign-up. Kids who enjoy this one can try how to draw a cat next.
-
Step 1 : Draw the head and ears
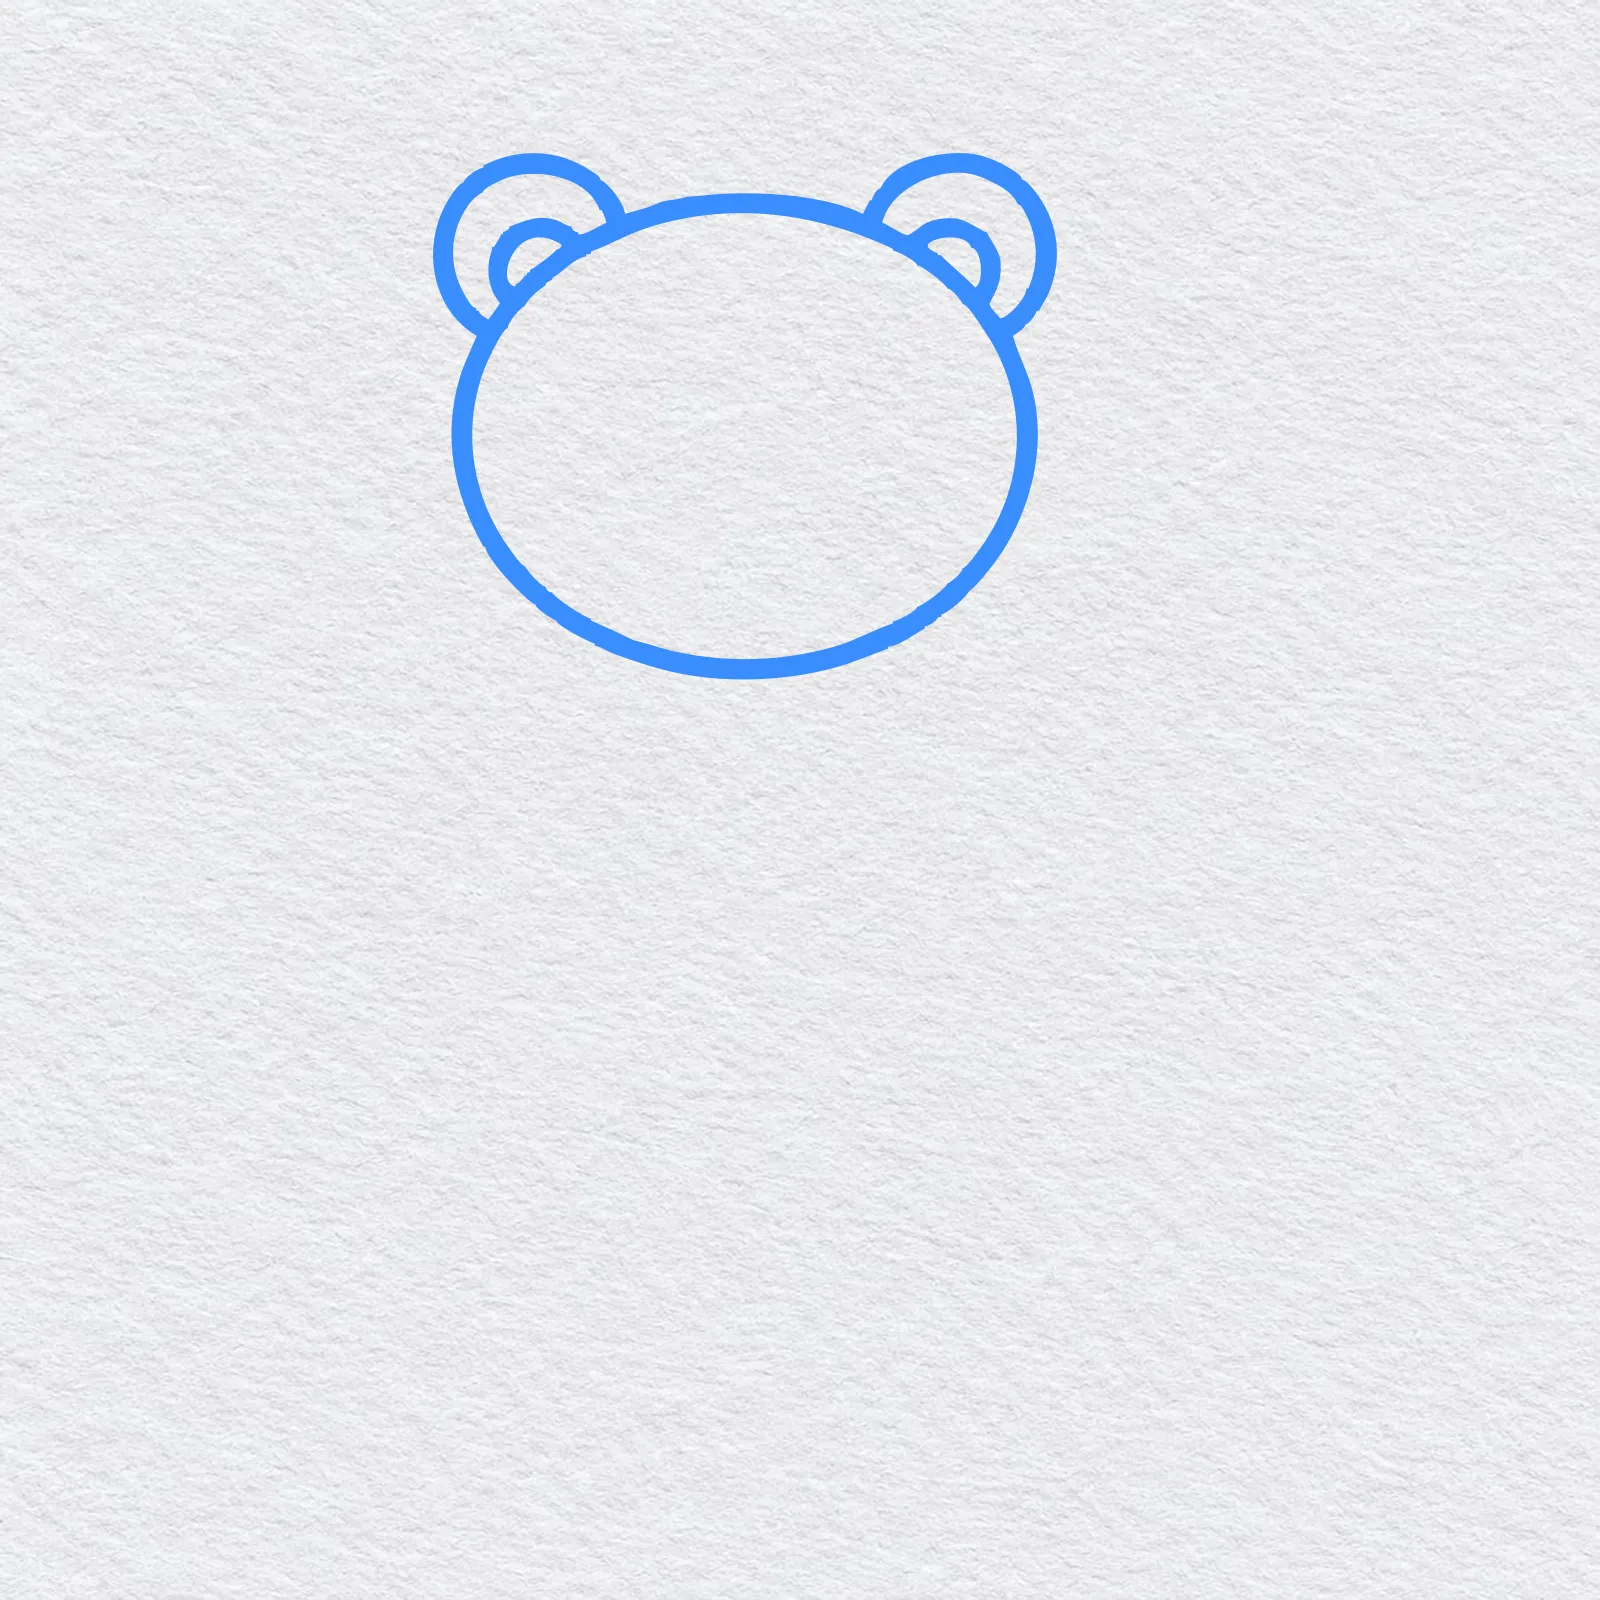
Start near the top of your paper with a big round circle for the head. On top, draw two small round ears, one on each side, with a smaller curve inside each ear.
Press lightly so it is easy to fix.
-
Step 2 : Draw the face
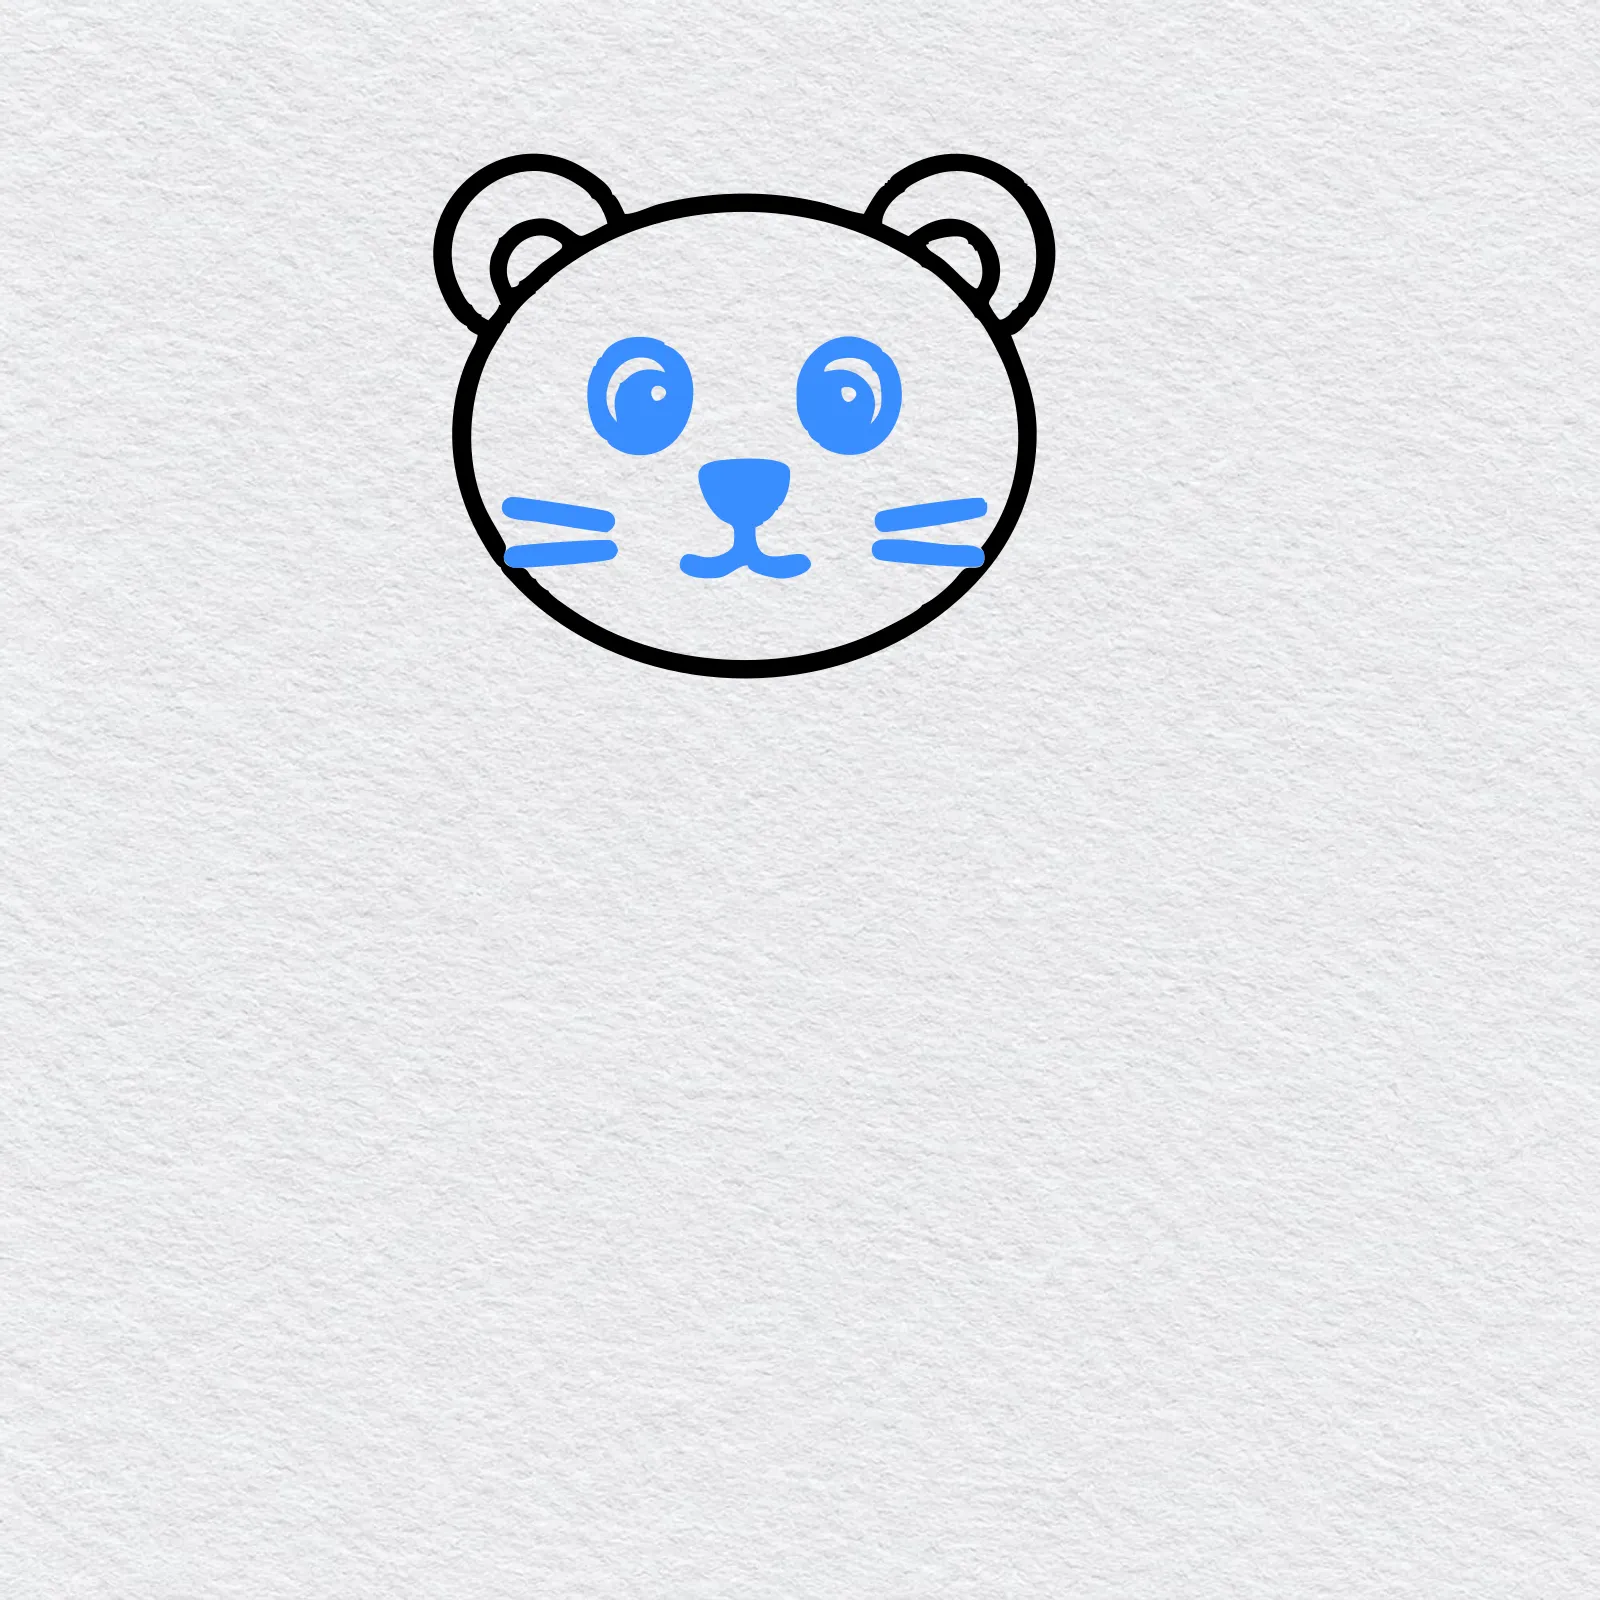
Draw two round eyes in the middle of the head with a dark dot and a tiny white shine in each. Under them, add a small triangle nose and a little mouth that looks like a letter w.
Finish with three short whisker lines on each cheek.
-
Step 3 : Draw the body
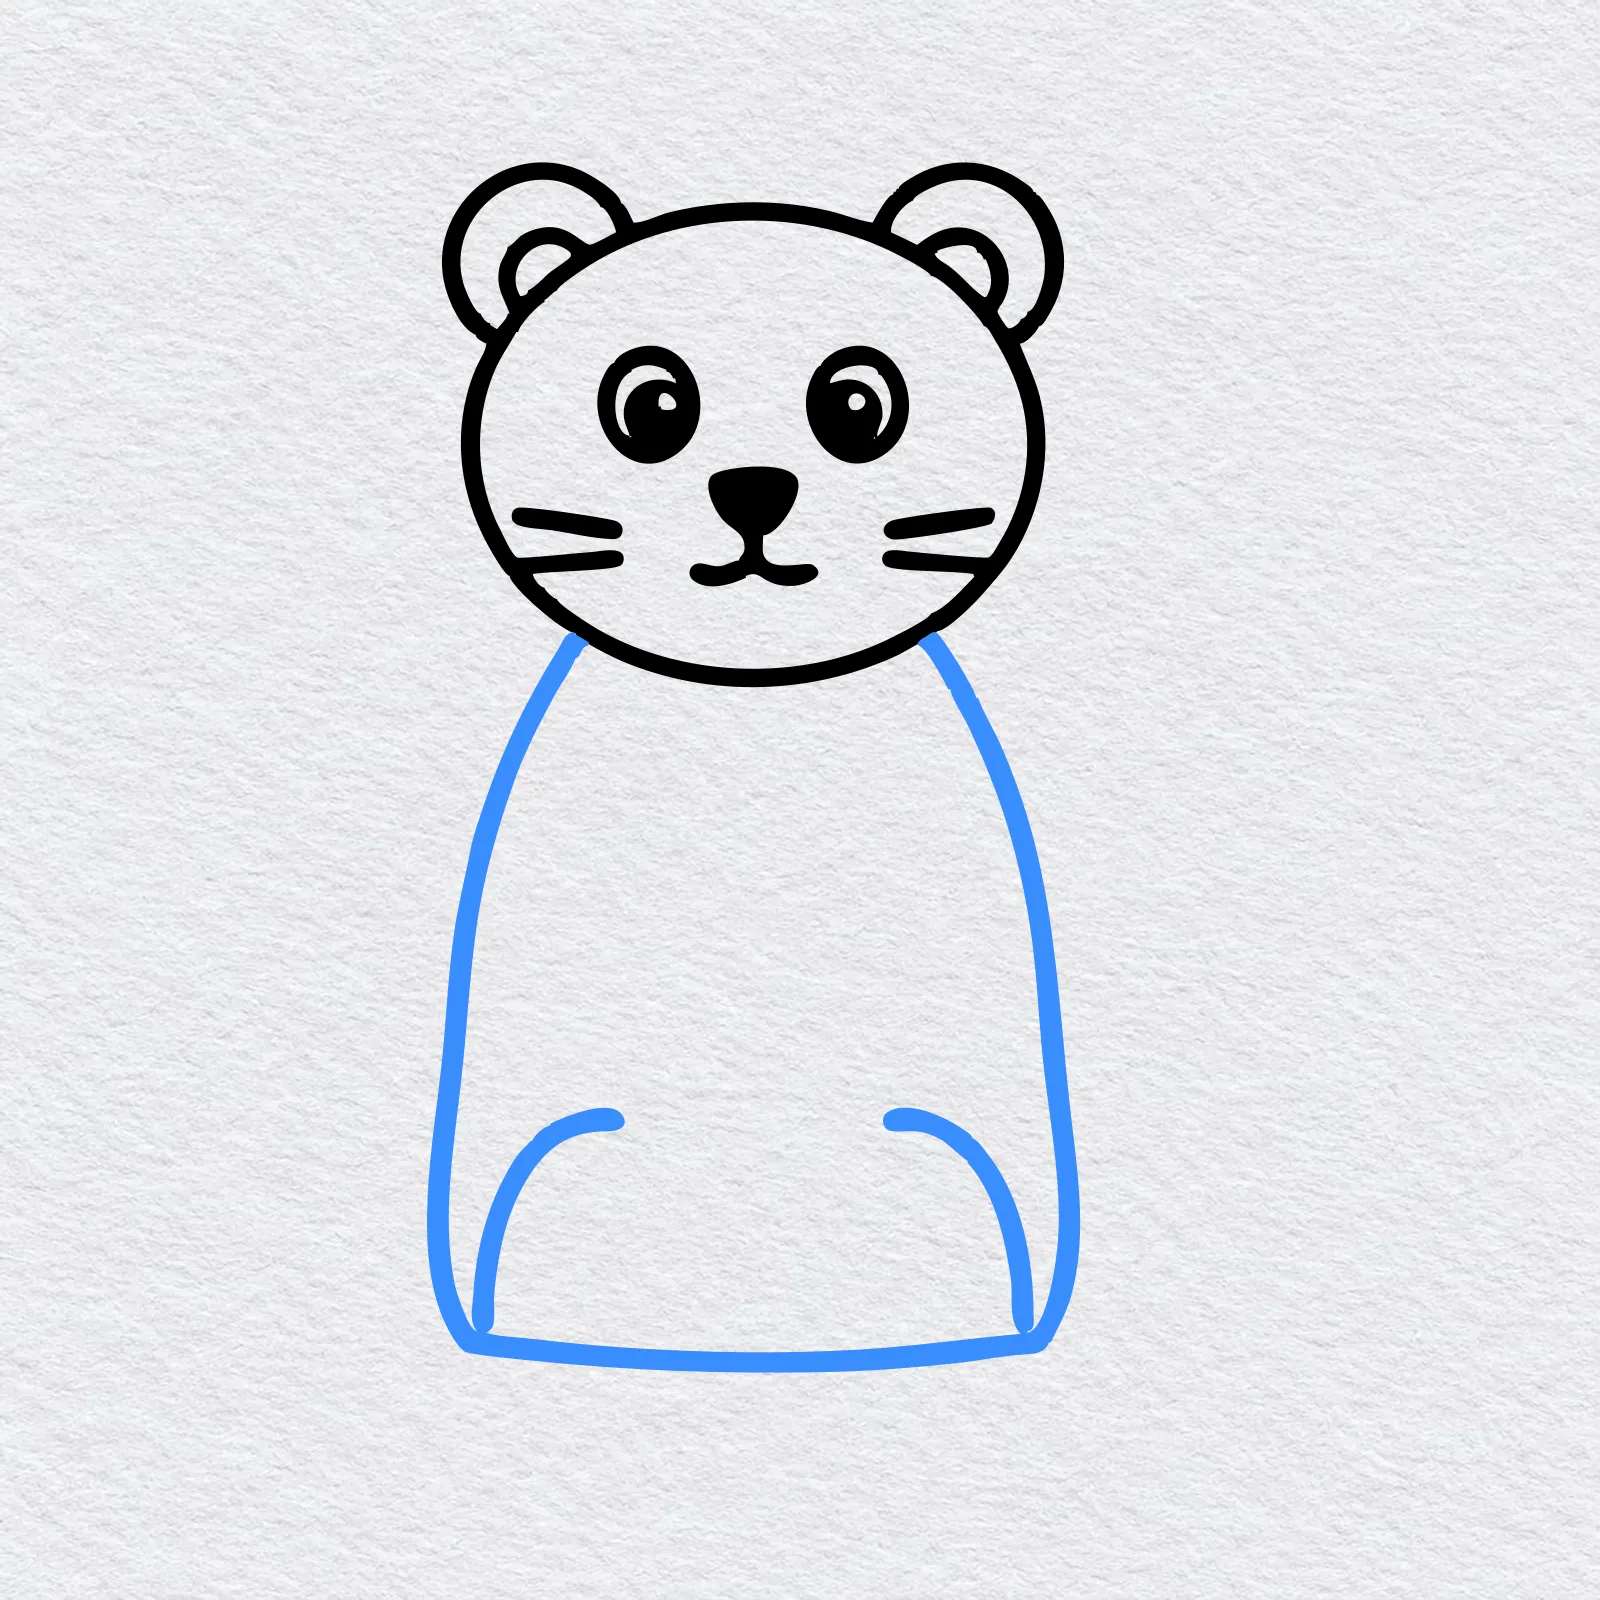
Under the head, draw a tall rounded shape for the body, like a bell that is wider at the bottom. Draw a flat line along the bottom.
Inside, near the bottom corners, add two curved lines for the back legs folded under.
-
Step 4 : Draw the front legs and paws
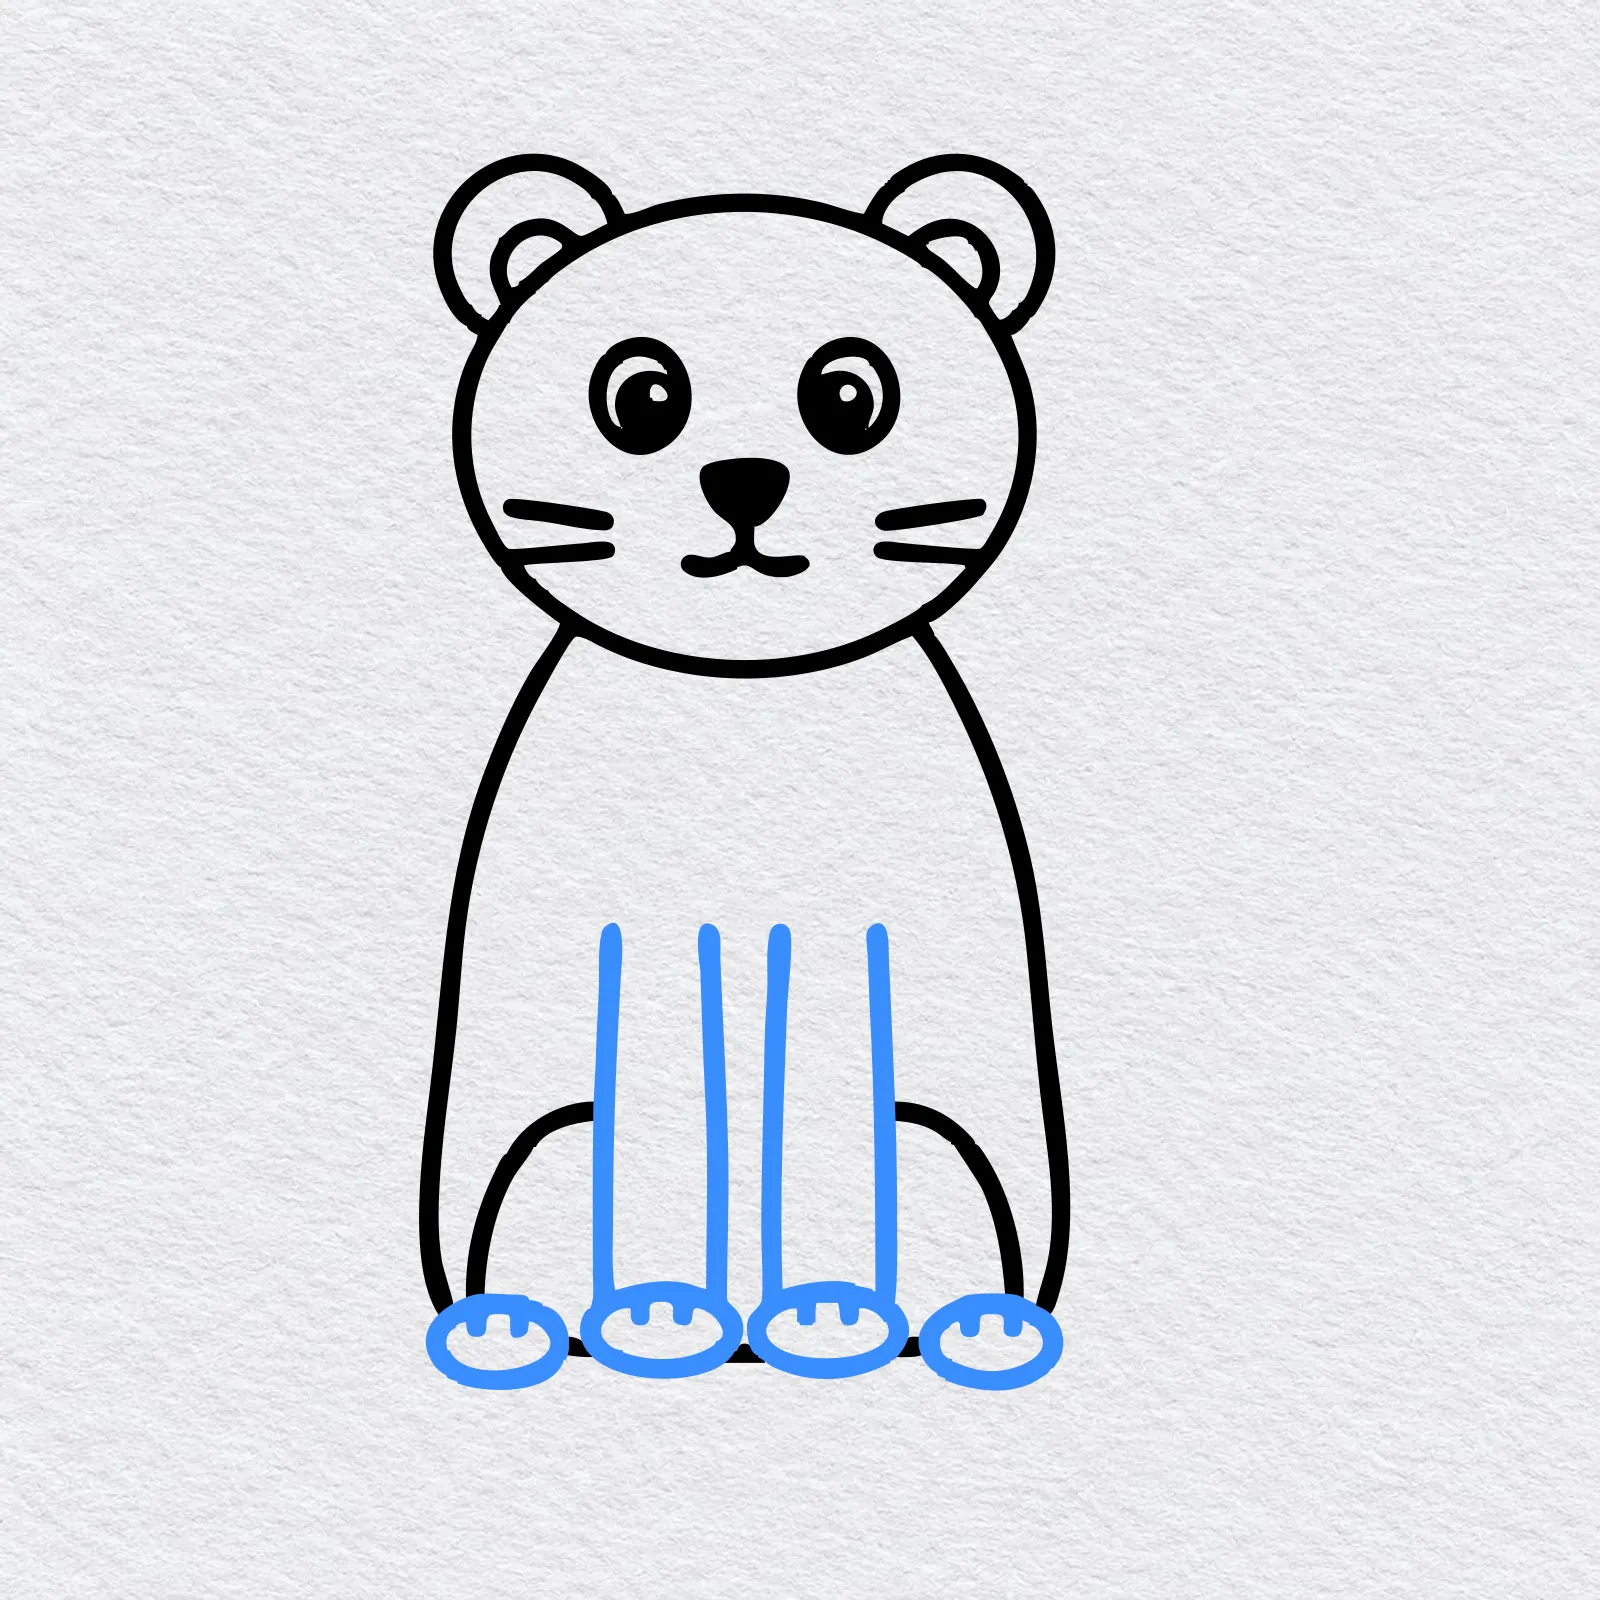
Draw two long straight front legs down the middle of the body, each made of two lines side by side. At the bottom, draw four small round paws in a row, two for the front legs and two for the back legs.
Add tiny toe lines on each paw.
-
Step 5 : Draw the long tail
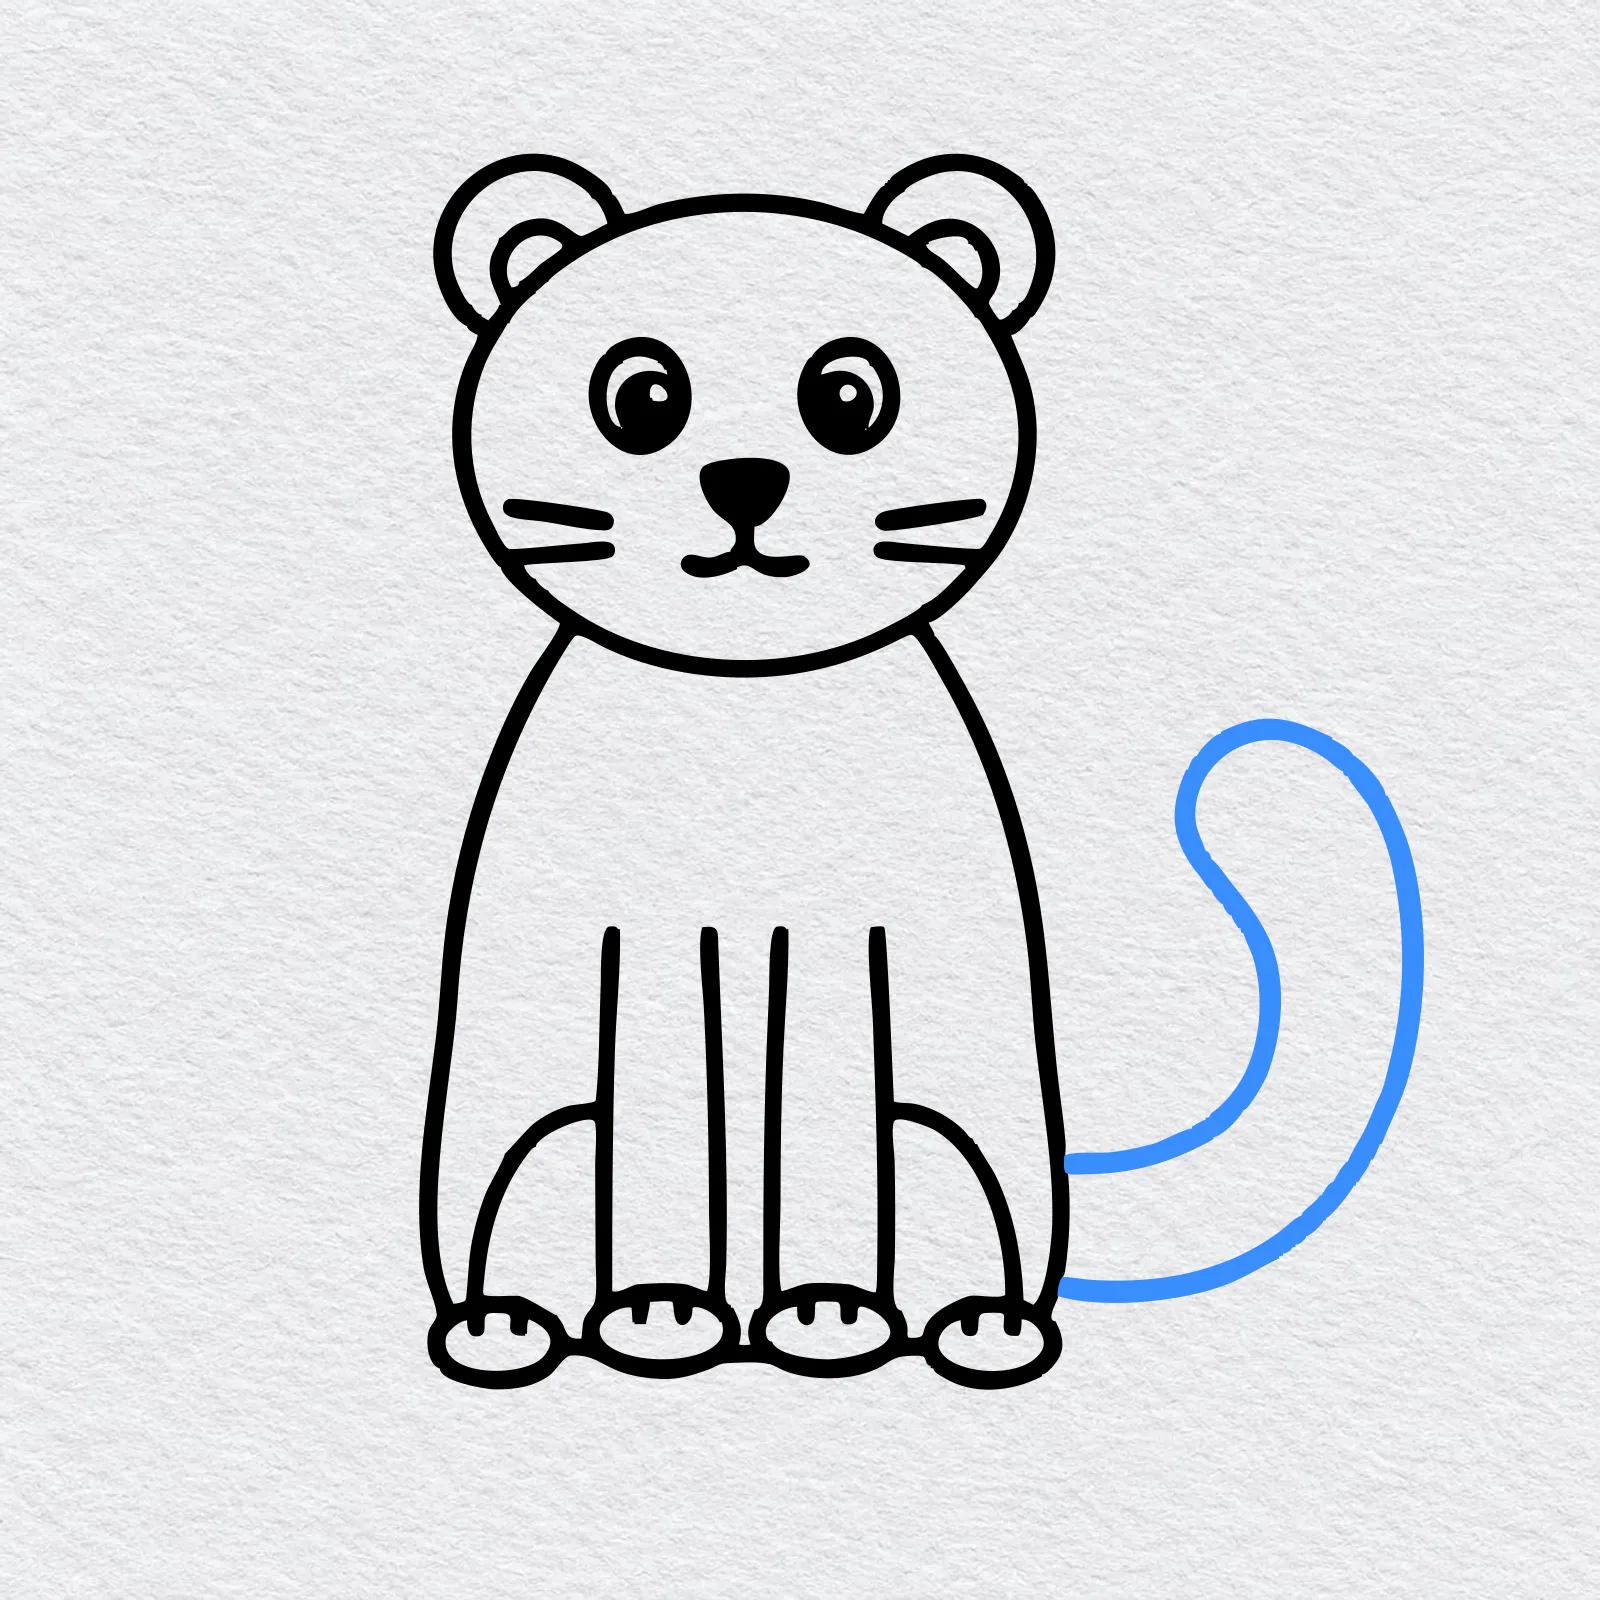
From the side of the body, near the bottom, draw a long thick tail that curves out and then curls up into a round hook. Use two lines that stay the same distance apart.
-
Step 6 : Draw the snowy ground
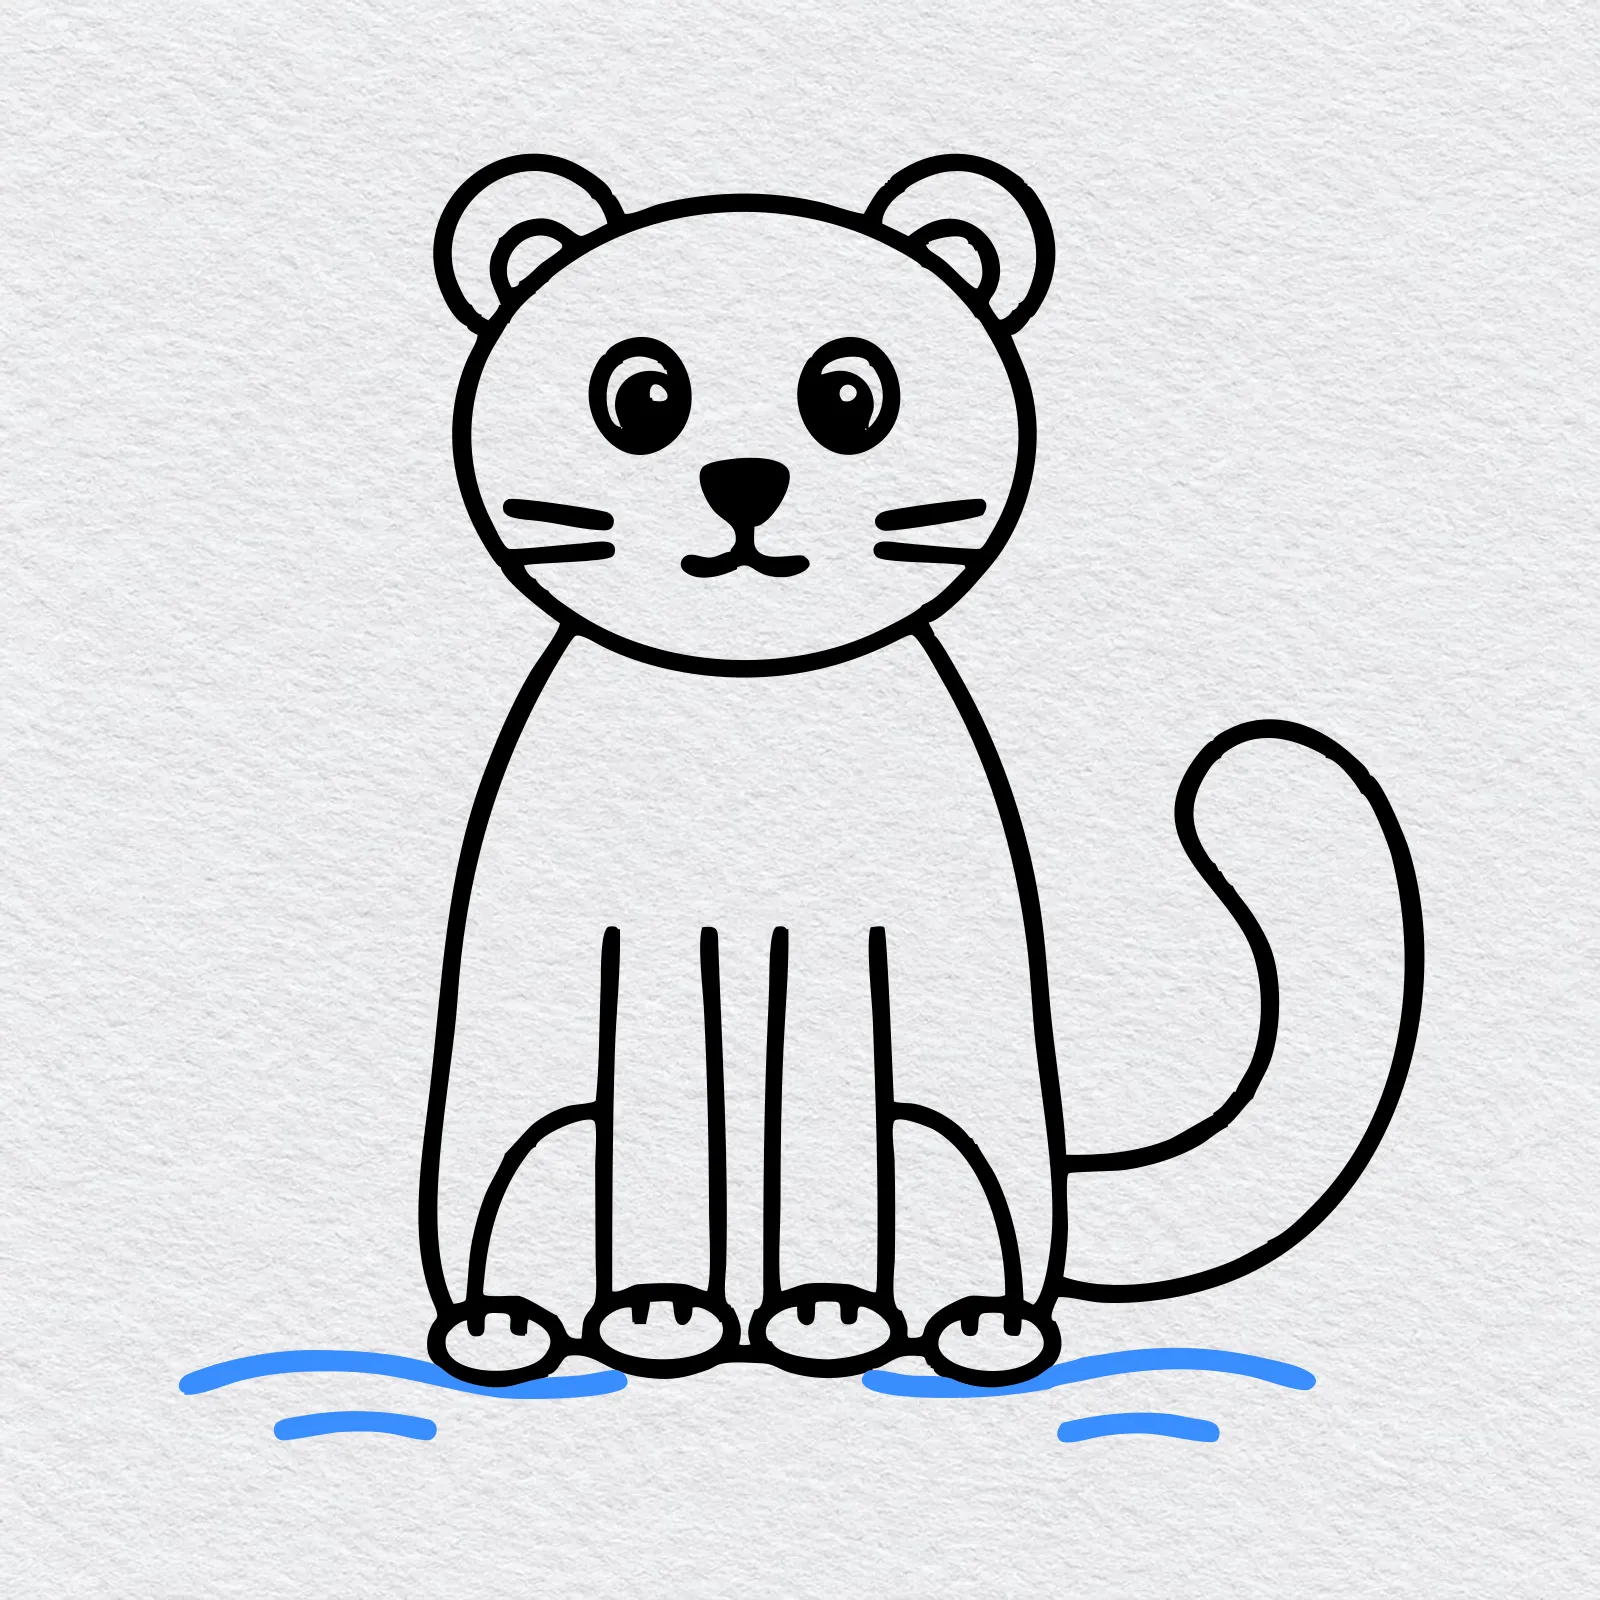
Under the paws, draw a long wavy line on each side for the snow. Add a few shorter wavy lines below them.
This makes it look like your snow leopard is sitting in fresh snow.
-
Step 7 : Draw the spots
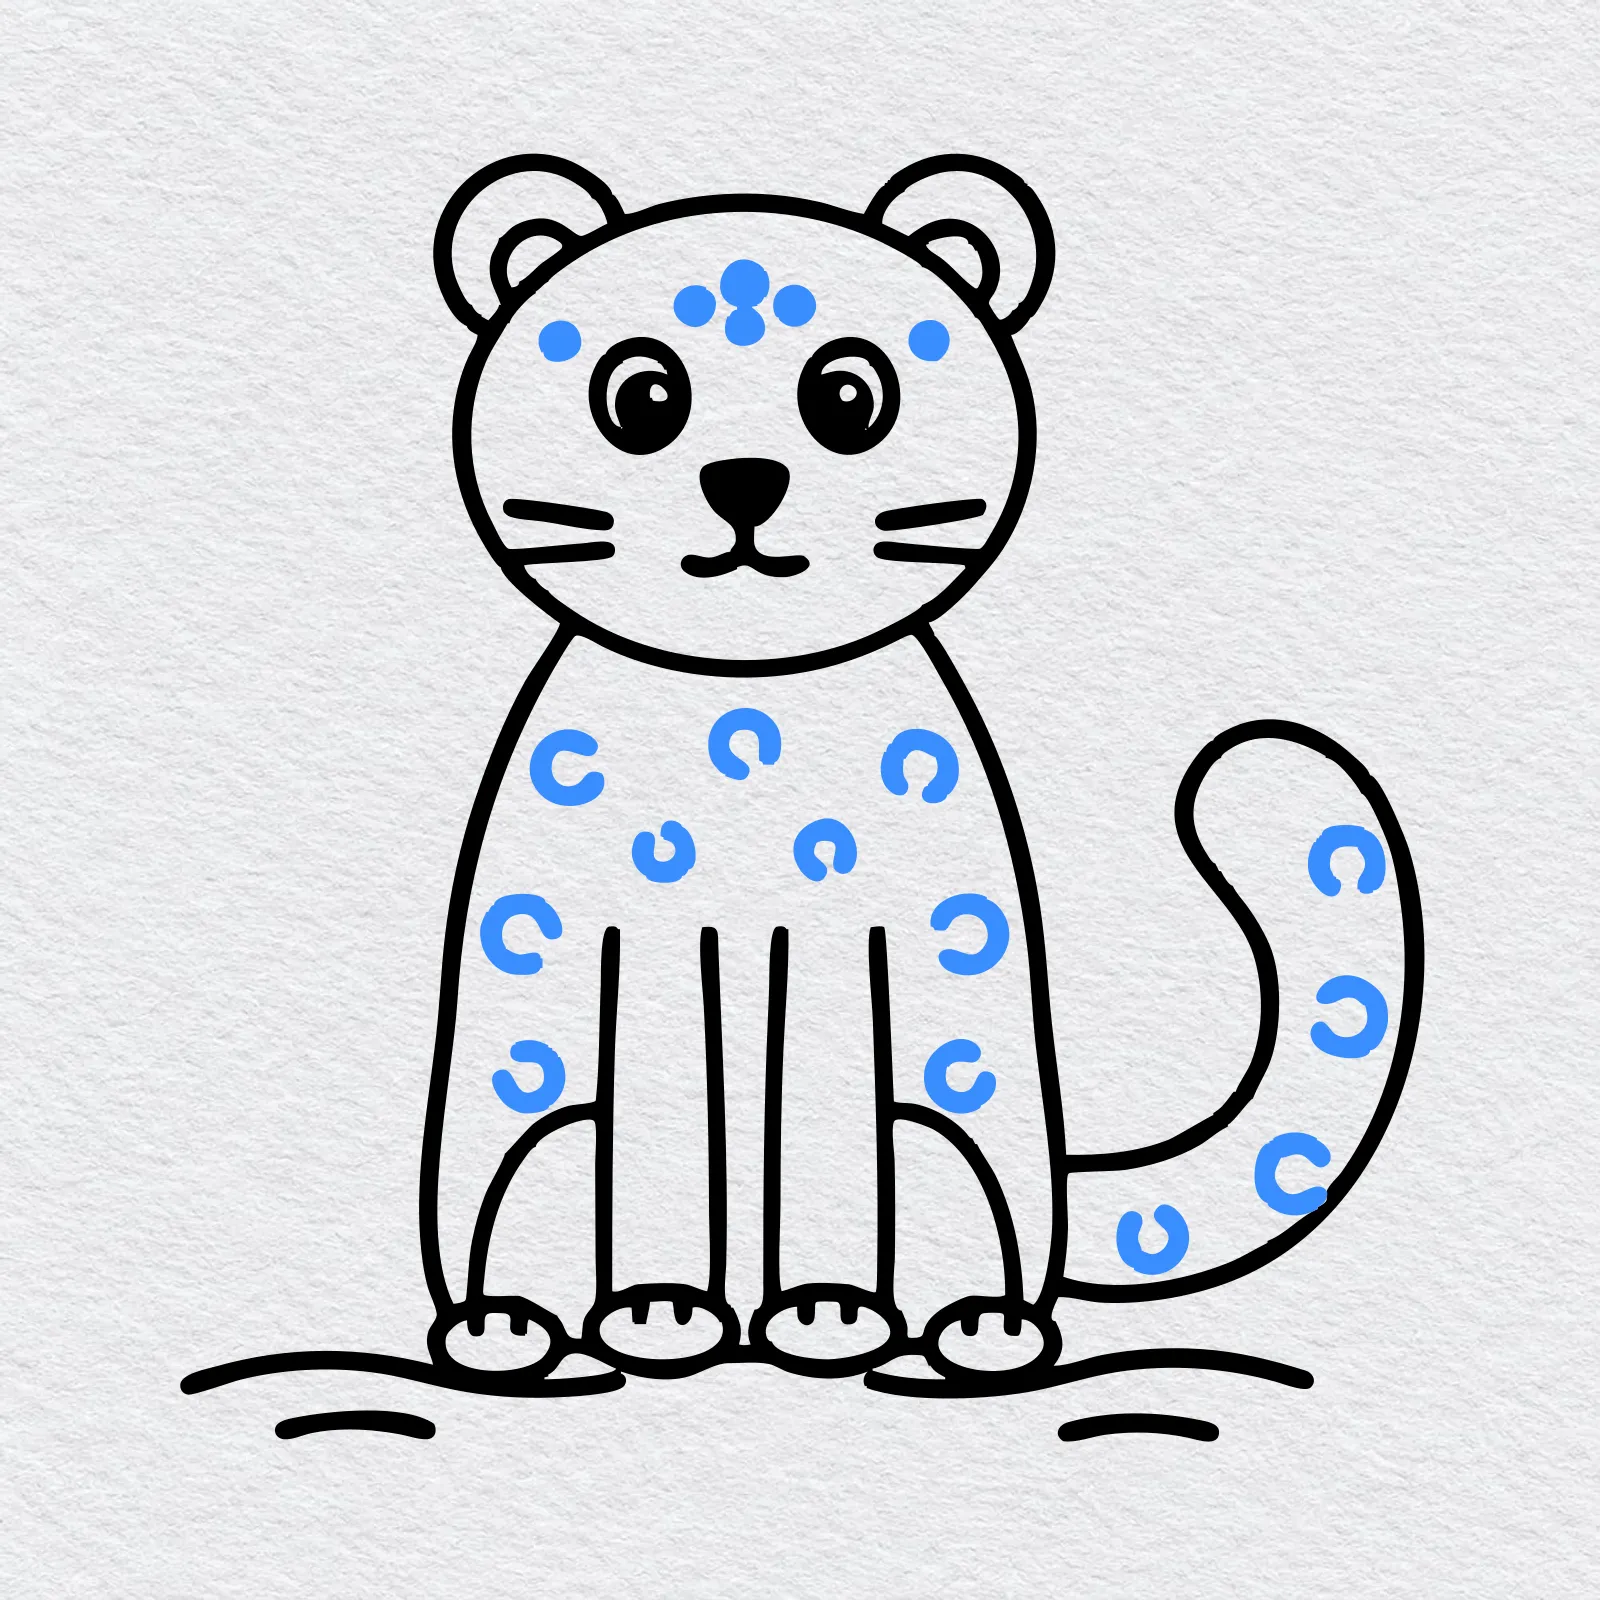
Put a few little dots on the forehead. Then draw small open rings, like the letter c, all over the body and along the tail.
Now go over your best lines with a marker or a dark crayon and erase the extra pencil marks.
-
Step 8 : Color your snow leopard
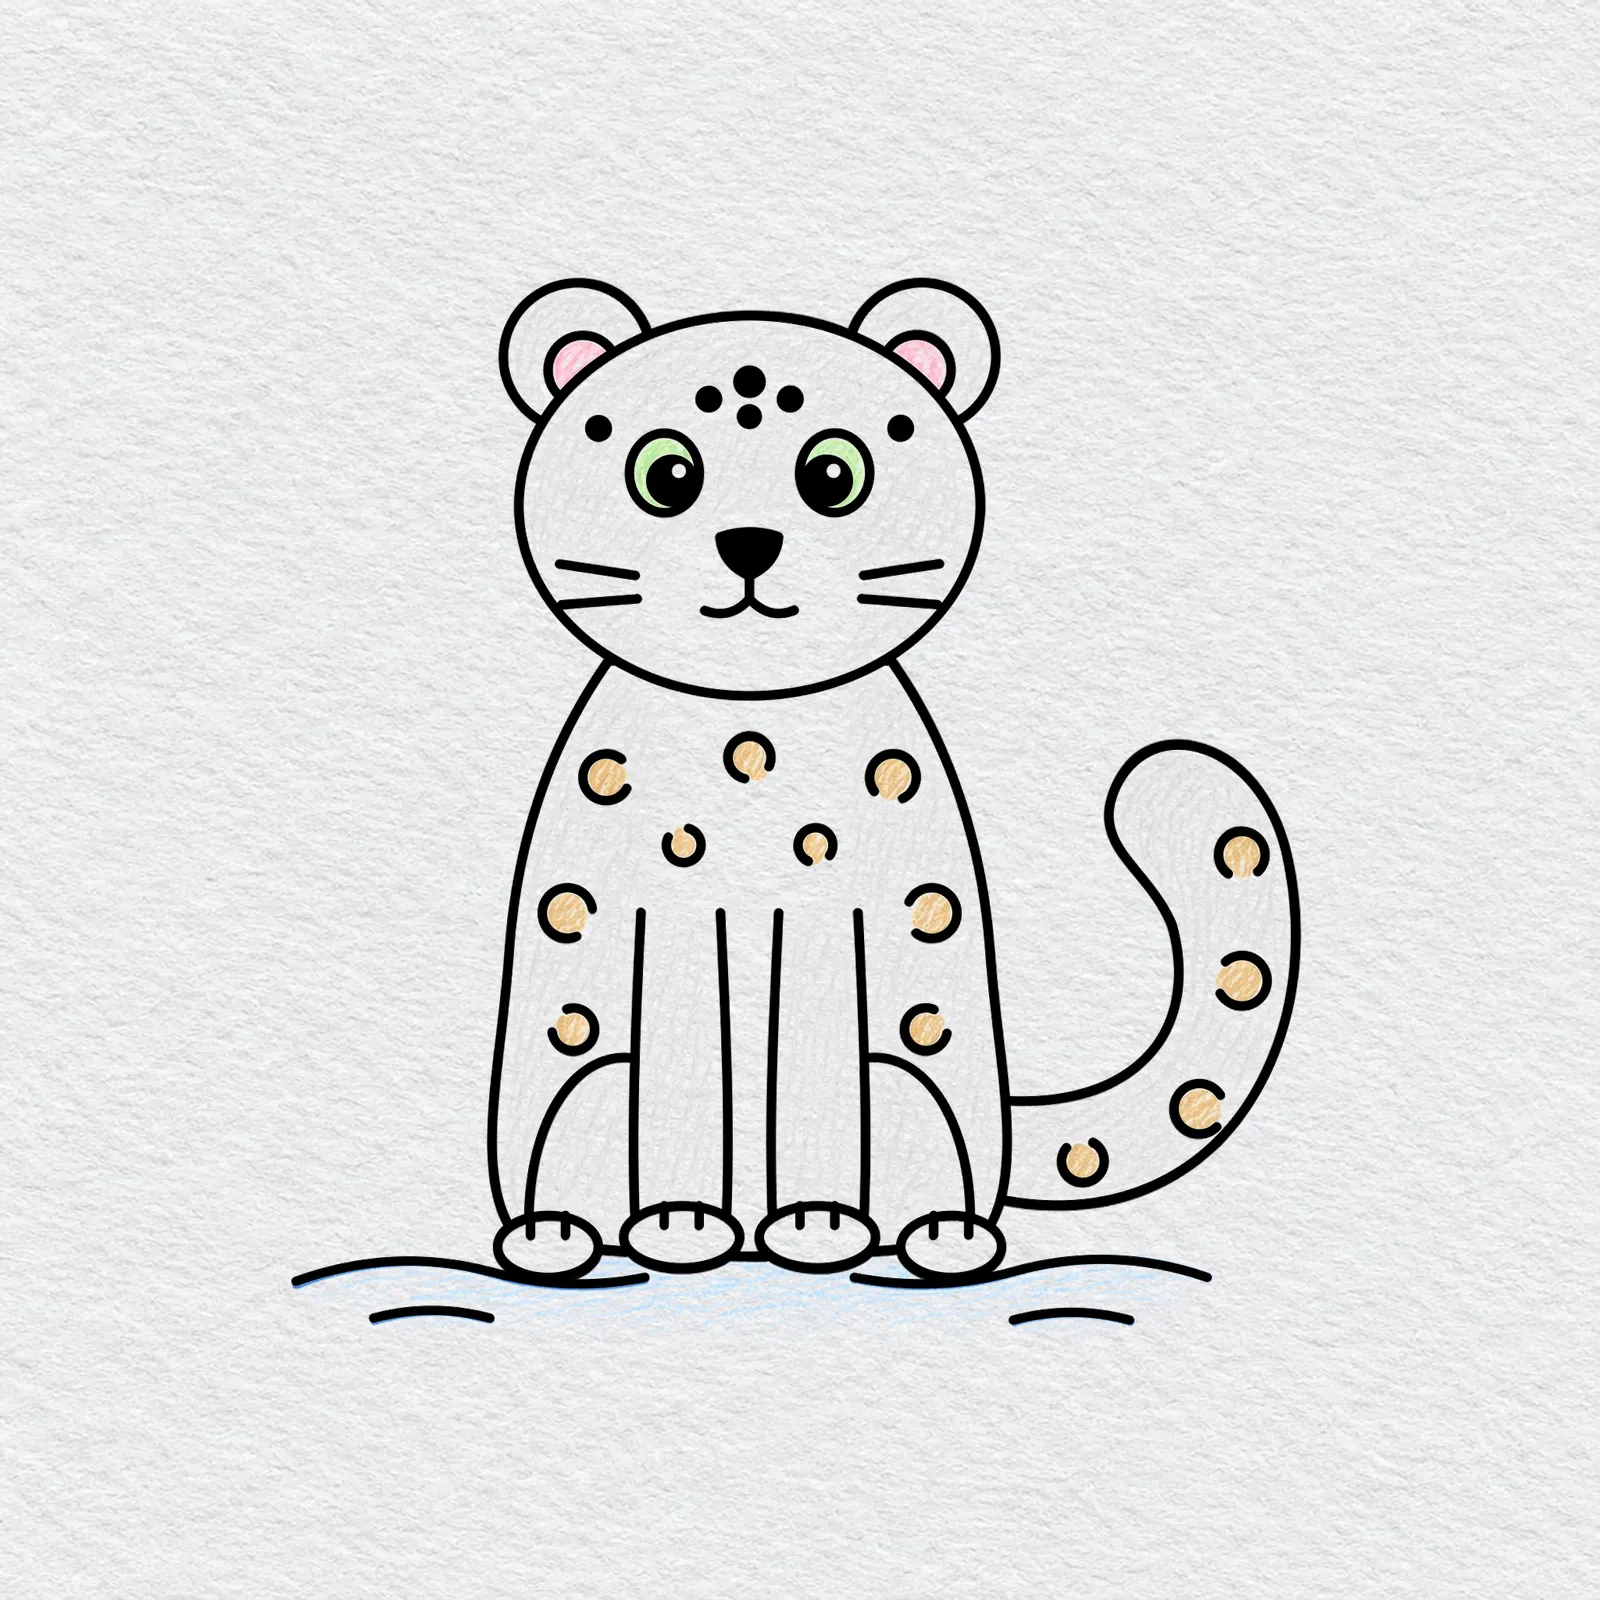
Snow leopards are pale grey with a cream chest. Color the fur light grey, the chest and paws cream, the inside of the ears pink and the eyes green. Fill the spots with tan, brown or dark grey, and add light blue to the snow.
Color slowly in small strokes, and press lightly first. You can always add more color later.
Printable snow leopard drawing PDFs
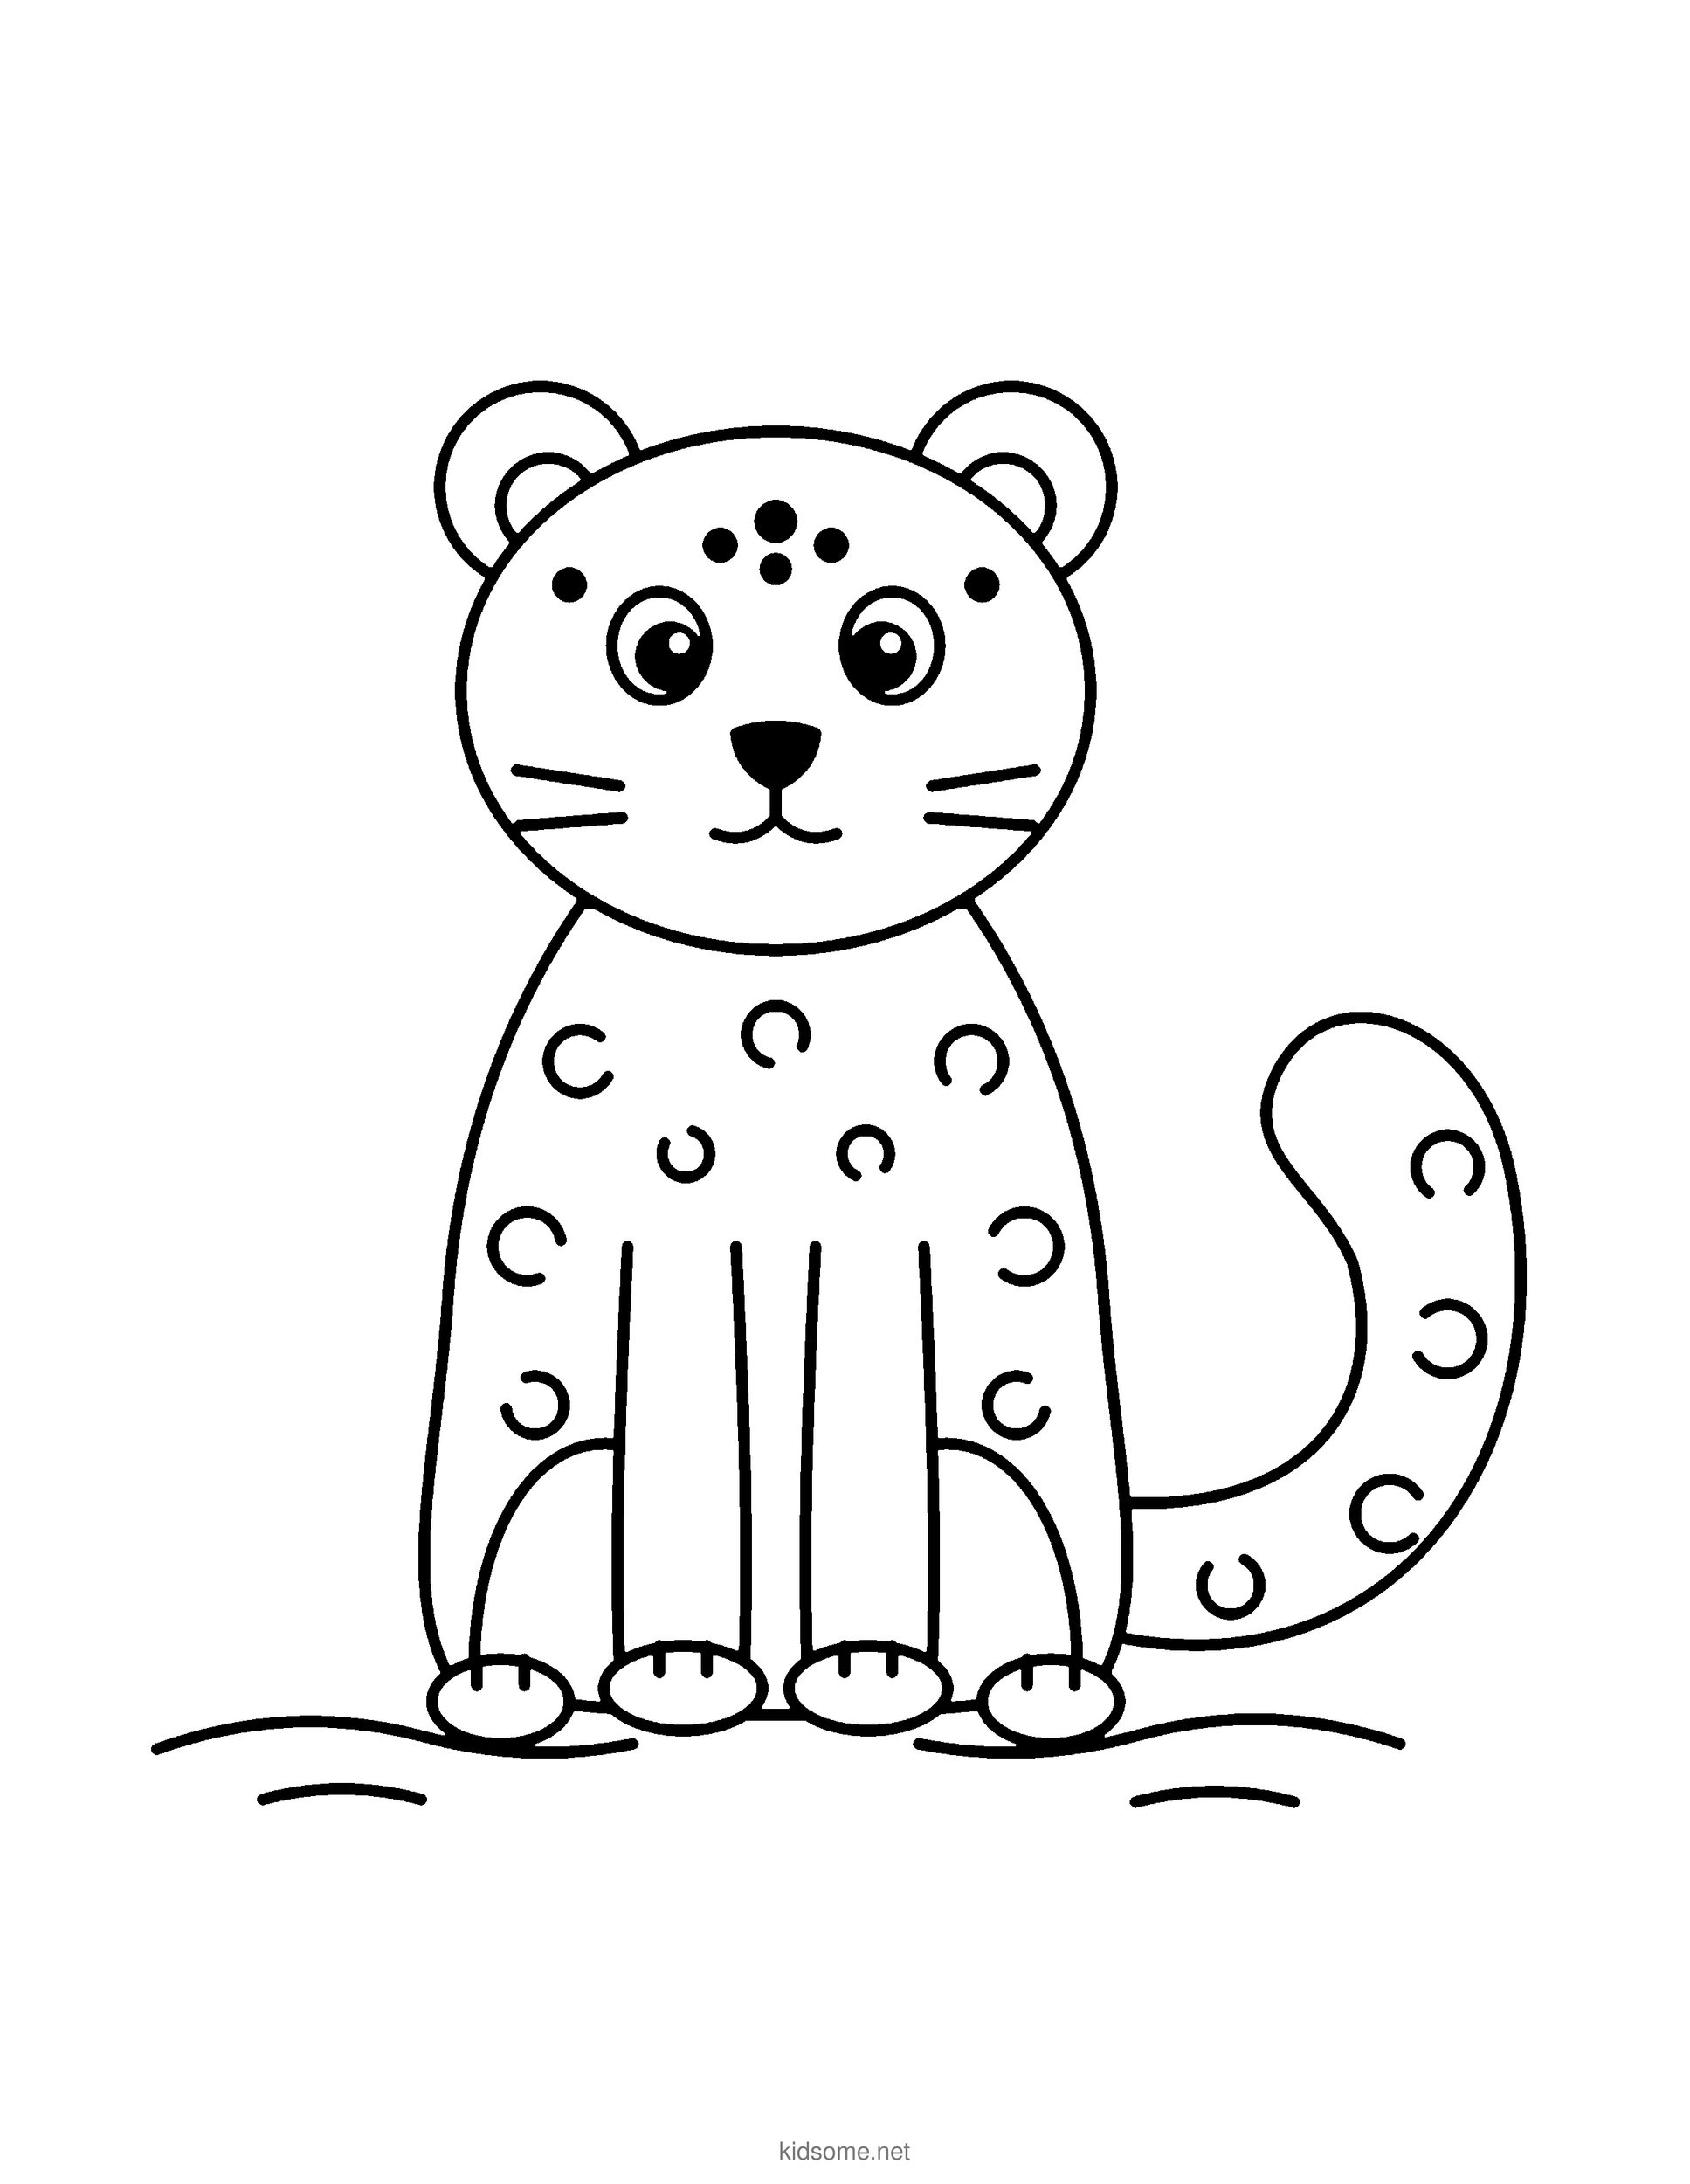 Save
Snow Leopard Outline
The finished snow leopard sitting in the snow as a clean outline to color, with the colored snow leopard on page two.
Download PDF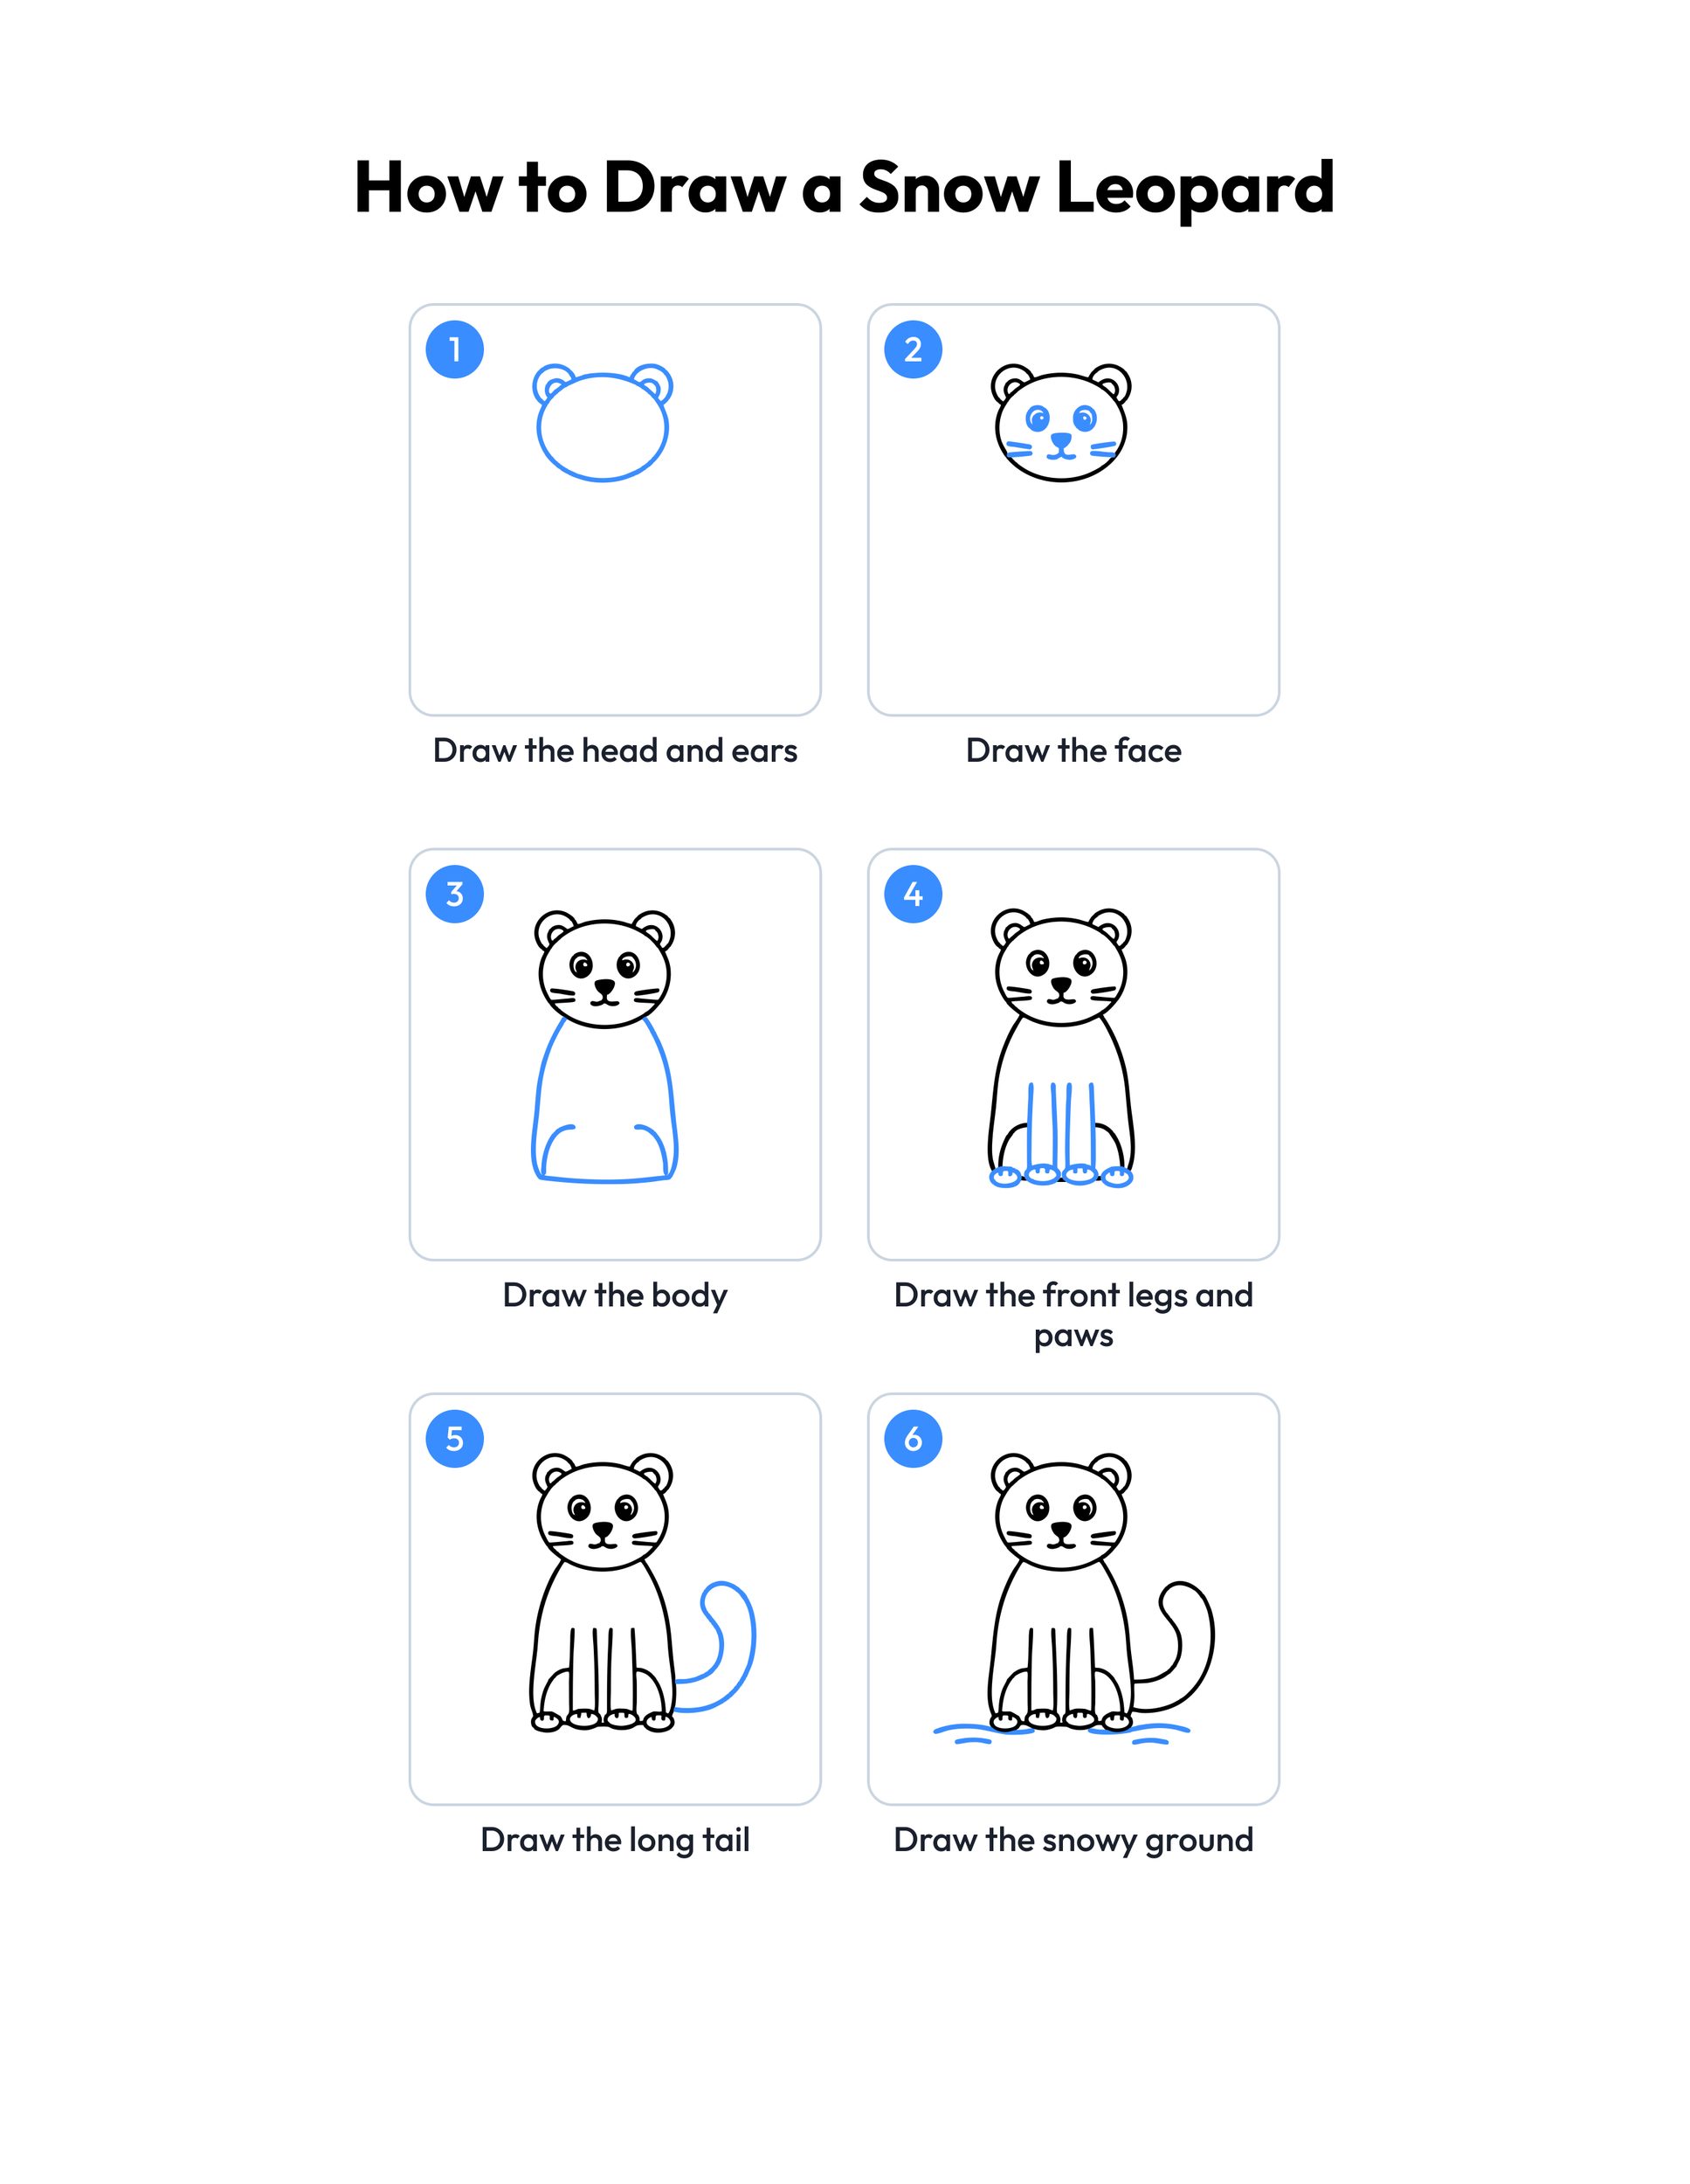 Save
Printable snow leopard drawing guide
Every step, two to a row, with the finished snow leopard in color at the end.
Download PDFHow to use this guide
Print the outline at 100 percent, or choose Fit to page if your printer asks. The PDF is set to US Letter, and the margins leave room for A4 too, so the whole snow leopard and its tail stay on the sheet. Page one is the outline to color and page two is the colored snow leopard, so print page one alone if you only want the drawing to fill in.
For drawing, plain copy paper and a pencil with a good eraser work best. Draw lightly at first, because the head and the body are guide shapes that often need a second try. When the snow leopard looks right, trace the lines with a marker or a dark crayon. Markers and paint soak through thin paper, so use cardstock for those.
Follow the steps in order and look for the blue lines on each picture, since blue always shows the part to add next. Steps one to three are big round shapes that younger kids can manage on their own. The face, the paws and the spots are small, so a grown-up can draw alongside and show each one on a separate scrap of paper first.
If the tail feels hard, draw it as one long letter c that curls at the end, then add the second line.
Ideas for your snow leopard drawing
- Draw it twice: Draw the snow leopard once following every step, then again from memory a day later. Kids are often surprised how much easier the second one feels.
- Snowy scene: Add mountains, a pine tree and falling snowflakes around the finished snow leopard to turn a single drawing into a whole winter picture.
- Cub version: Draw a smaller snow leopard with a bigger head and shorter legs beside the first one, and talk about how cubs look different from grown cats.
- Shape spotting: Before drawing, name the shapes together: circles for the head and ears, a bell for the body and rings for the spots. It builds early geometry words.
- Winter friends: Draw a snow leopard and then a snowman from our snowman drawing guide, and put them side by side in a snowy picture.
- Animal fact card: Write one fact under the drawing, such as how snow leopards live high in the mountains, then fold the page into a little card for a friend.
- Classroom drawing time: Show one step at a time on the board while the class draws along. Pause after each blue part so everyone can catch up.
- More animals: Keep the drawing streak going with our animal drawing guides, picking one new animal each week to add to a home art folder.
Is this snow leopard drawing easy enough for young kids?
Yes. The guide is made for kids ages 4 to 8 and uses only circles, a bell shape, straight lines and little rings. Younger children may need help with the face and the paws, while older kids can usually follow all seven steps on their own.
How do I print the snow leopard outline?
Click the download button to open the free PDF, then print at 100 percent or Fit to page. It is sized for US Letter and leaves margins that fit A4 as well. Page one is the outline and page two is the colored example, so print only page one if you need just the drawing.
What do I need to draw a snow leopard?
A pencil, an eraser and plain paper are enough to start. A black marker or dark crayon helps go over the final lines, and crayons or colored pencils are best for coloring. If you plan to use markers or paint, print or draw on cardstock so nothing soaks through.
What colors should a snow leopard be?
Real snow leopards have pale grey or creamy white fur with dark grey spots and a lighter chest. Their eyes are often pale green or grey. Kids can copy those colors, follow the colored example on page two, or invent a bright snow leopard of their own.
Can I use this guide in my classroom?
Yes. Teachers are welcome to show the steps on a screen and print the outline for the whole class. The guide is free for personal and classroom use, not for resale. Please share a link to this page rather than the PDF file itself.