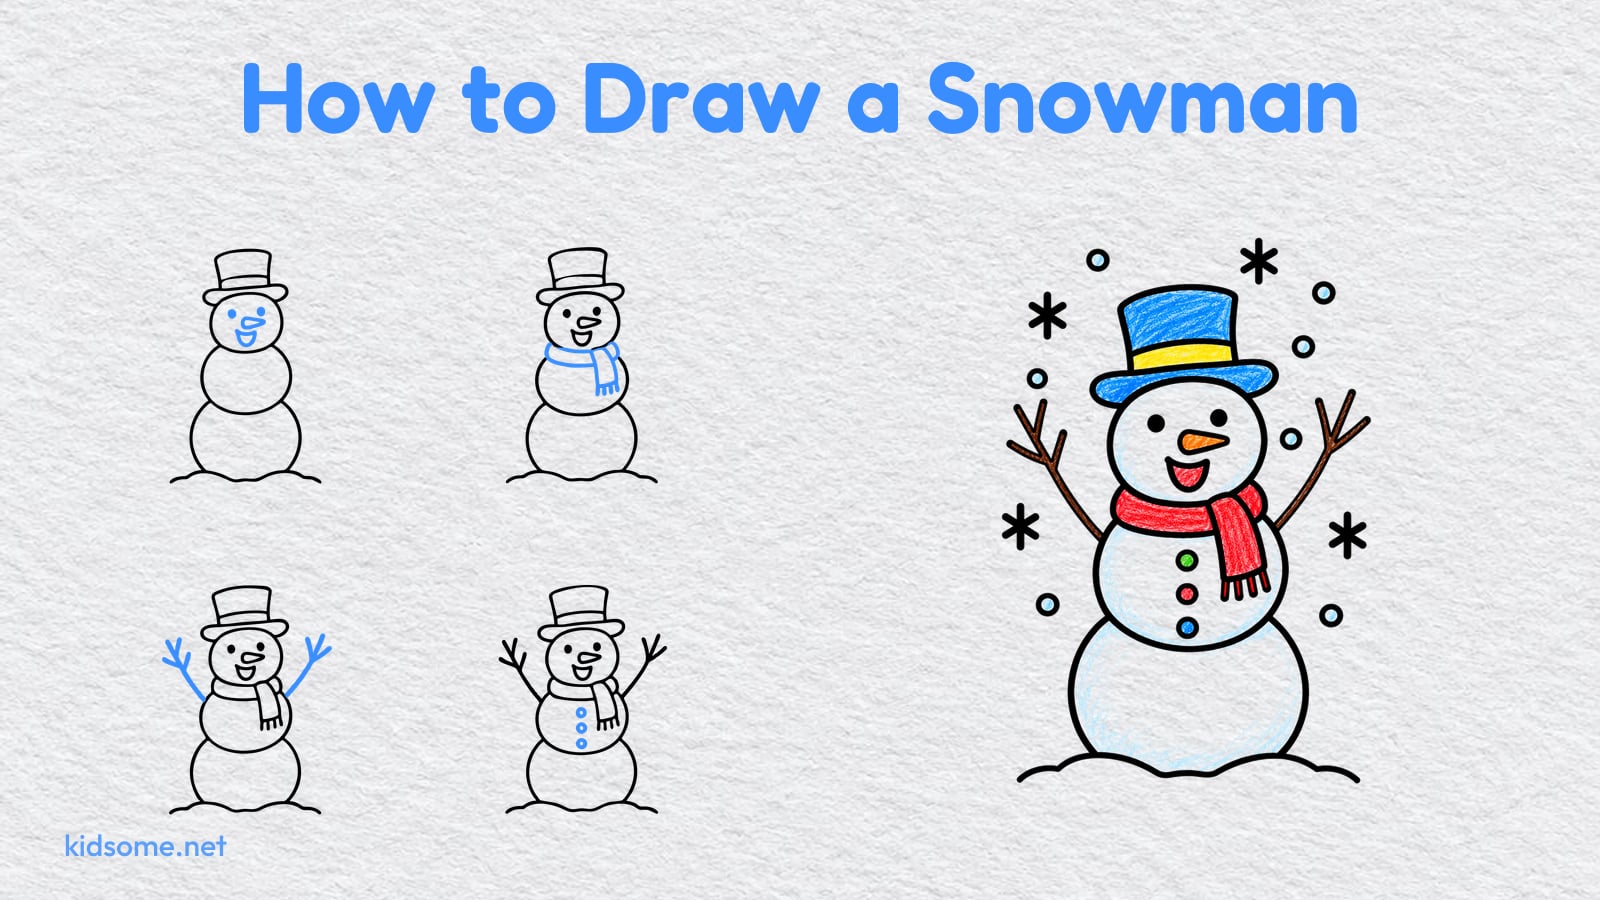
This how to draw a snowman guide is for kids ages 4 to 8 and the grown-up sitting beside them. If your child can draw a circle, they can finish this easy snowman drawing. The snowman stands on a little hill of snow with his stick arms up high, a tall top hat, a carrot nose, a big open smile, a scarf with a fringed end and three round buttons.
There are nine steps. Each one shows the drawing so far in black and the new part in blue, so your child always knows what to add next. A last picture shows the snowman colored in, as an idea to copy or change. Two free PDFs go with the guide: the finished snowman outline to color, and a printable guide with every step, two to a row, to keep beside the paper. Both print on US Letter and A4, and there is no sign-up.
When the snowman is finished and hanging on the fridge, pick the next one from the winter drawing guides.
Step 1: Draw the snow hill and big snowball
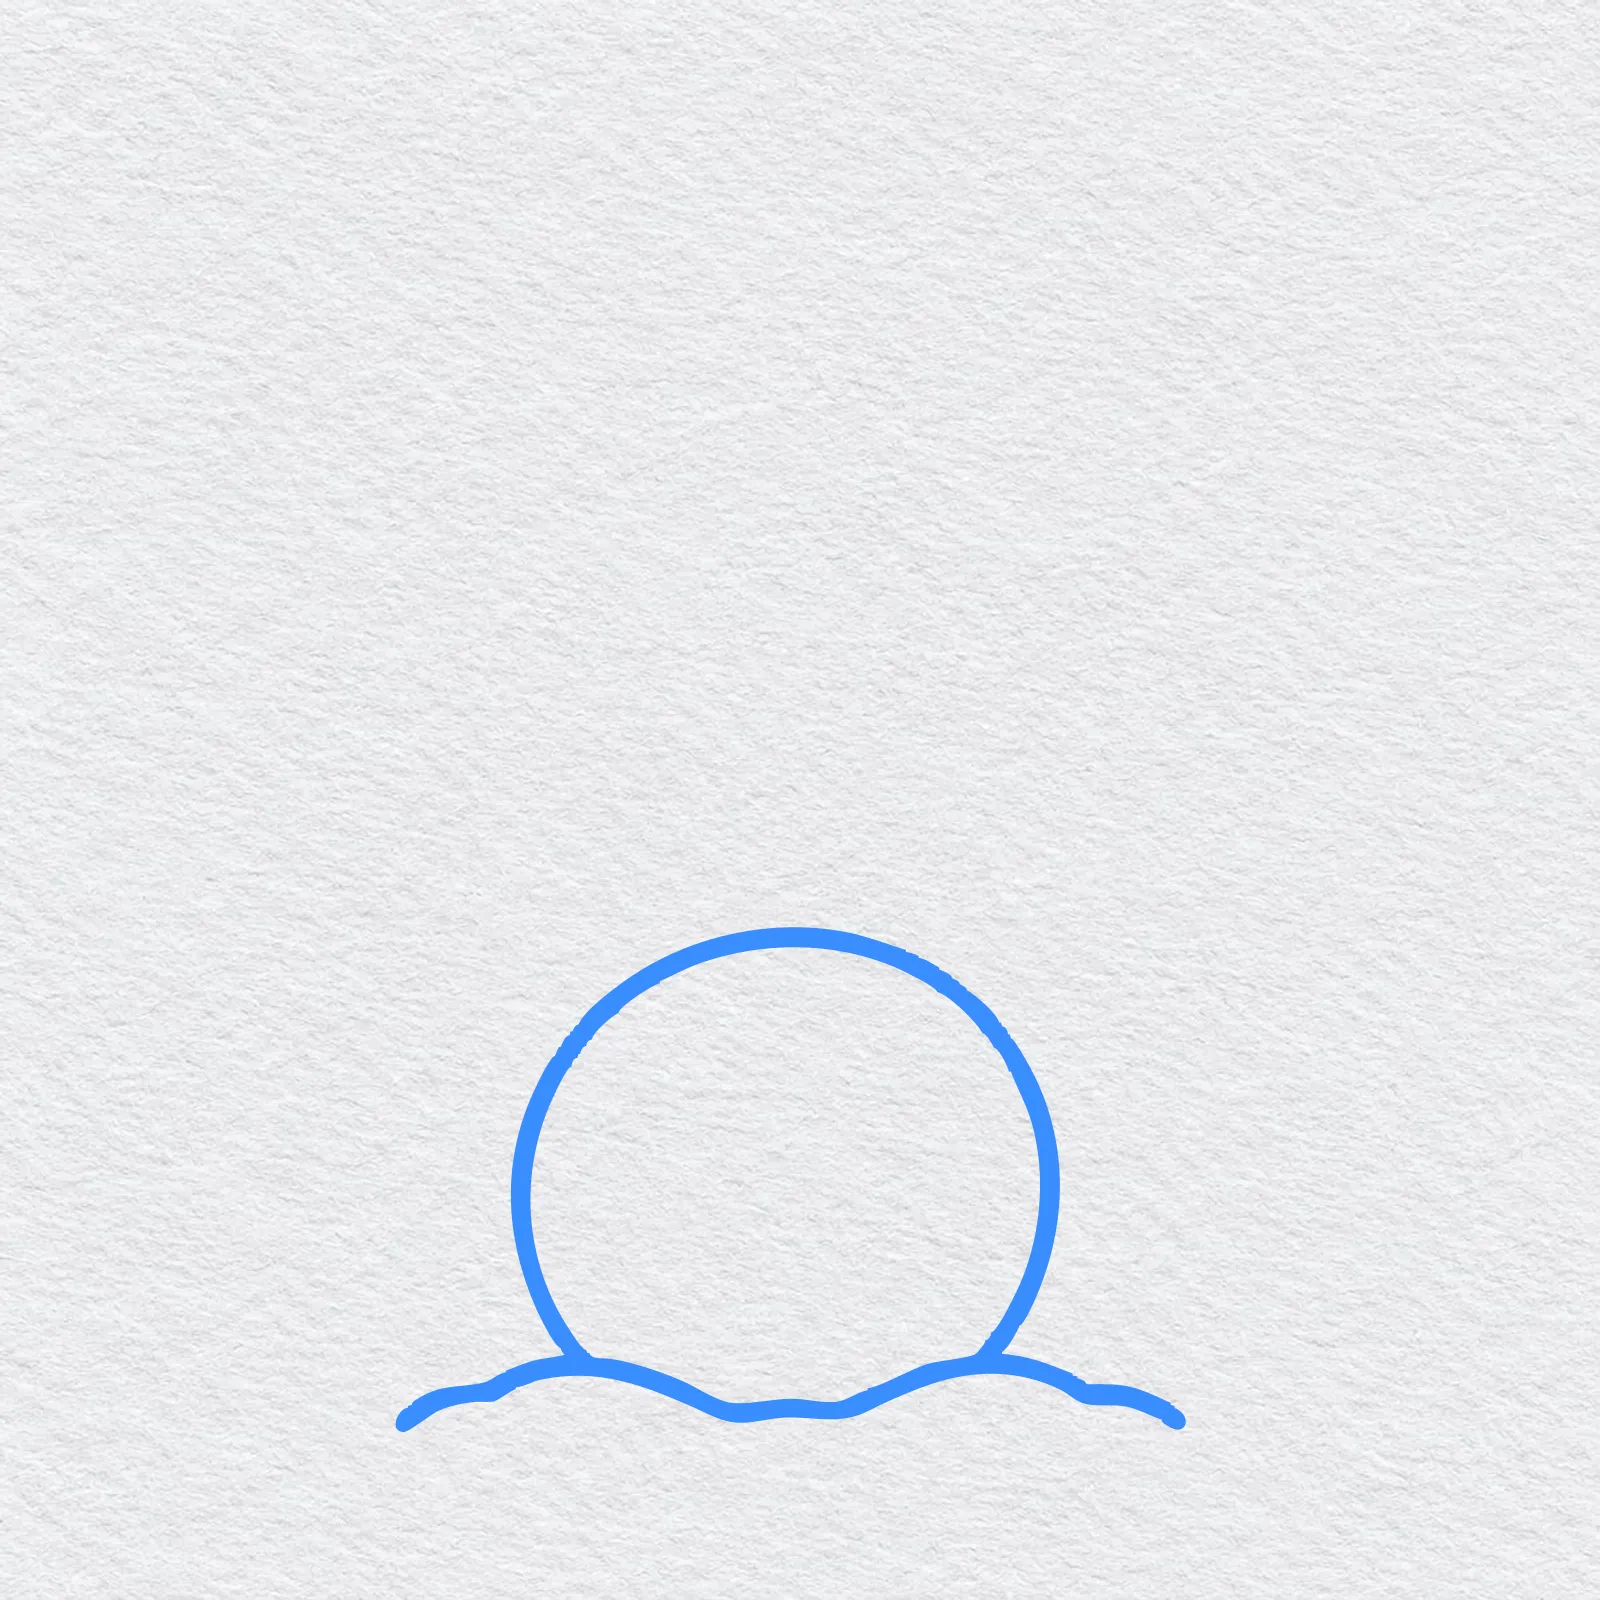
Start near the bottom of your paper with a wavy line for a hill of snow. Draw a big circle sitting on it. This is the bottom snowball, the biggest one.
Step 2: Draw the middle snowball
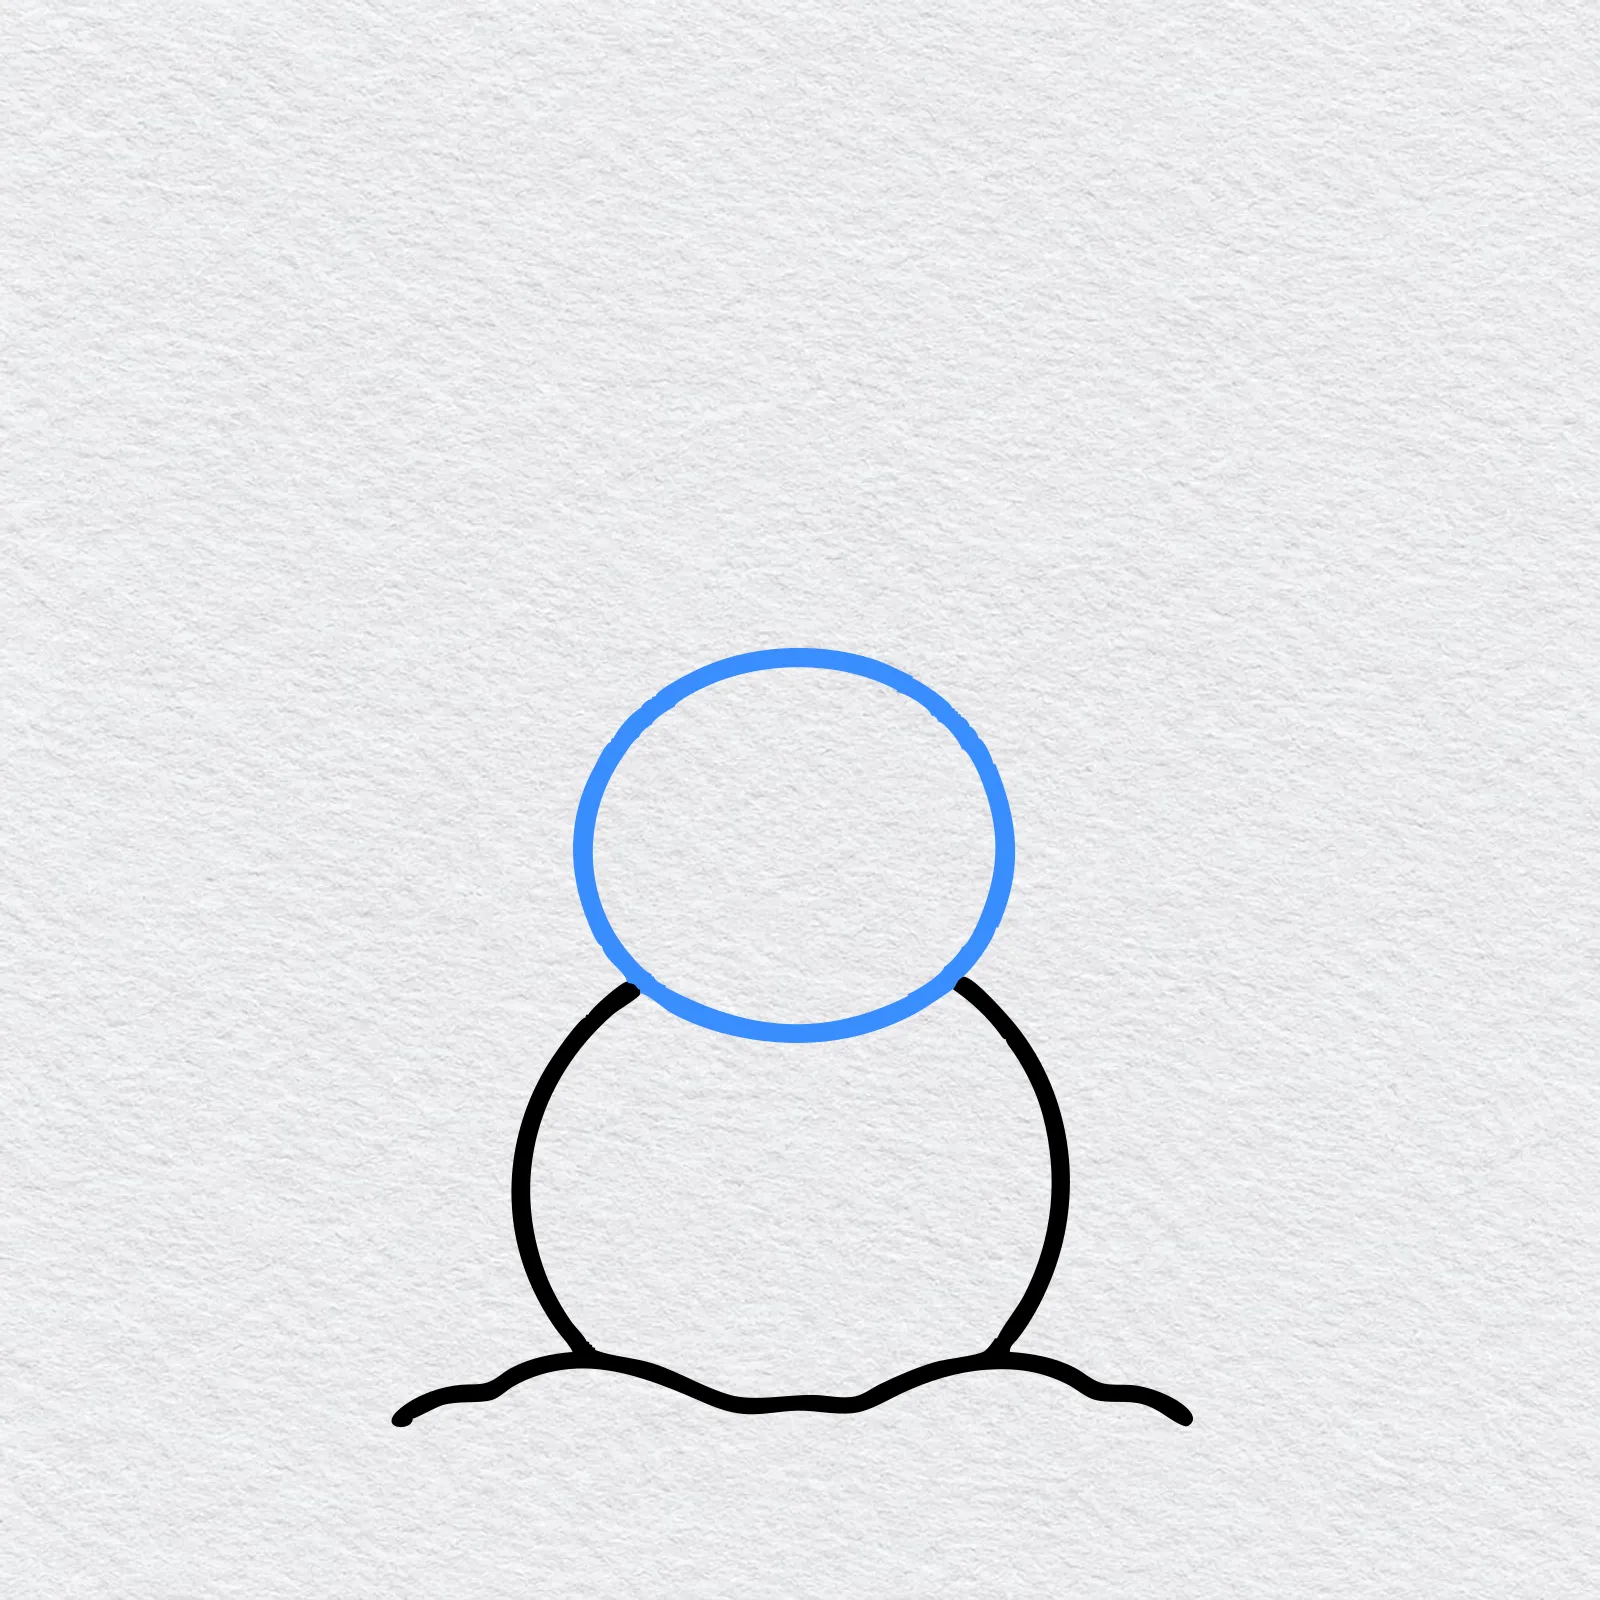
Draw a smaller circle on top of the big one. Let it squash down a little, and erase the part of the big circle that ends up inside it.
Step 3: Draw the head
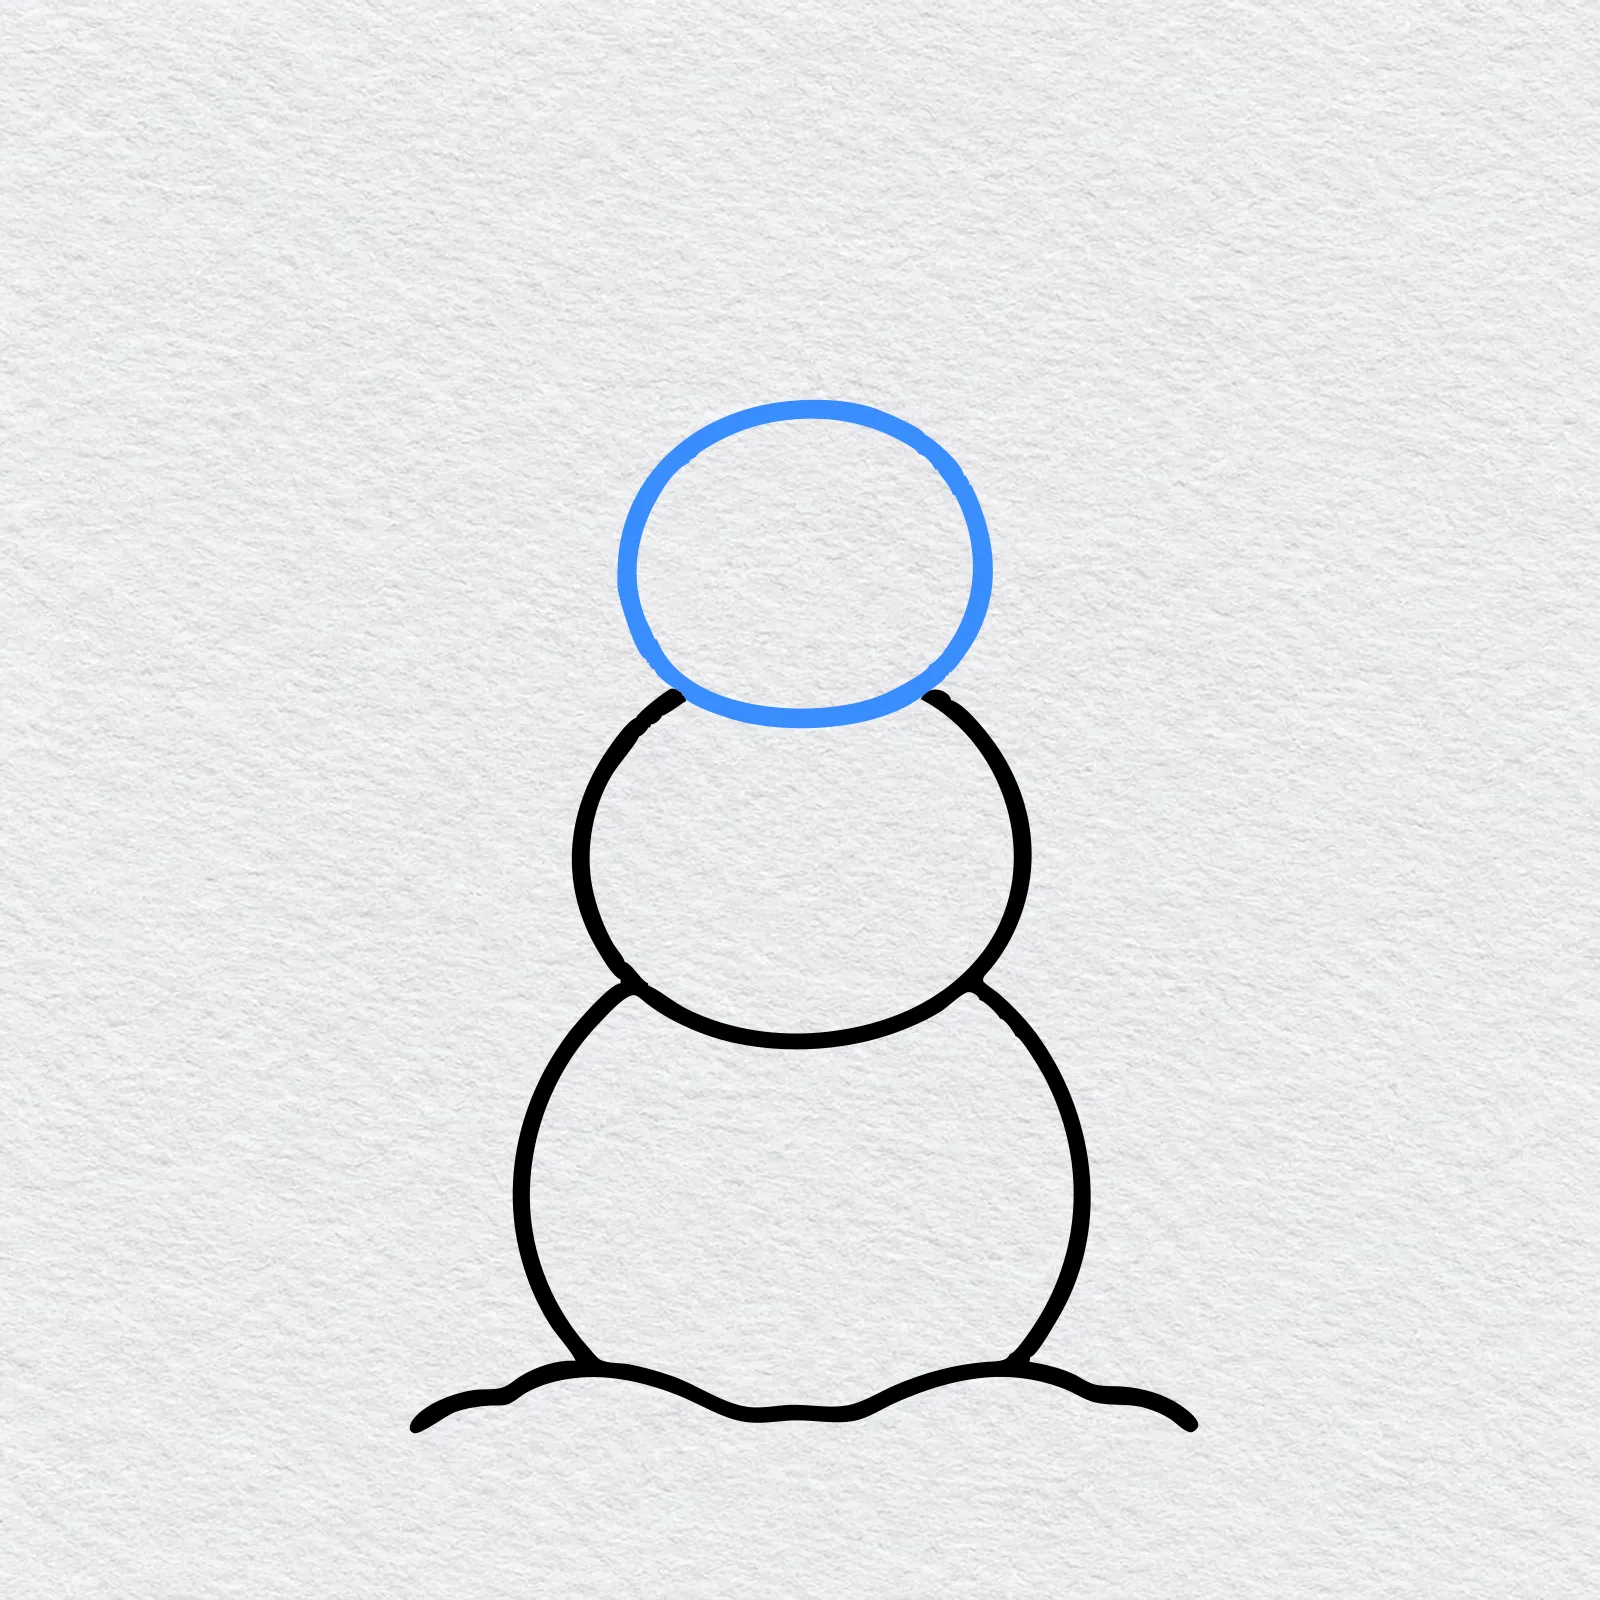
Draw the smallest circle on top for the head. Now three snowballs stand in a stack, big at the bottom and small at the top.
Step 4: Draw the top hat
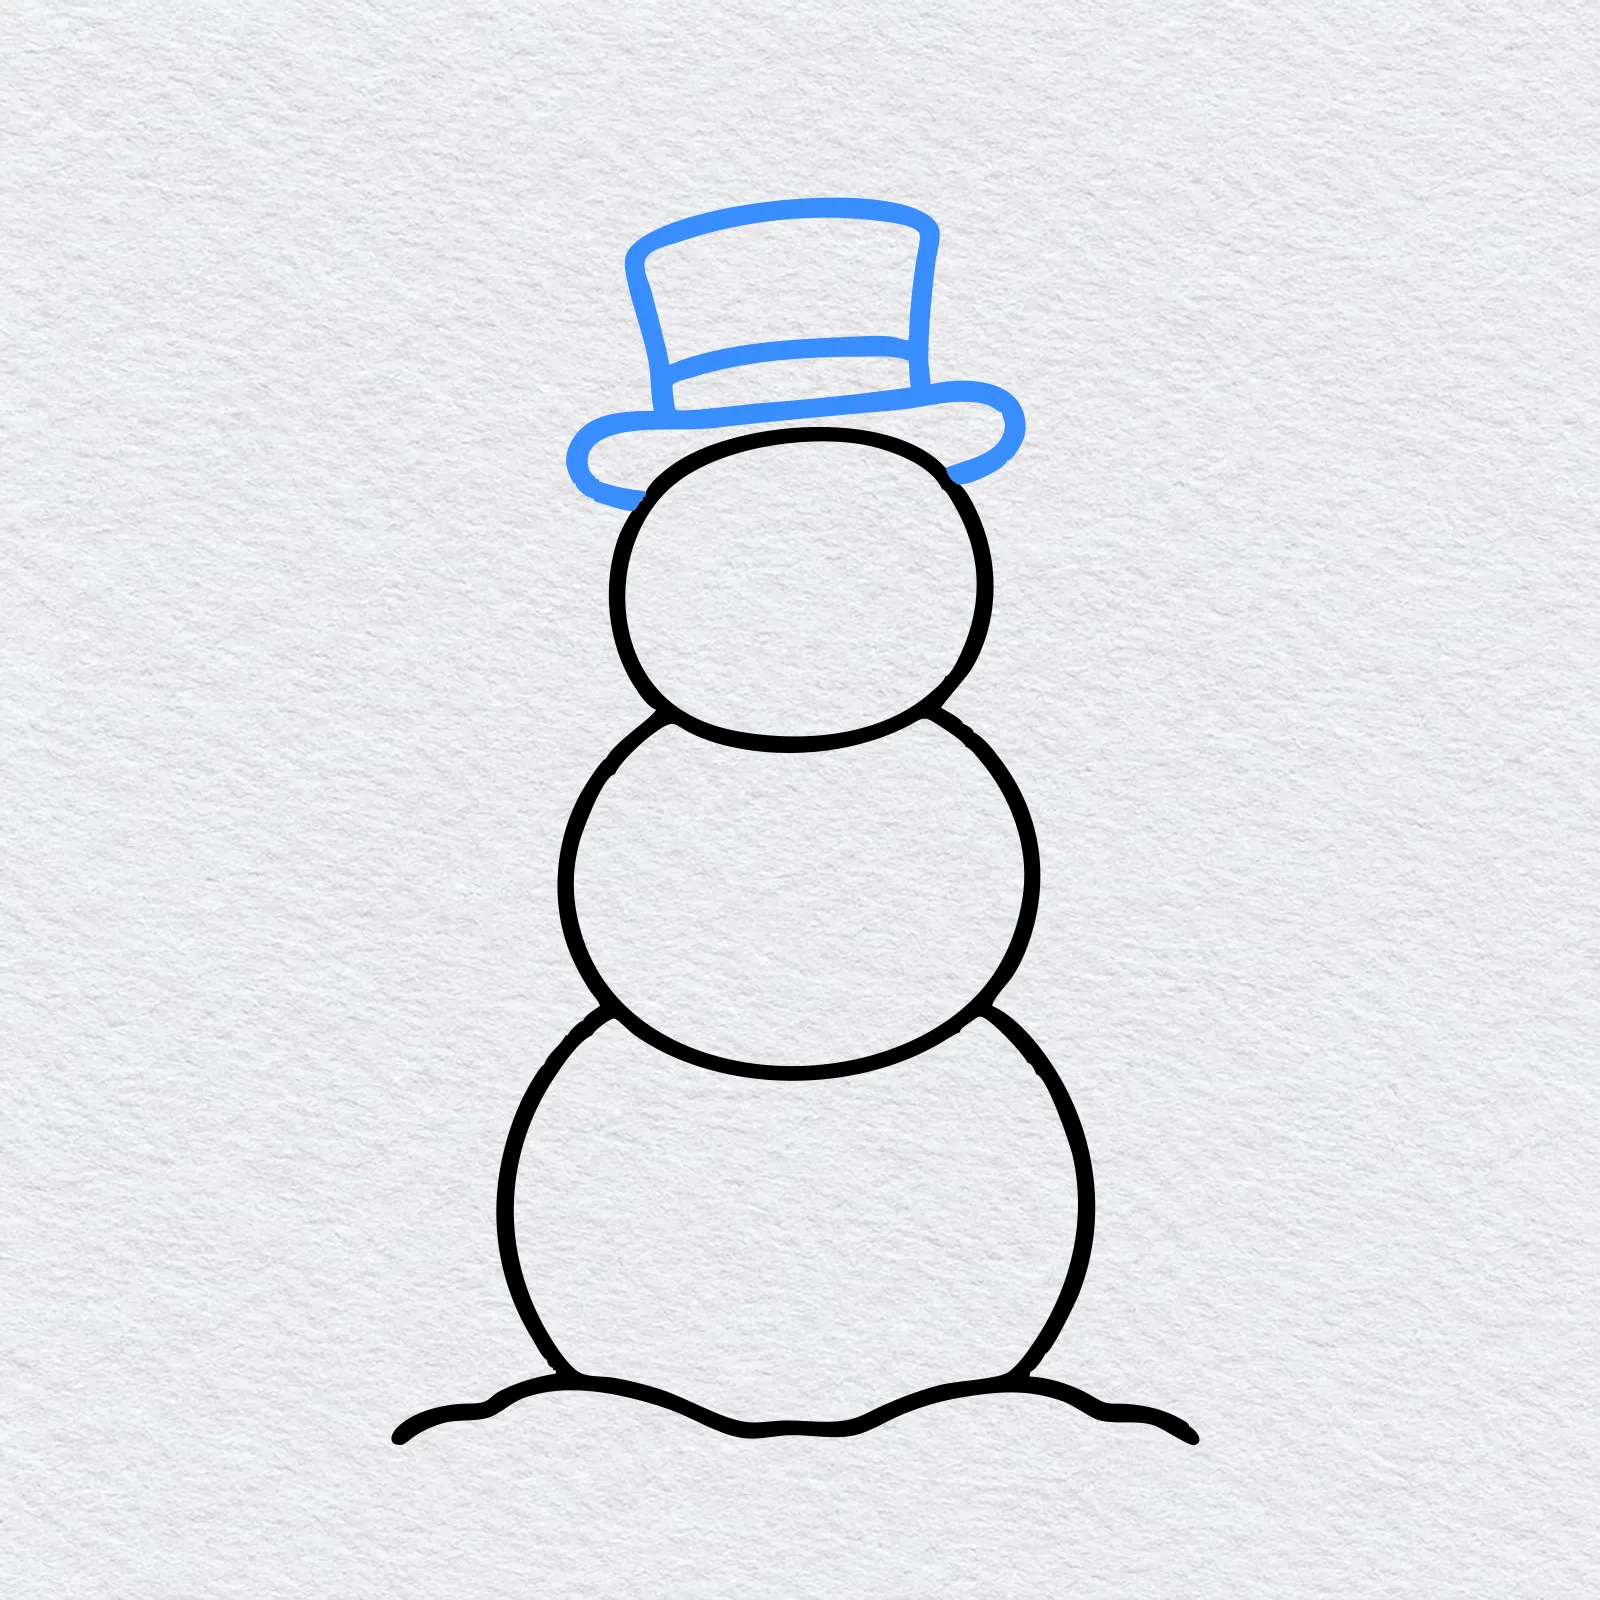
Draw a wide, flat oval across the top of the head for the brim. Then draw a tall box on top of it and a curved line near its bottom for the band.
Step 5: Draw the eyes, nose and smile
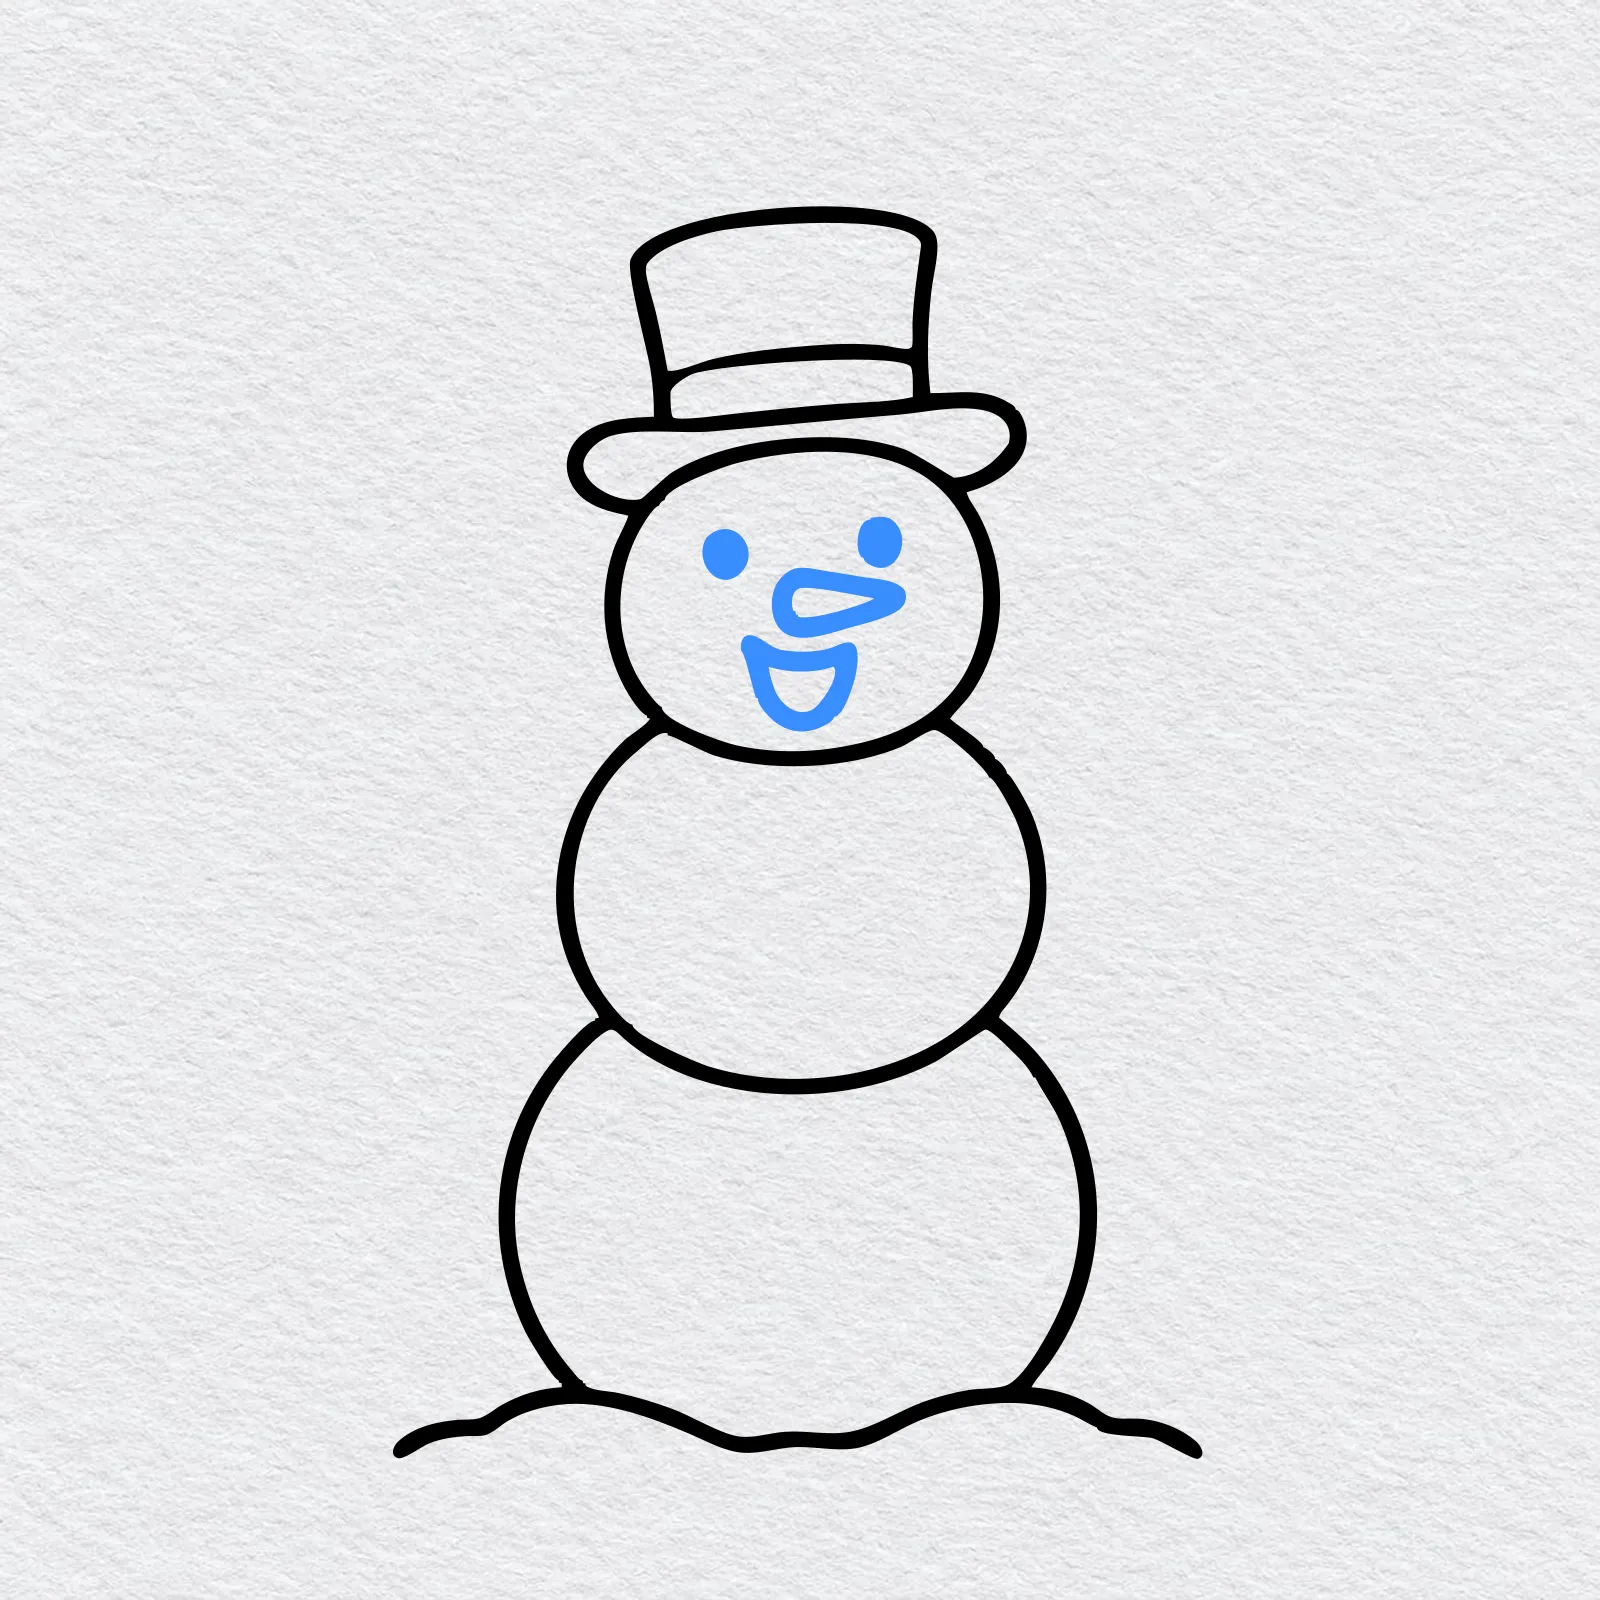
Draw two small dots for the eyes and color them in. Under them, draw a pointy carrot nose. Finish with a big, open smile shaped like a U.
Step 6: Draw the scarf
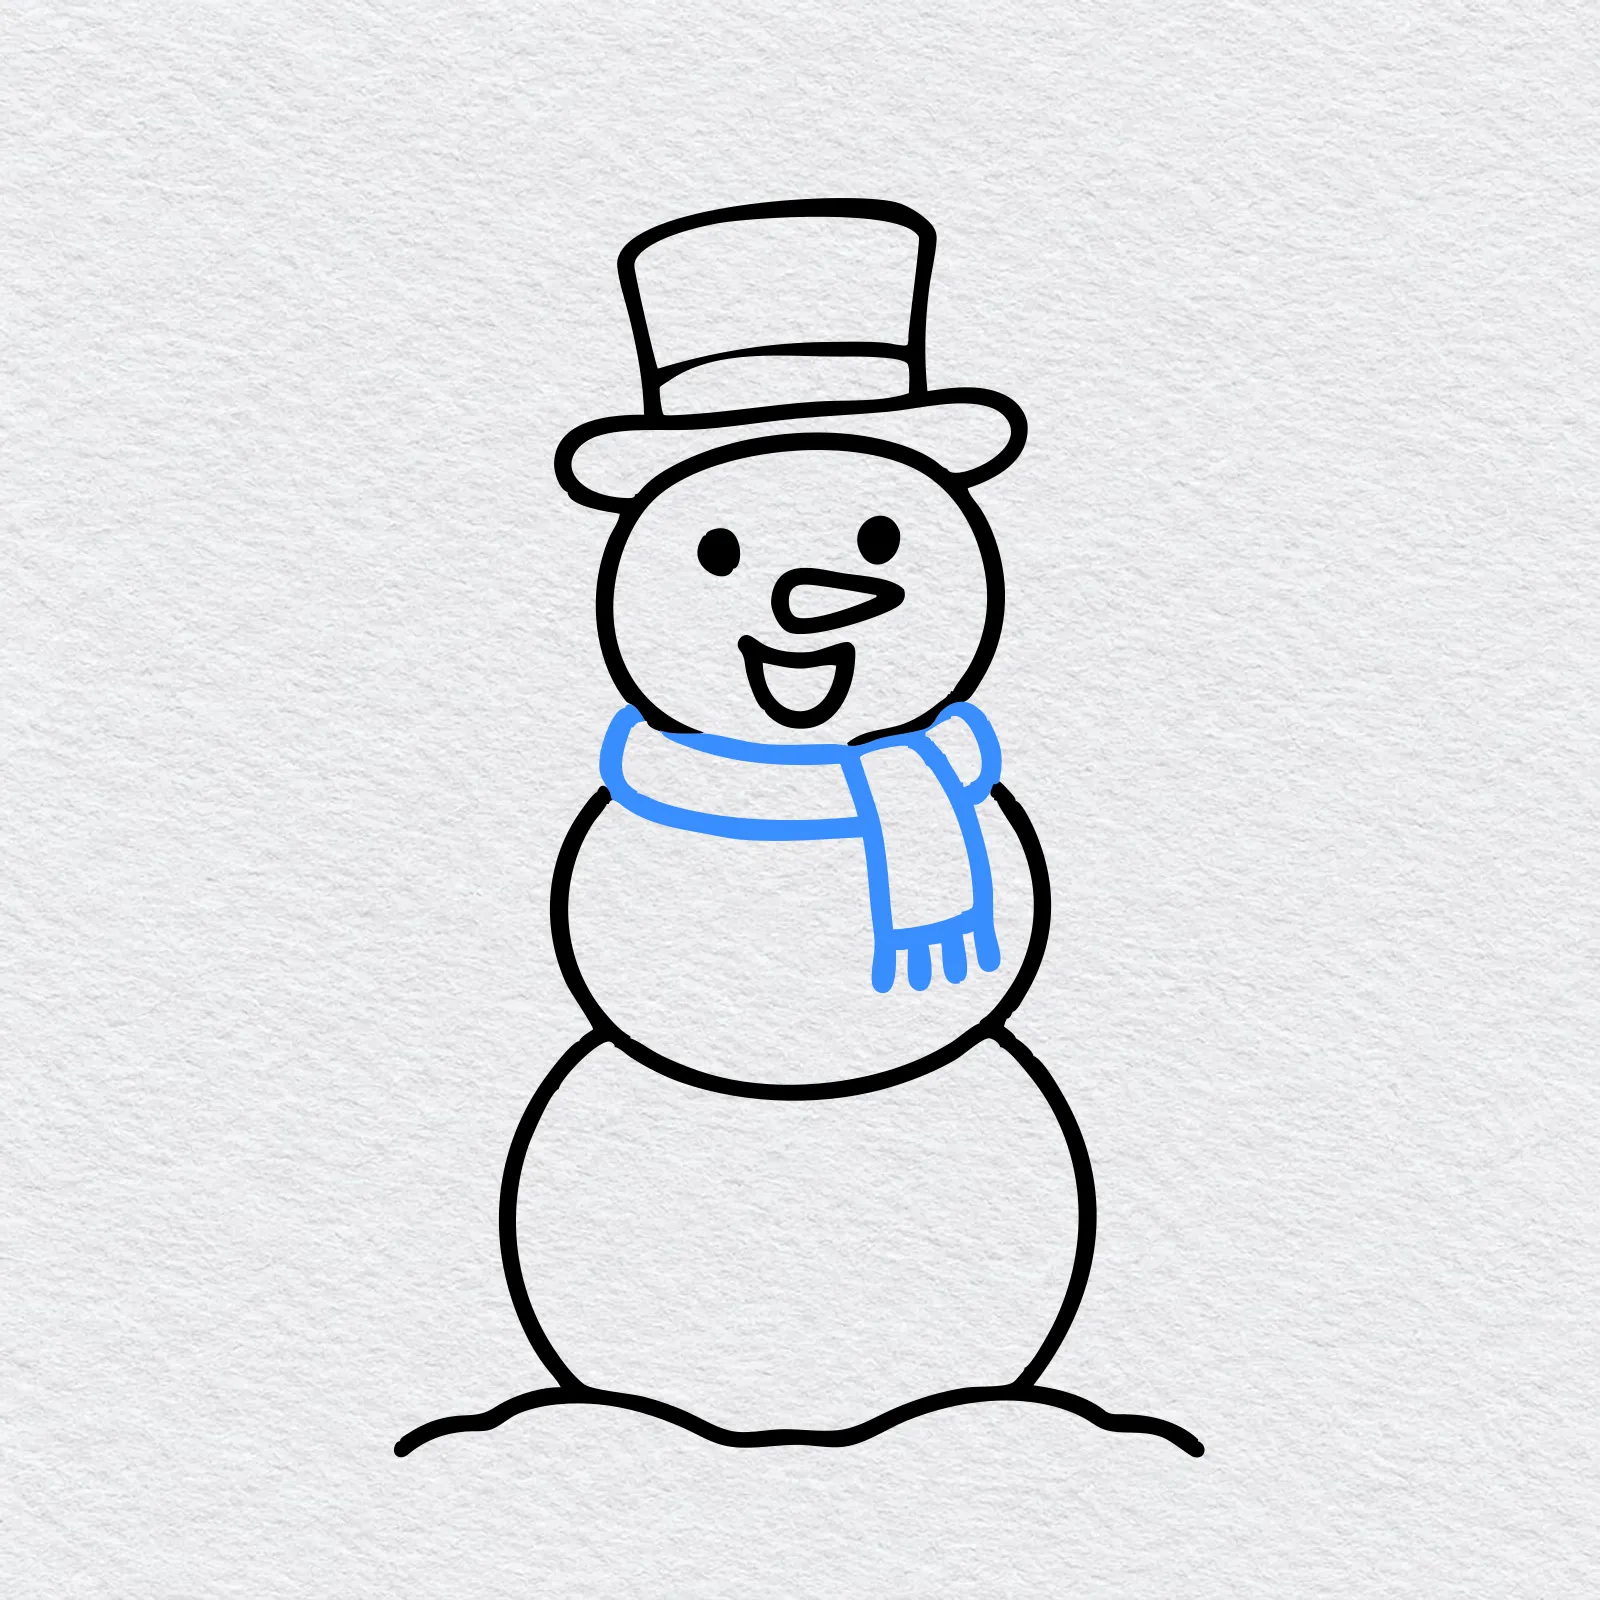
Draw a band around the neck, between the head and the middle snowball. Let one end hang down the front, and add a few short lines at its tip for the fringe.
Step 7: Draw the stick arms
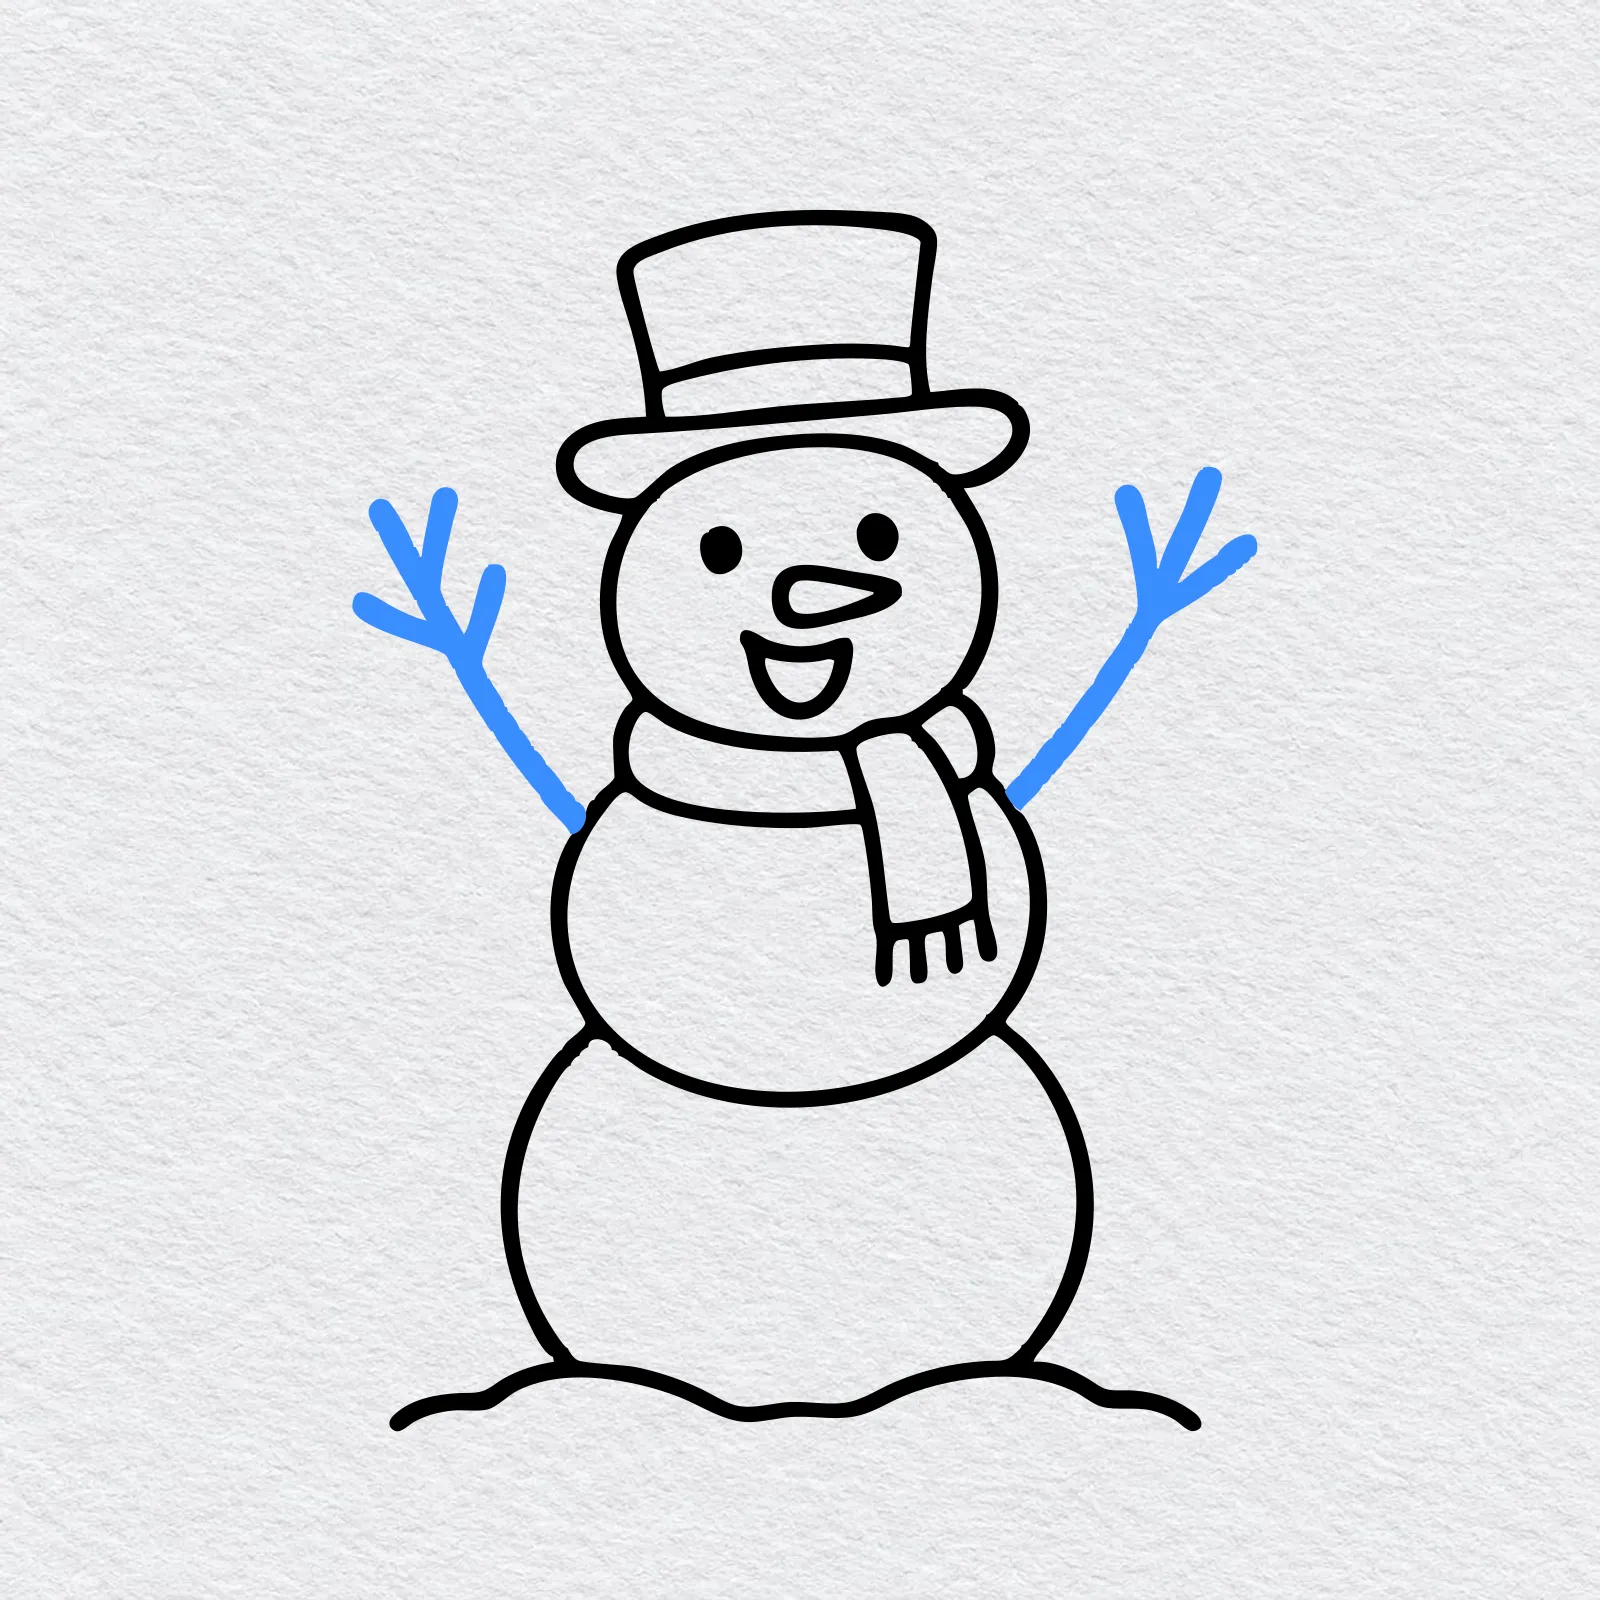
Draw a long line from each side of the middle snowball, reaching up as if the snowman is waving. Add two or three short twigs at the end of each arm.
Step 8: Draw the buttons
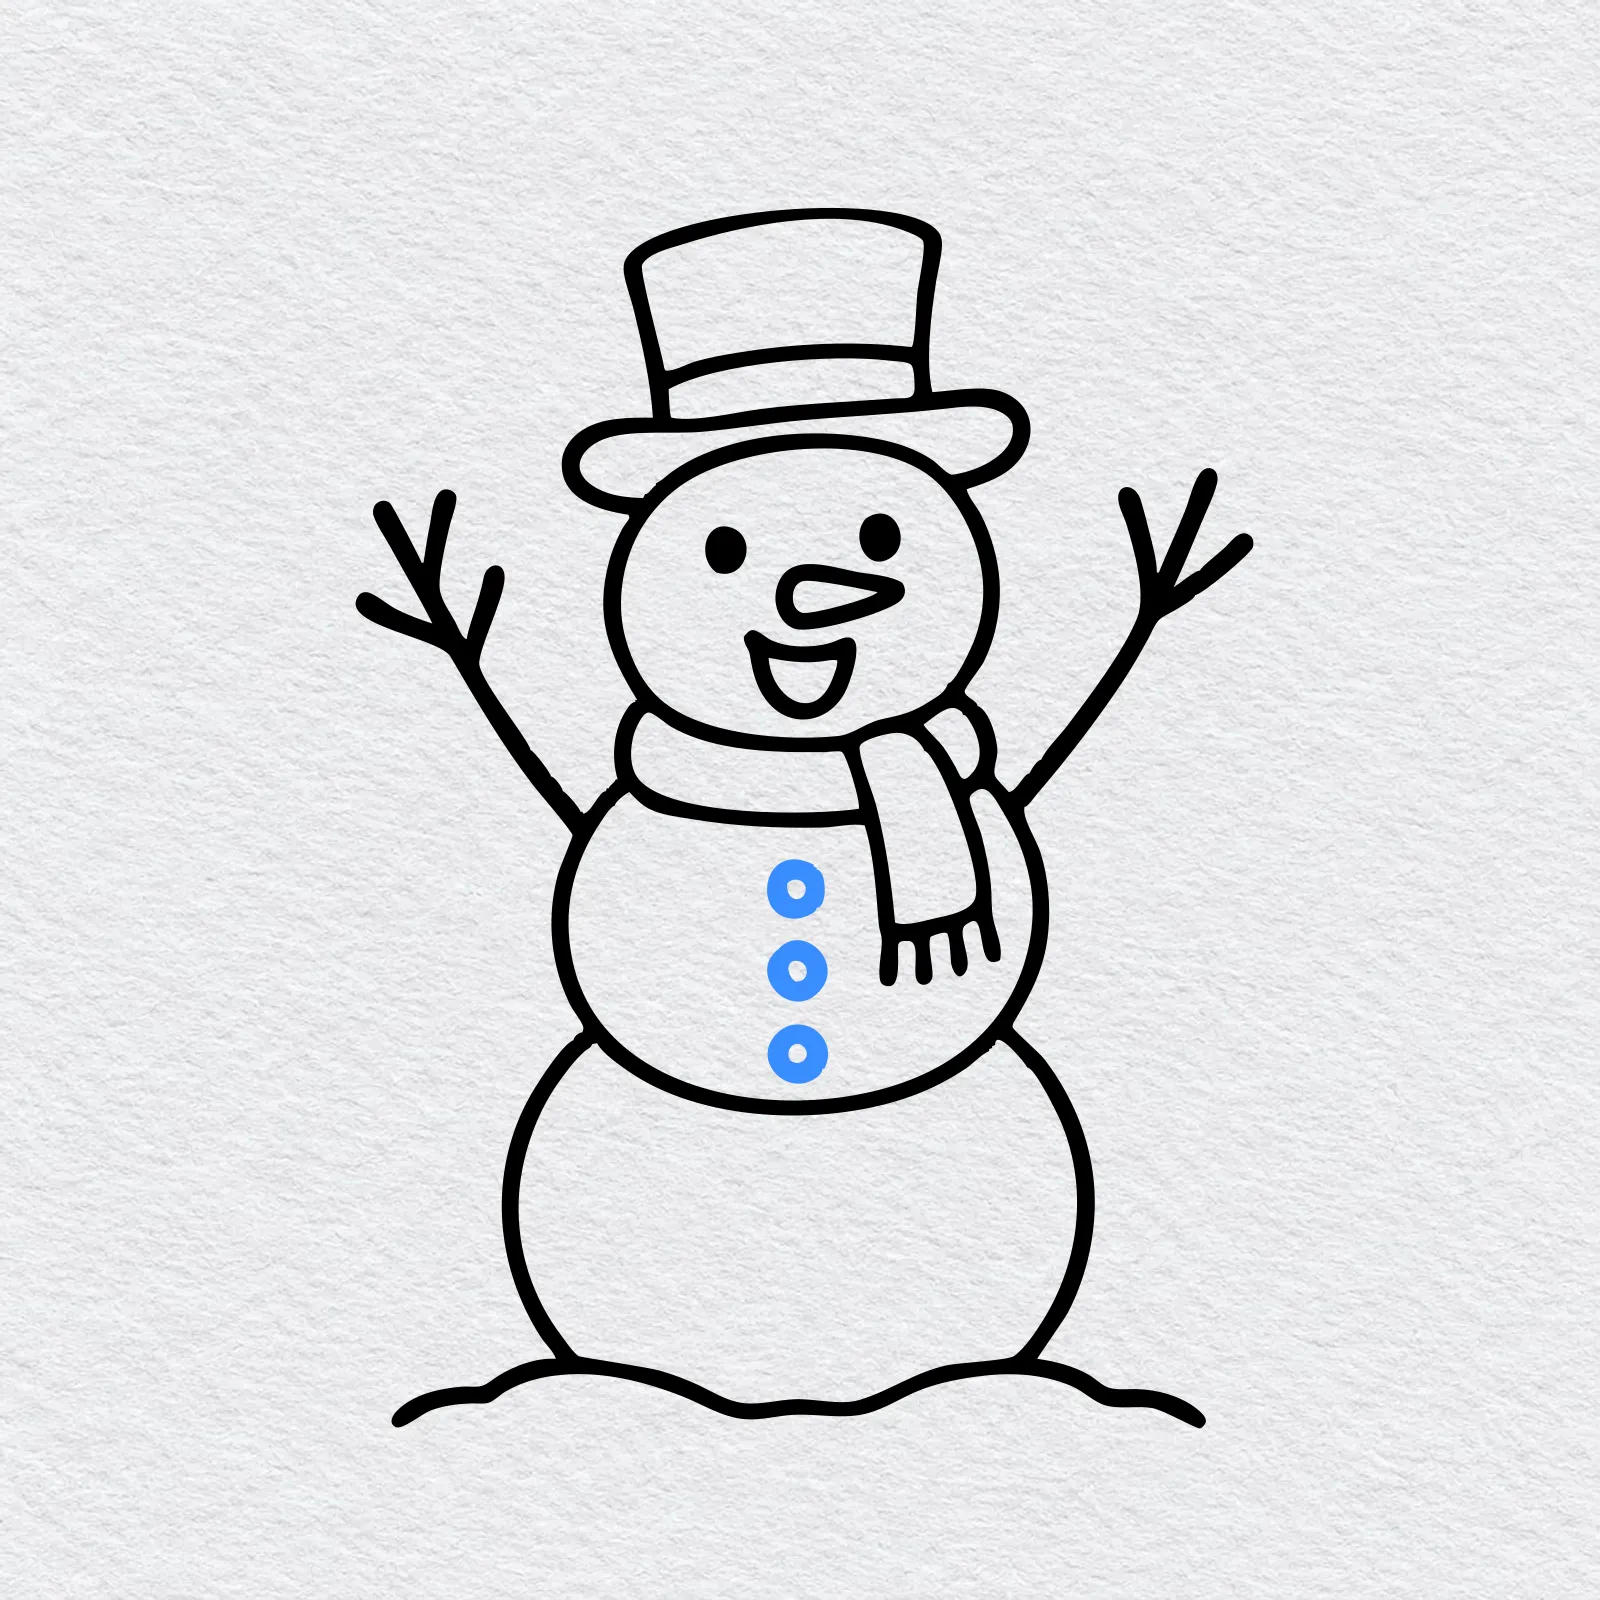
Draw three small circles in a row down the middle snowball. Put a tiny dot inside each one so they look like real buttons.
Step 9: Draw the falling snow
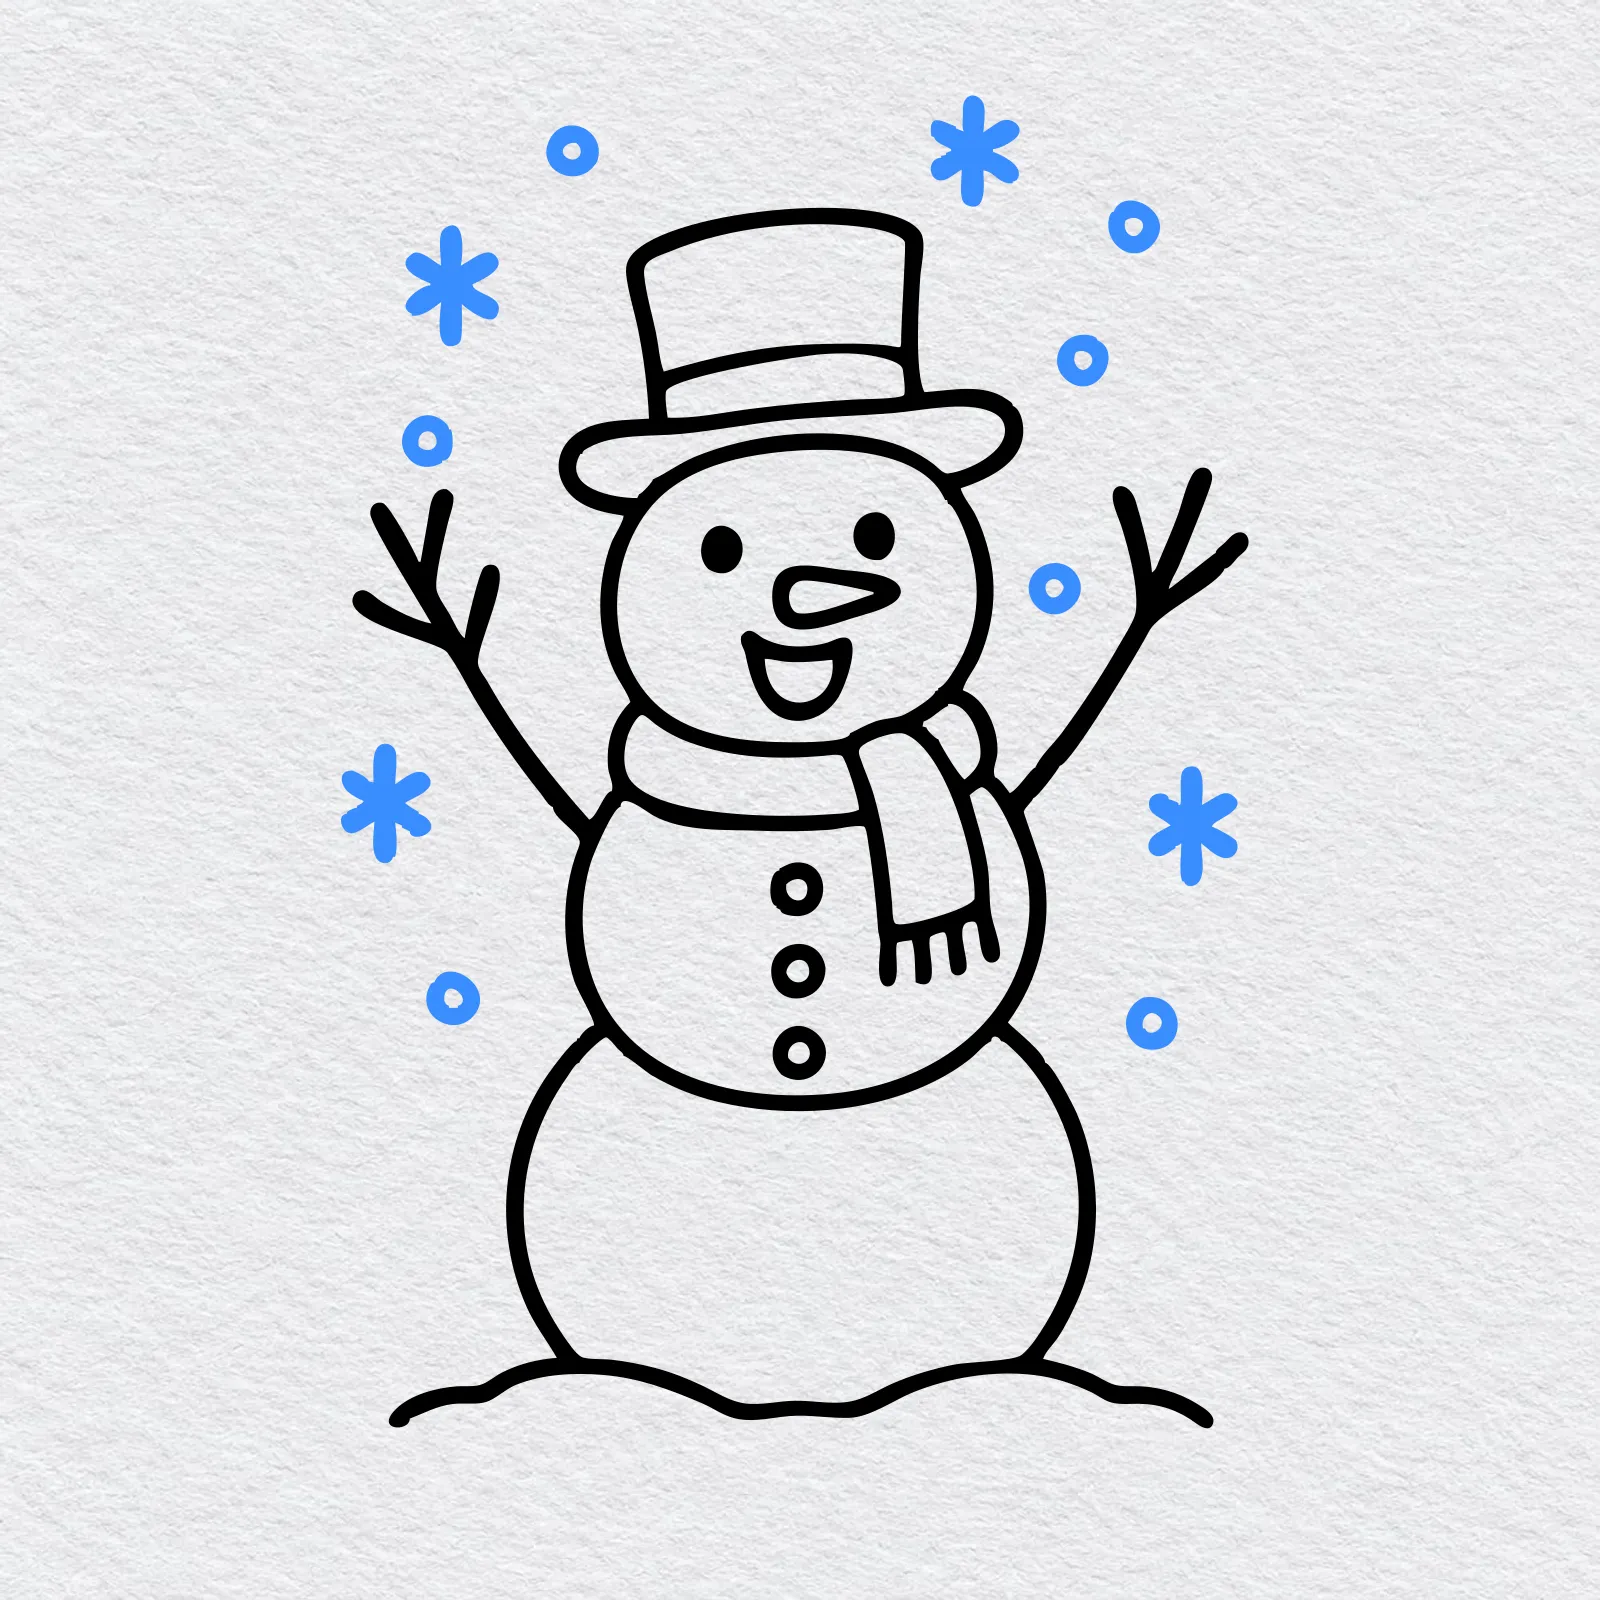
Add snow falling all around your snowman. Draw some snowflakes as little stars made of crossing lines and some as small circles. Your snowman drawing is finished.
Step 10: Color your snowman
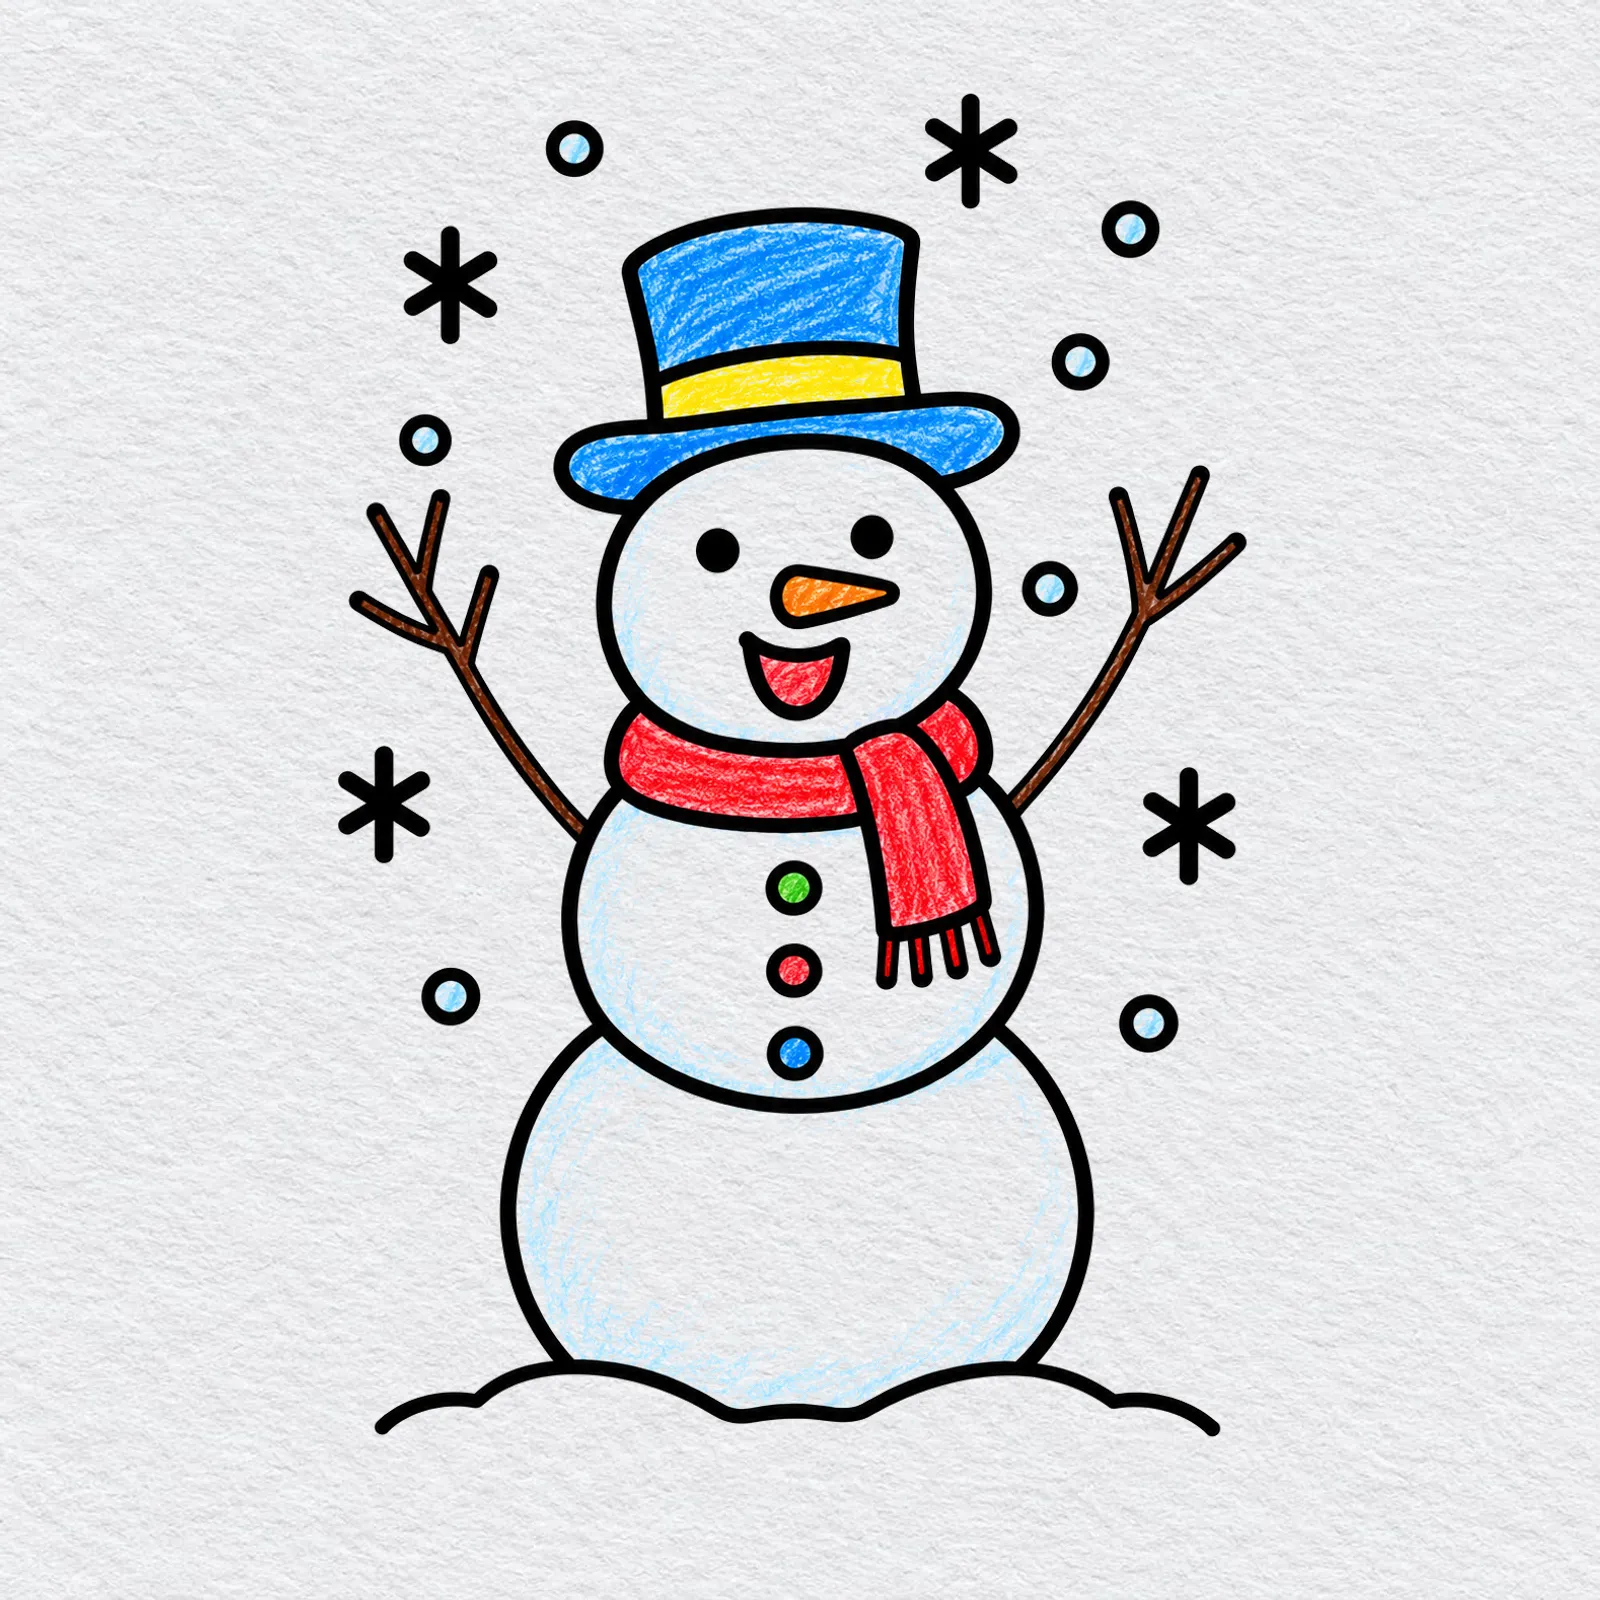
Leave the snowballs white, or shade them very lightly with light blue so they look cold and bright. Color the carrot nose orange and the stick arms brown, then pick your favorite colors for the hat, the scarf and the buttons.
Go slowly and press lightly first. You can always add more color, but it is hard to take it away.
Printable snowman drawing PDFs
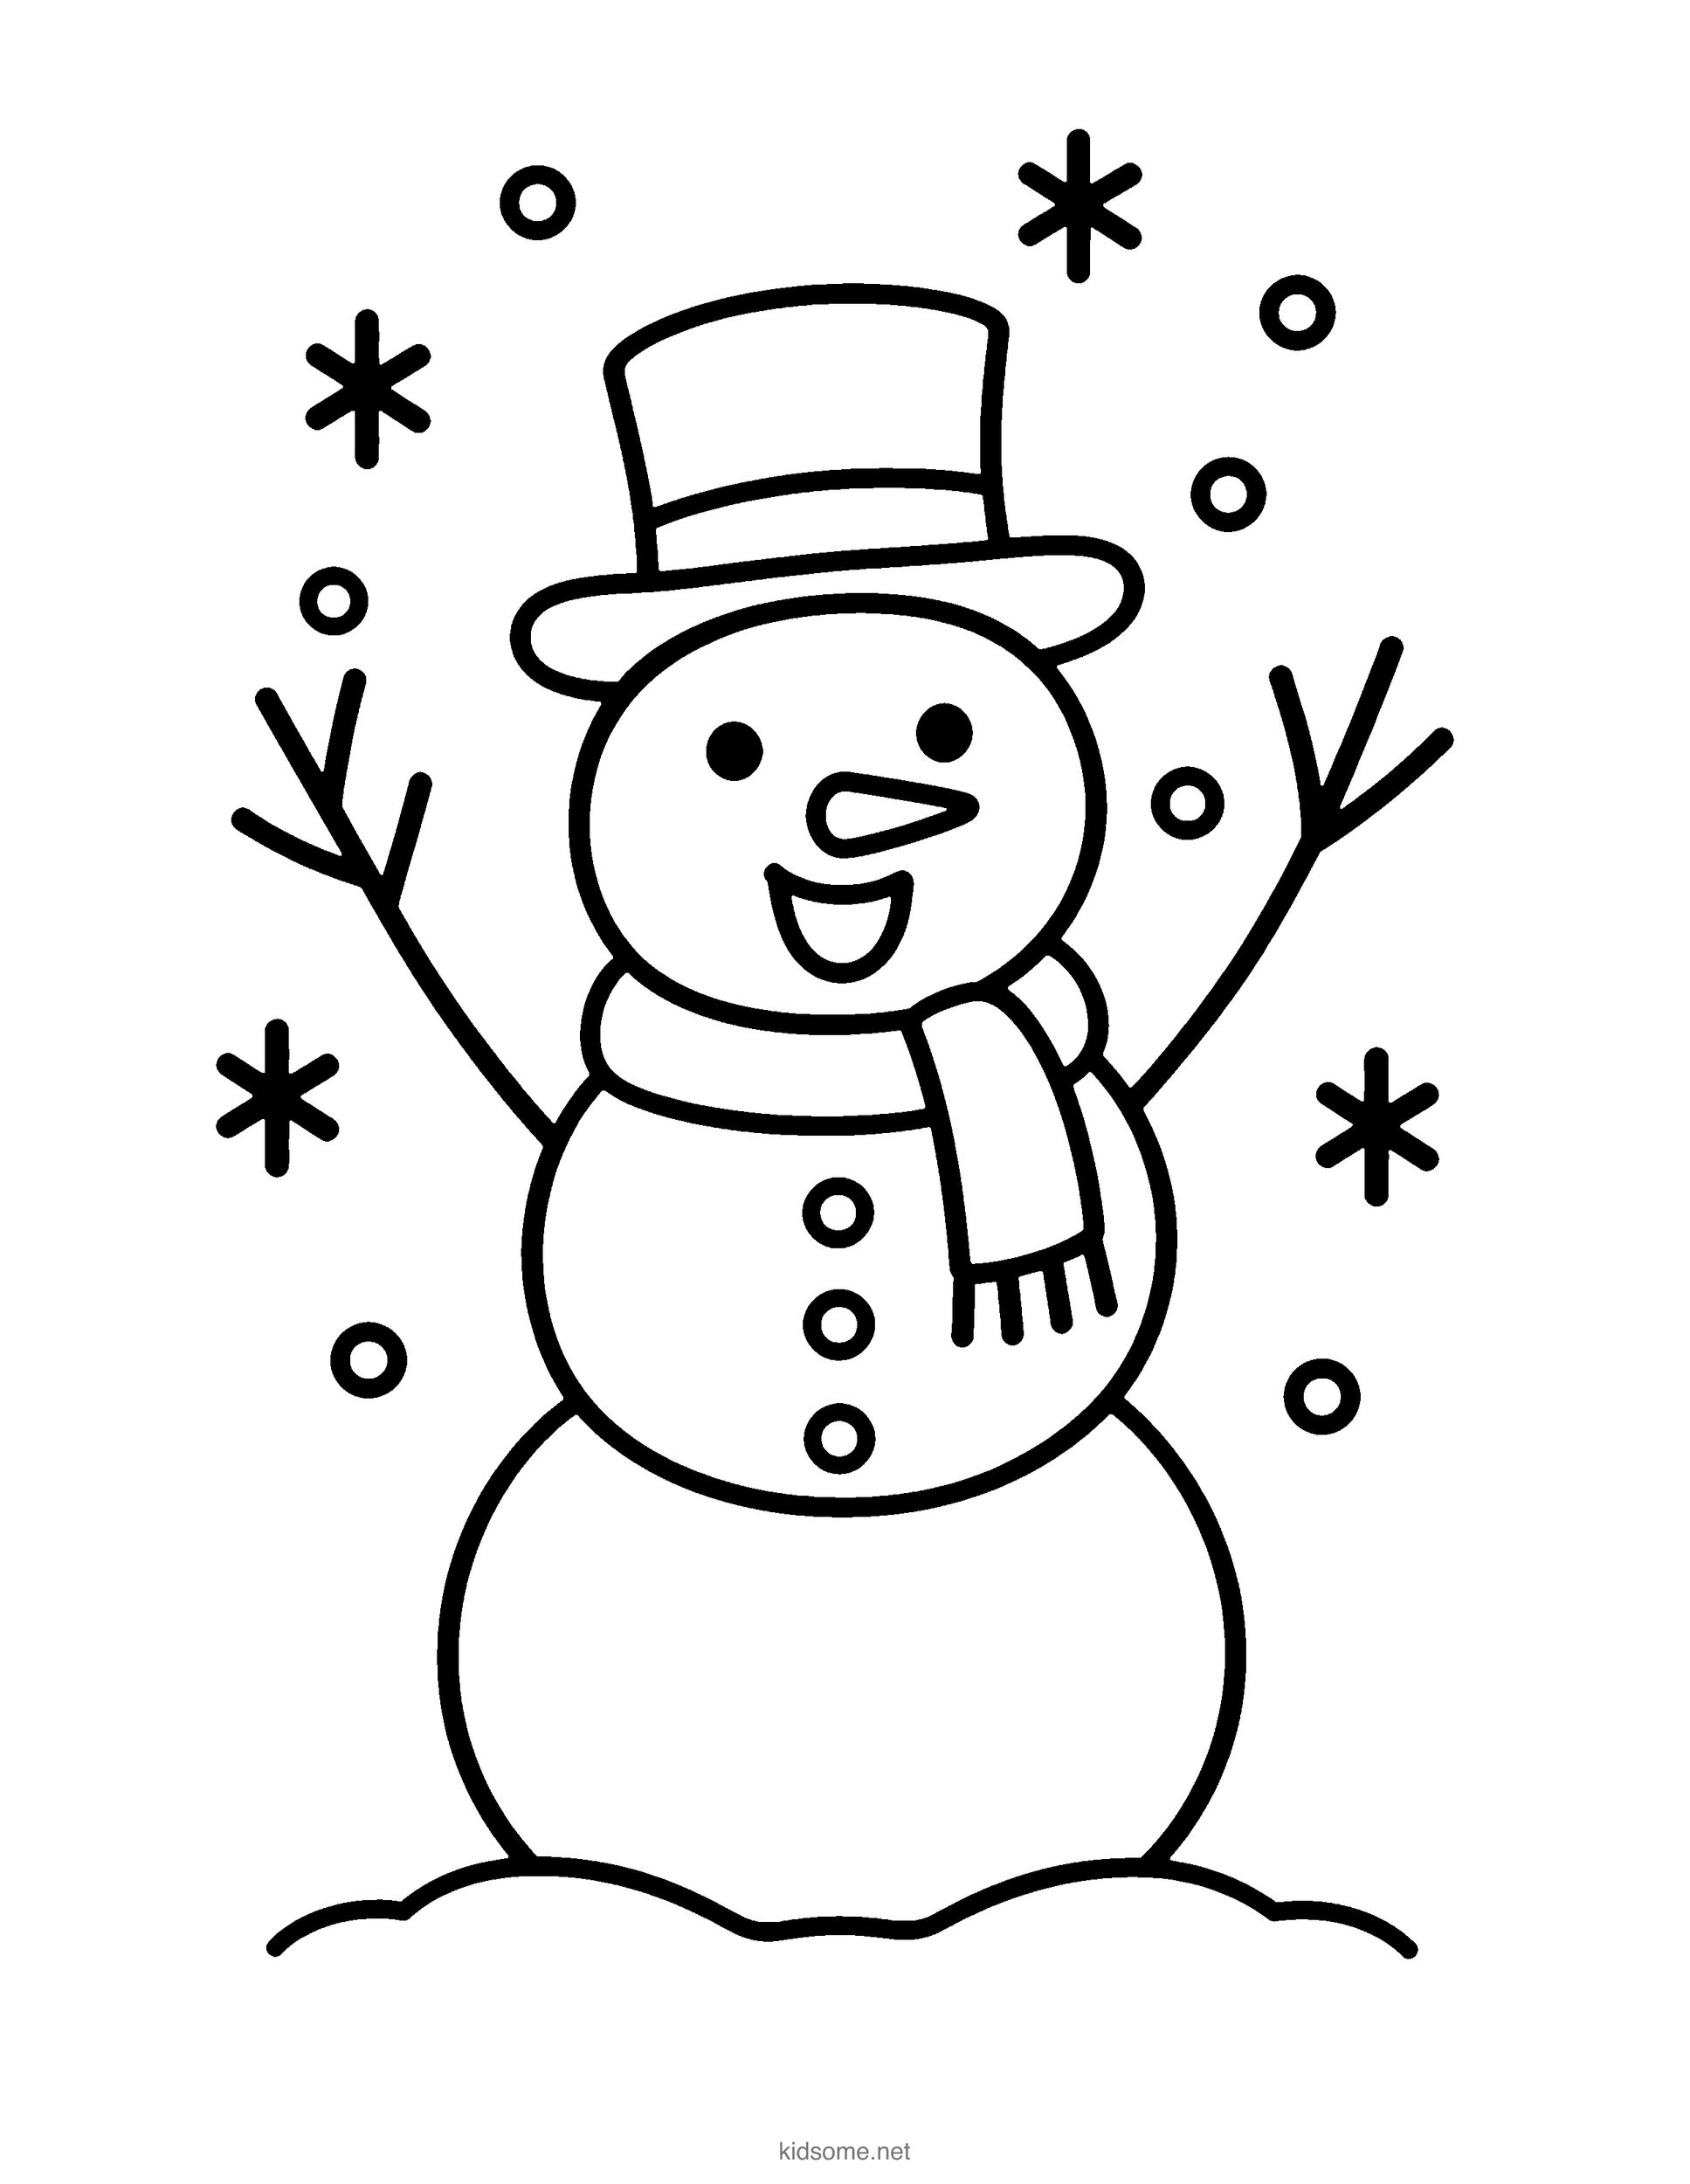
Happy Snowman Outline to Color
The finished snowman in a top hat and scarf as a clean outline to color, with the colored snowman on page two.
Download PDF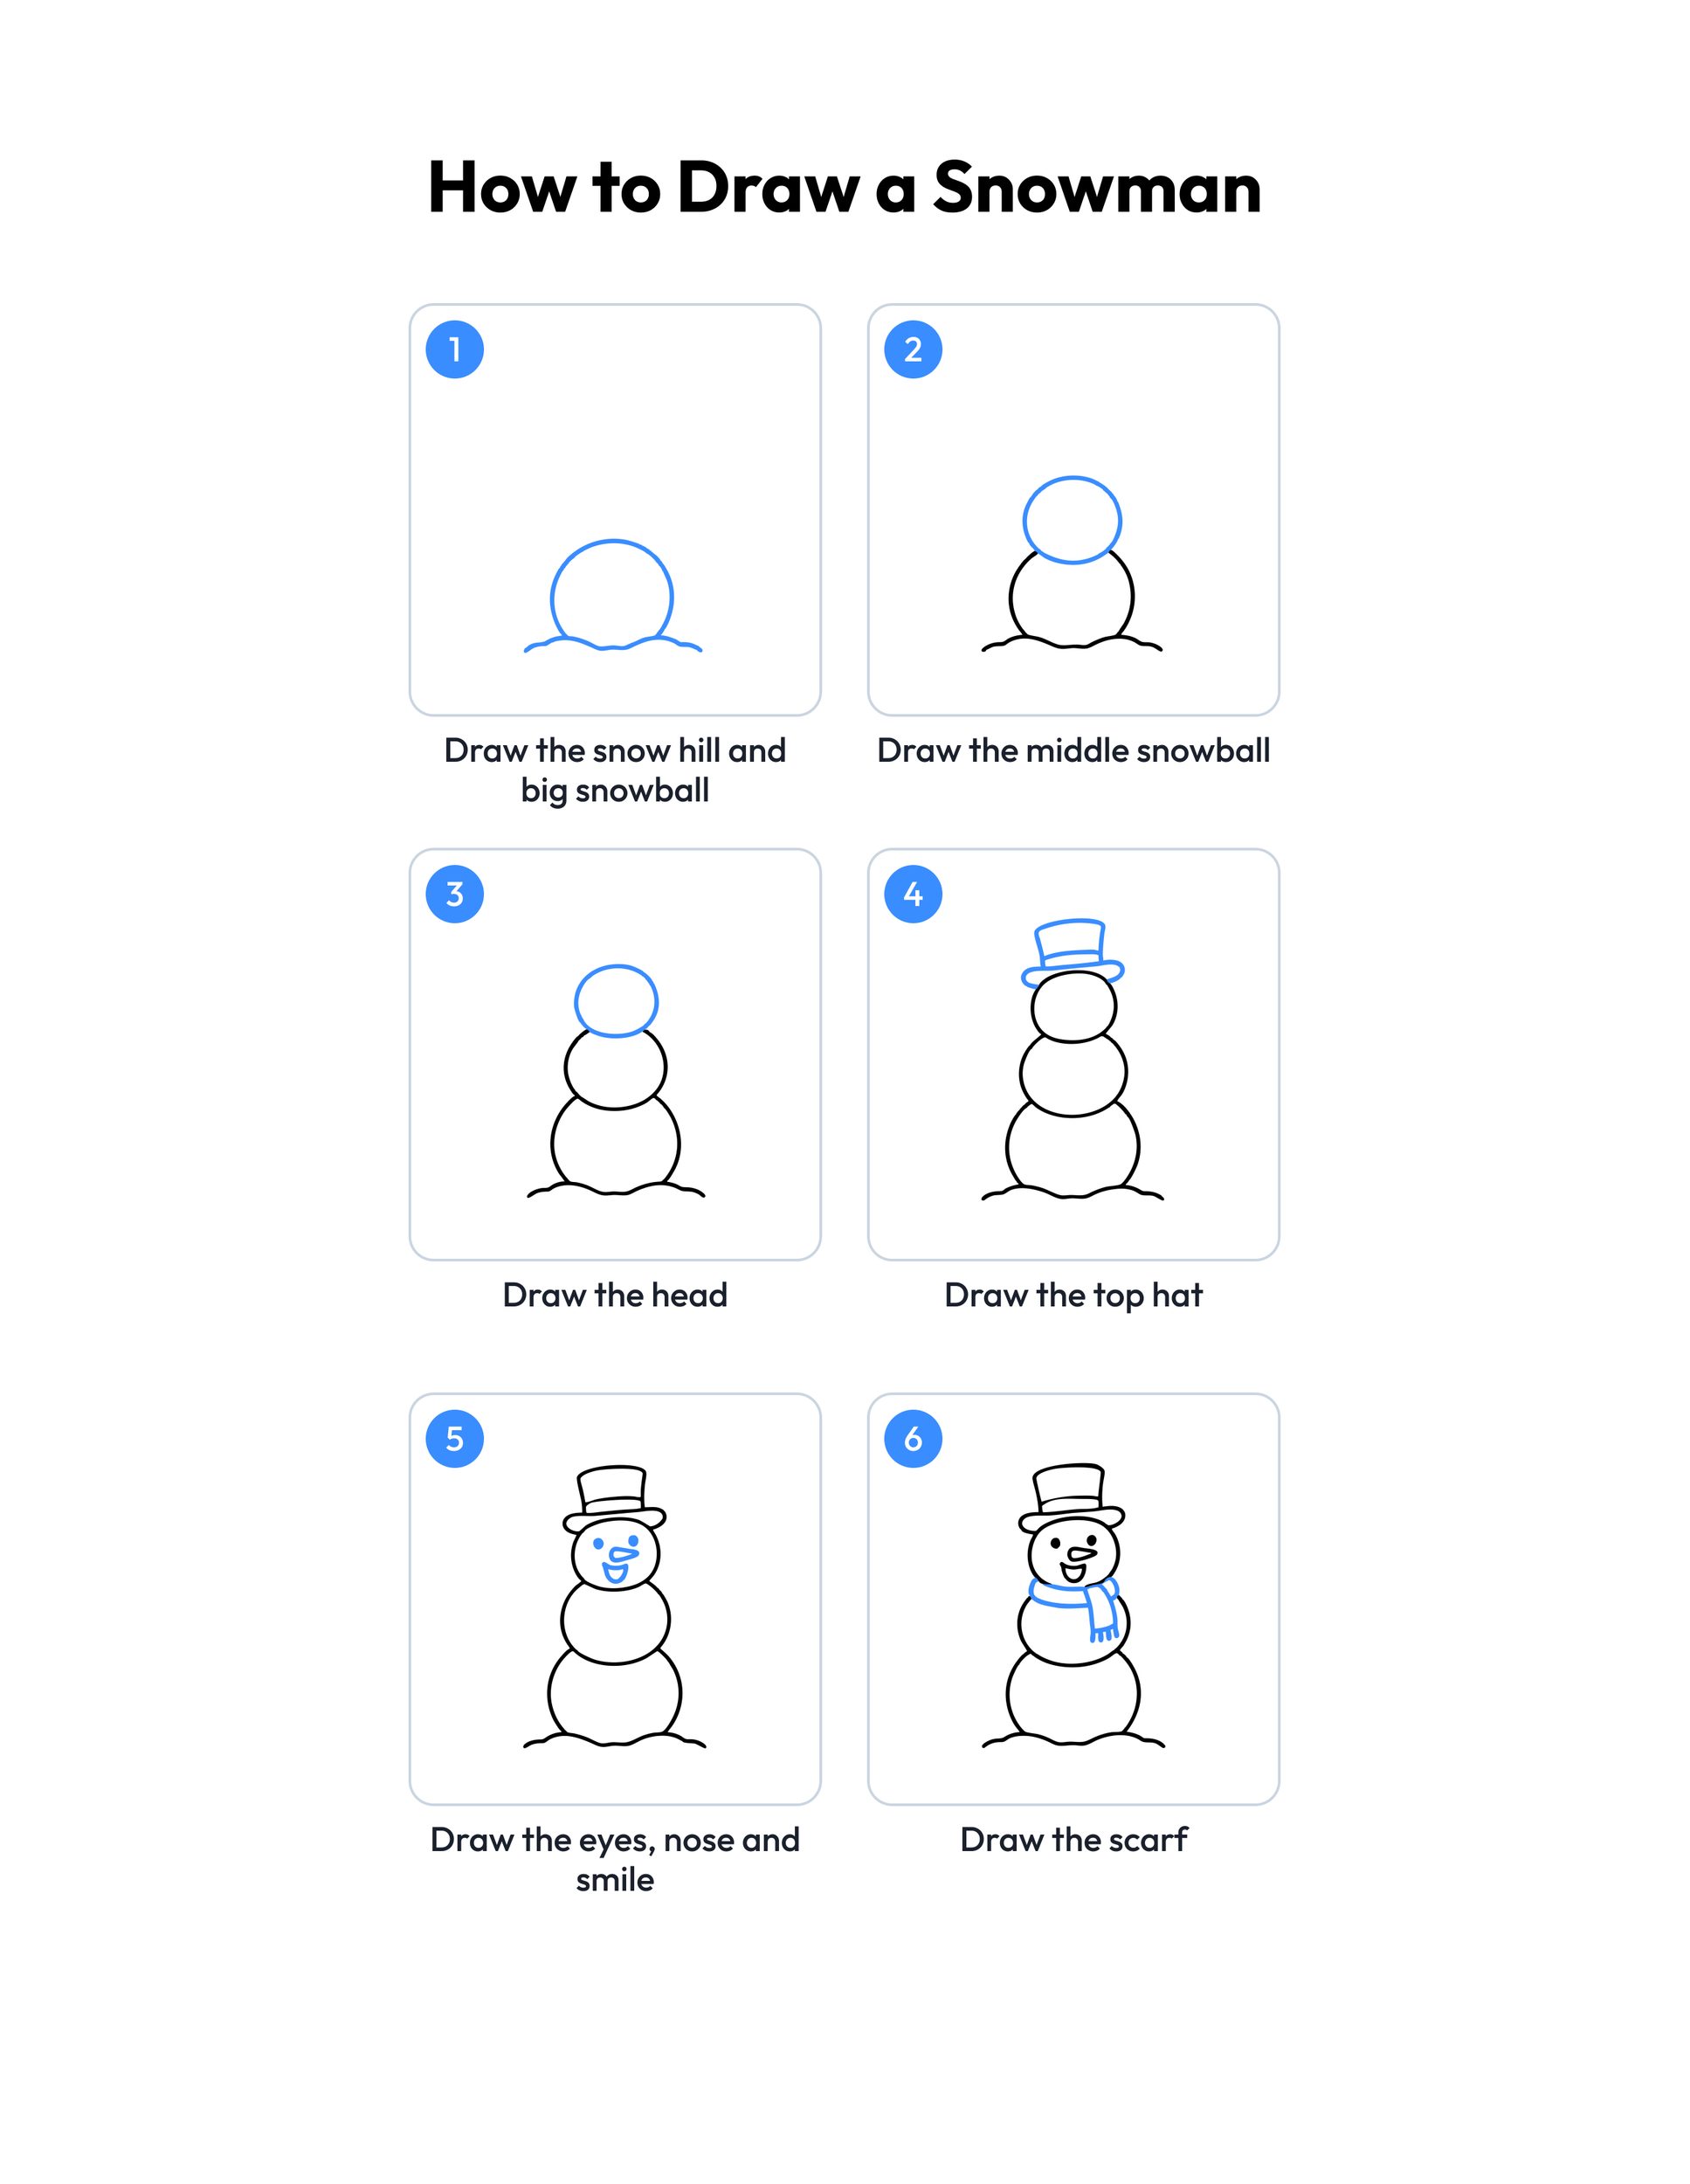
Printable snowman drawing guide
Every step, two to a row, with the finished snowman in color at the end.
Download PDFHow to use this guide
Print the outline at 100 percent, or choose Fit to page if your printer asks. The PDF is set to US Letter, and the margins leave room for A4 too, so the hat and the snowflakes stay on the sheet. Page one is the snowman outline to color. Page two is the same snowman colored in, so print page one alone when you only want the picture to fill in.
For drawing, plain copy paper and a pencil with a good eraser work best. Draw the three snowballs lightly at first, since circles often need a second try. When the snowman looks right, go over the lines with a marker or a dark crayon. Crayons and colored pencils are fine on plain paper, and markers need cardstock so the color does not soak through.
The first three steps are the easiest: Big Snowball on a Snow Hill, Middle Snowball on Top and Small Round Snowman Head. Top Hat With a Brim and Scarf With a Fringed End take more care, because they have straight sides and corners, so a grown-up can draw them lightly and let the child go over the lines. Stick Arms With Twigs and Falling Snowflakes and Snow are quick and fun to finish.
Print the step guide and set it beside the paper. Point to the blue part in each step and name it out loud before your child draws it.
Ideas for your snowman drawing
- Snowman family: Draw two or three snowmen side by side, one tall and one small. Give each a different hat and scarf, then name them and tell a short story about them.
- Circle count: Before coloring, count every circle in the drawing: the snowballs, eyes, buttons and snow dots. Write the number at the bottom and check it with a grown-up.
- Cotton ball snow: Glue cotton balls or torn white paper onto the three snowballs for a soft, fluffy snowman. Add a strip of real fabric for the scarf.
- Classroom winter wall: Put step guides, pencils and erasers in an art center during a winter unit. Each child draws a snowman, and the class lines them up along one snowy hill.
- Weather talk: After drawing, talk about why snow falls and why it melts. Draw a sun in one corner and ask what would happen to the snowman on a warm day.
- Story page: Draw the snowman at the top of a page and write one sentence about where he lives. Younger children can say it for a grown-up to write.
- Snow day card: Fold a sheet in half and draw the snowman on the front. Write a warm note inside for a grandparent, a teacher or a friend far away.
- Quiet-time folder: Keep the step guide and a few blank sheets in a folder for car trips, waiting rooms and cold afternoons indoors. A snowman is a calm drawing to come back to.
What age is this snowman drawing made for?
It is made for ages 4 to 8. The youngest children can draw the three snowballs and the face with a grown-up nearby, and older kids can finish the whole snowman alone, then add a sled, a tree or a house behind it.
What is the easiest way to draw a snowman?
Start with three circles, big at the bottom and small at the top, then add two eyes and a smile. That alone is a snowman. The hat, scarf, arms and buttons come one at a time after that, and any of them can wait for another day.
How do I help a child who finds it hard?
Draw each new part lightly in pencil yourself and let your child go over it, then swap for the next step. Big, slow movements help more than small ones. If a snowball comes out lumpy, keep it: real snowmen are lumpy too, and the next try is usually rounder.
Can I print the guide for my class?
Yes. Teachers, homeschool parents and art clubs can print as many copies of the outline and the step guide as their students need. Both PDFs are free for personal and classroom use. Please do not sell them or post the files on another site.