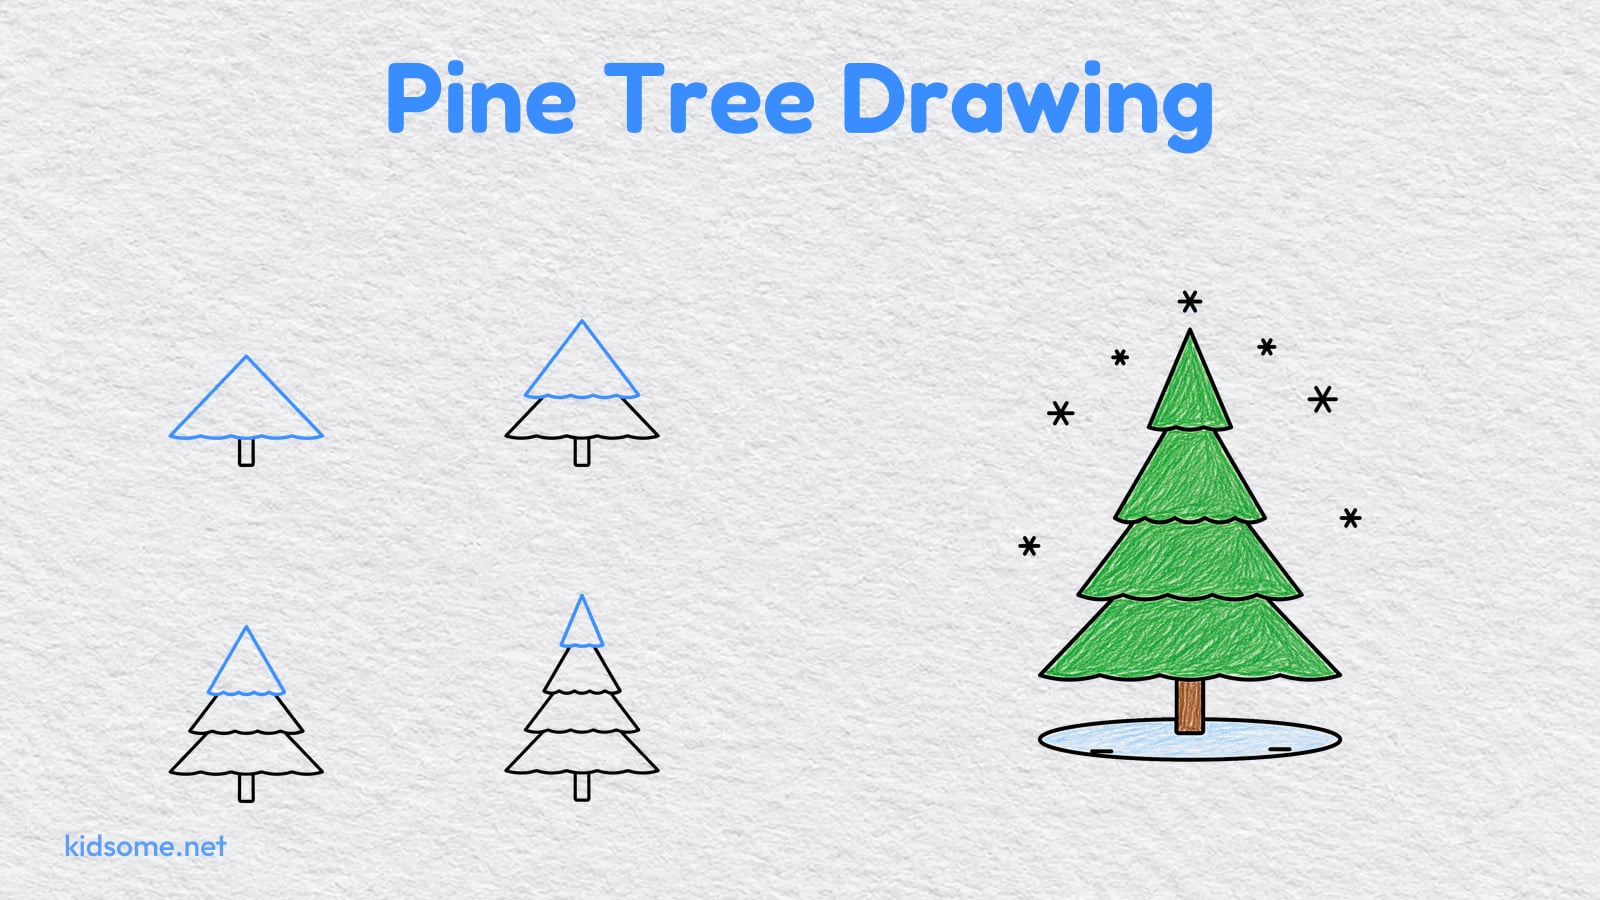
This pine tree drawing guide shows kids ages 4 to 8, and the grown-ups drawing beside them, how to draw a pine tree one easy step at a time. A tall plain pine with layered branches and a pointed top is one of the friendliest winter pictures there is, and it is easier to draw than it looks because it starts as a simple straight trunk. Add a wide bottom layer of branches, a middle layer, a top layer and a little pointed cap, and that trunk turns into a full tree standing on a snowy patch with a few snowflakes around it. No special art skills are needed, just a pencil and an eraser, and maybe a crayon for the last step.
There are six steps. Each step shows the drawing so far in black and the new part in blue, so it is always clear what to add next. At the end there is a free printable outline of the finished pine to trace or color, plus a crayon colored example to copy if you like. Kids who enjoy it can try more of our winter drawing guides on the next snowy afternoon.
-
Step 1 : Draw the trunk

Draw a tall, slightly rounded rectangle in the lower middle of the page for the trunk. Leave plenty of room above it for the branches and a little room below it for the snow.
-
Step 2 : Draw the bottom branches
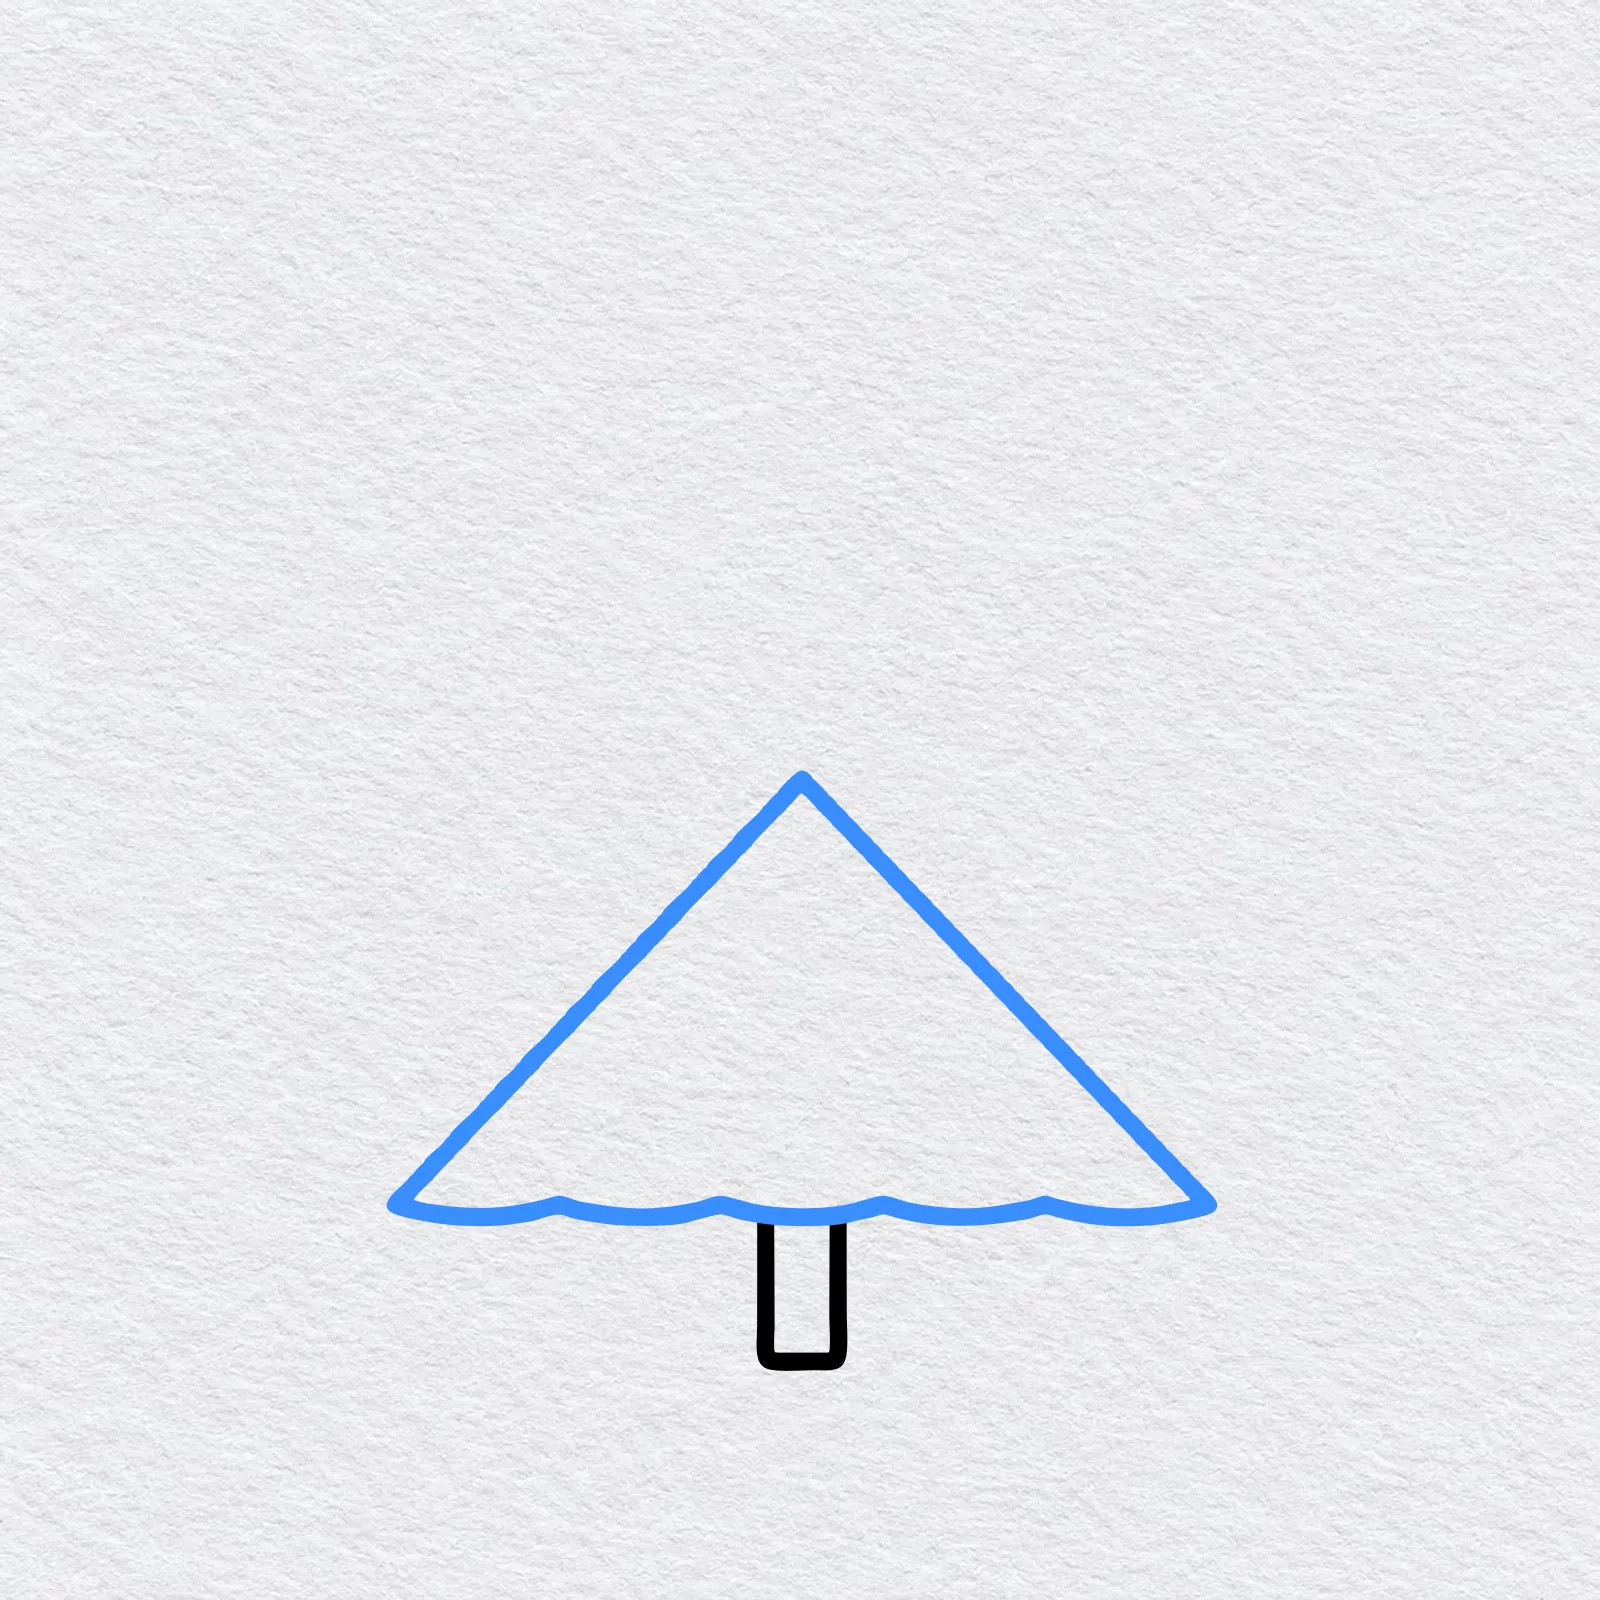
Over the top of the trunk, draw a wide triangle with a wavy, scalloped bottom. This layer should be the widest part of the tree and should cover the top of the trunk.
-
Step 3 : Add the middle branches
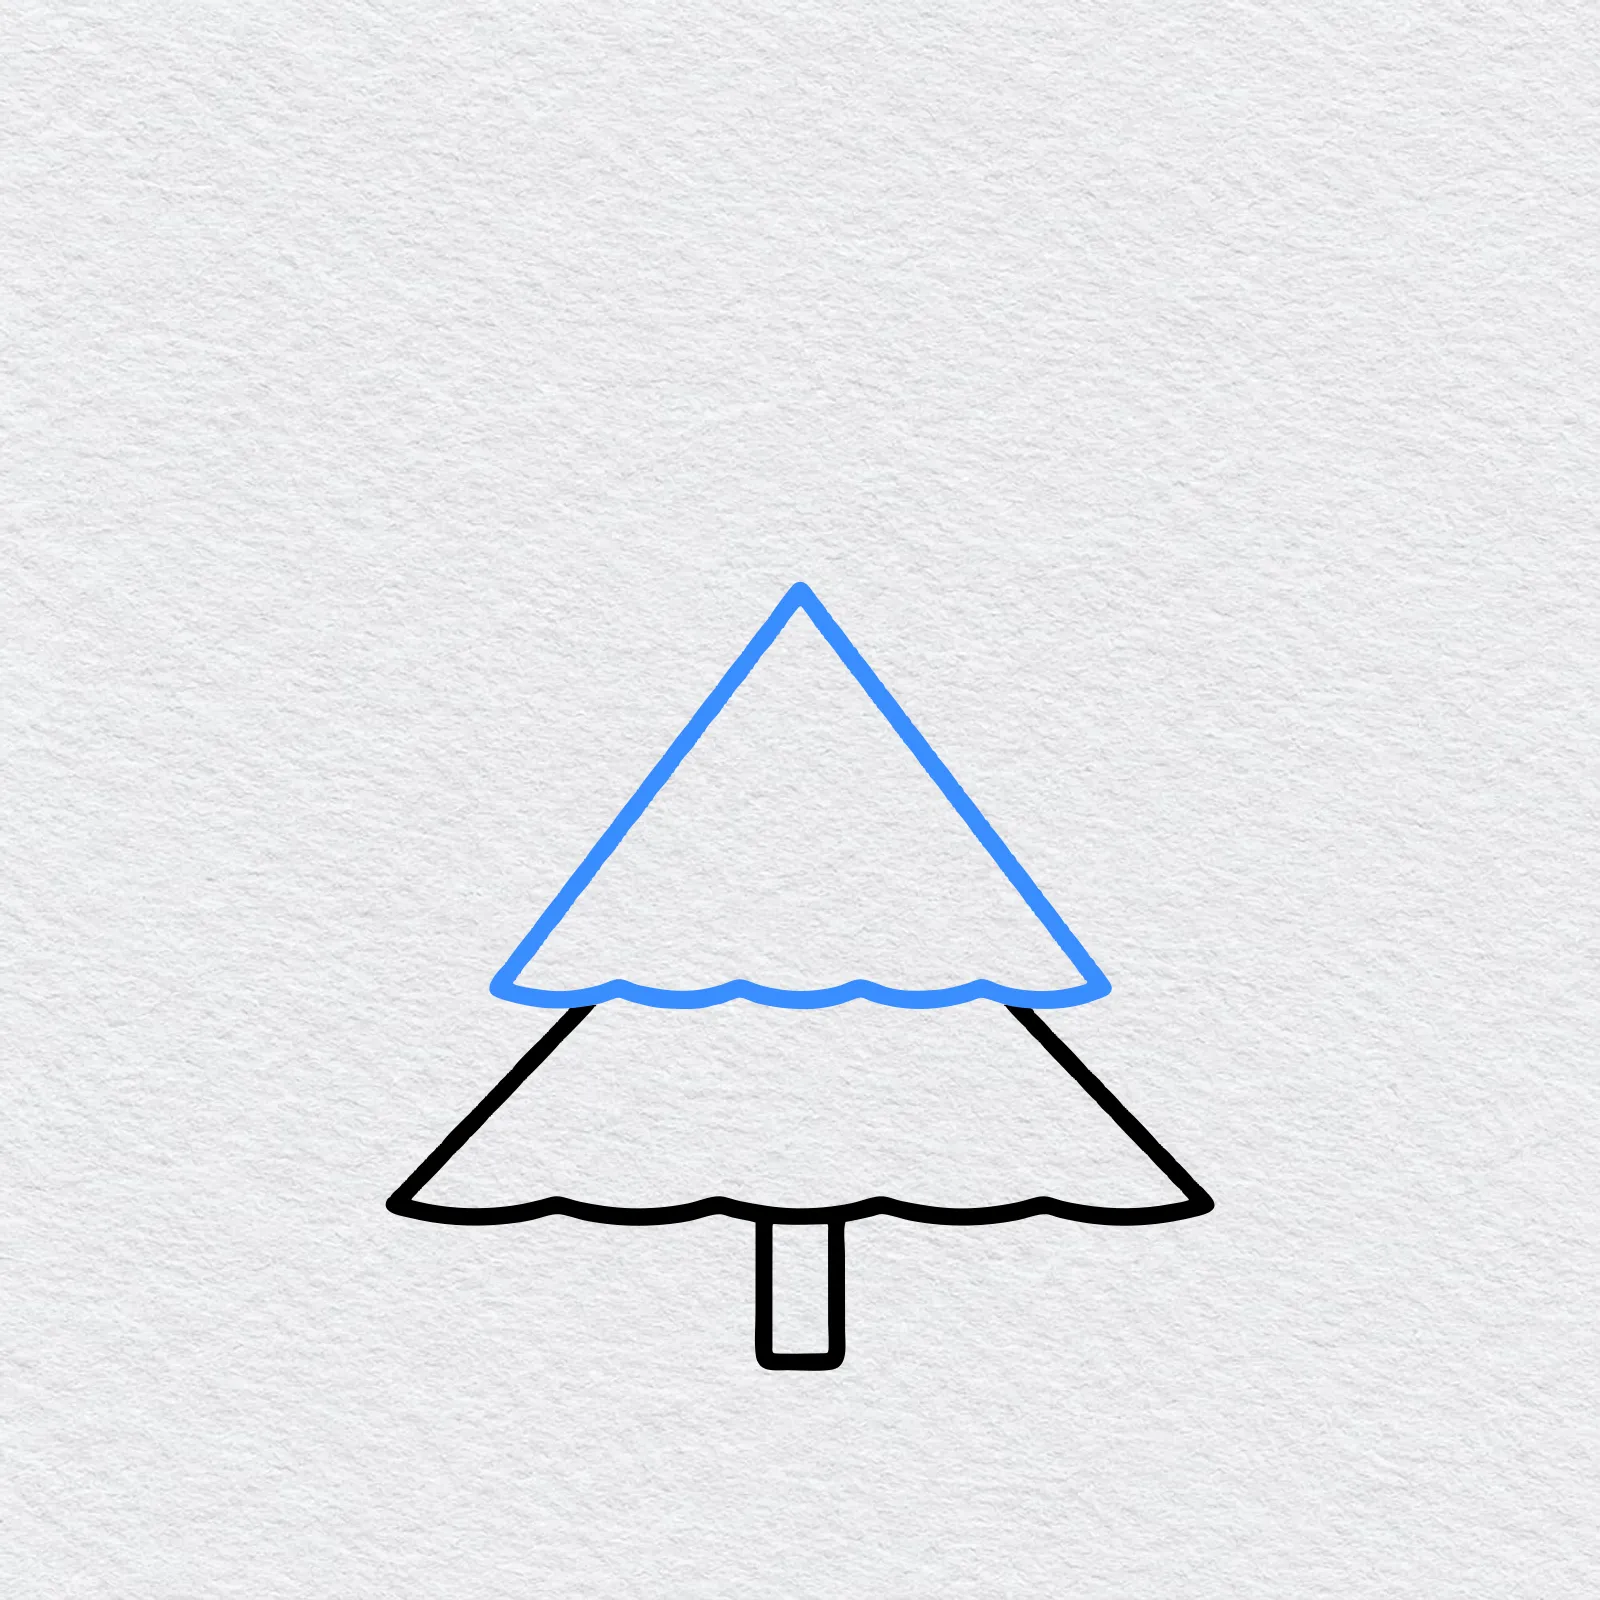
Draw a slightly narrower scalloped layer on top of the first one. Let its bottom edge sit over the layer below, just as real pine branches overlap.
-
Step 4 : Add the top branches
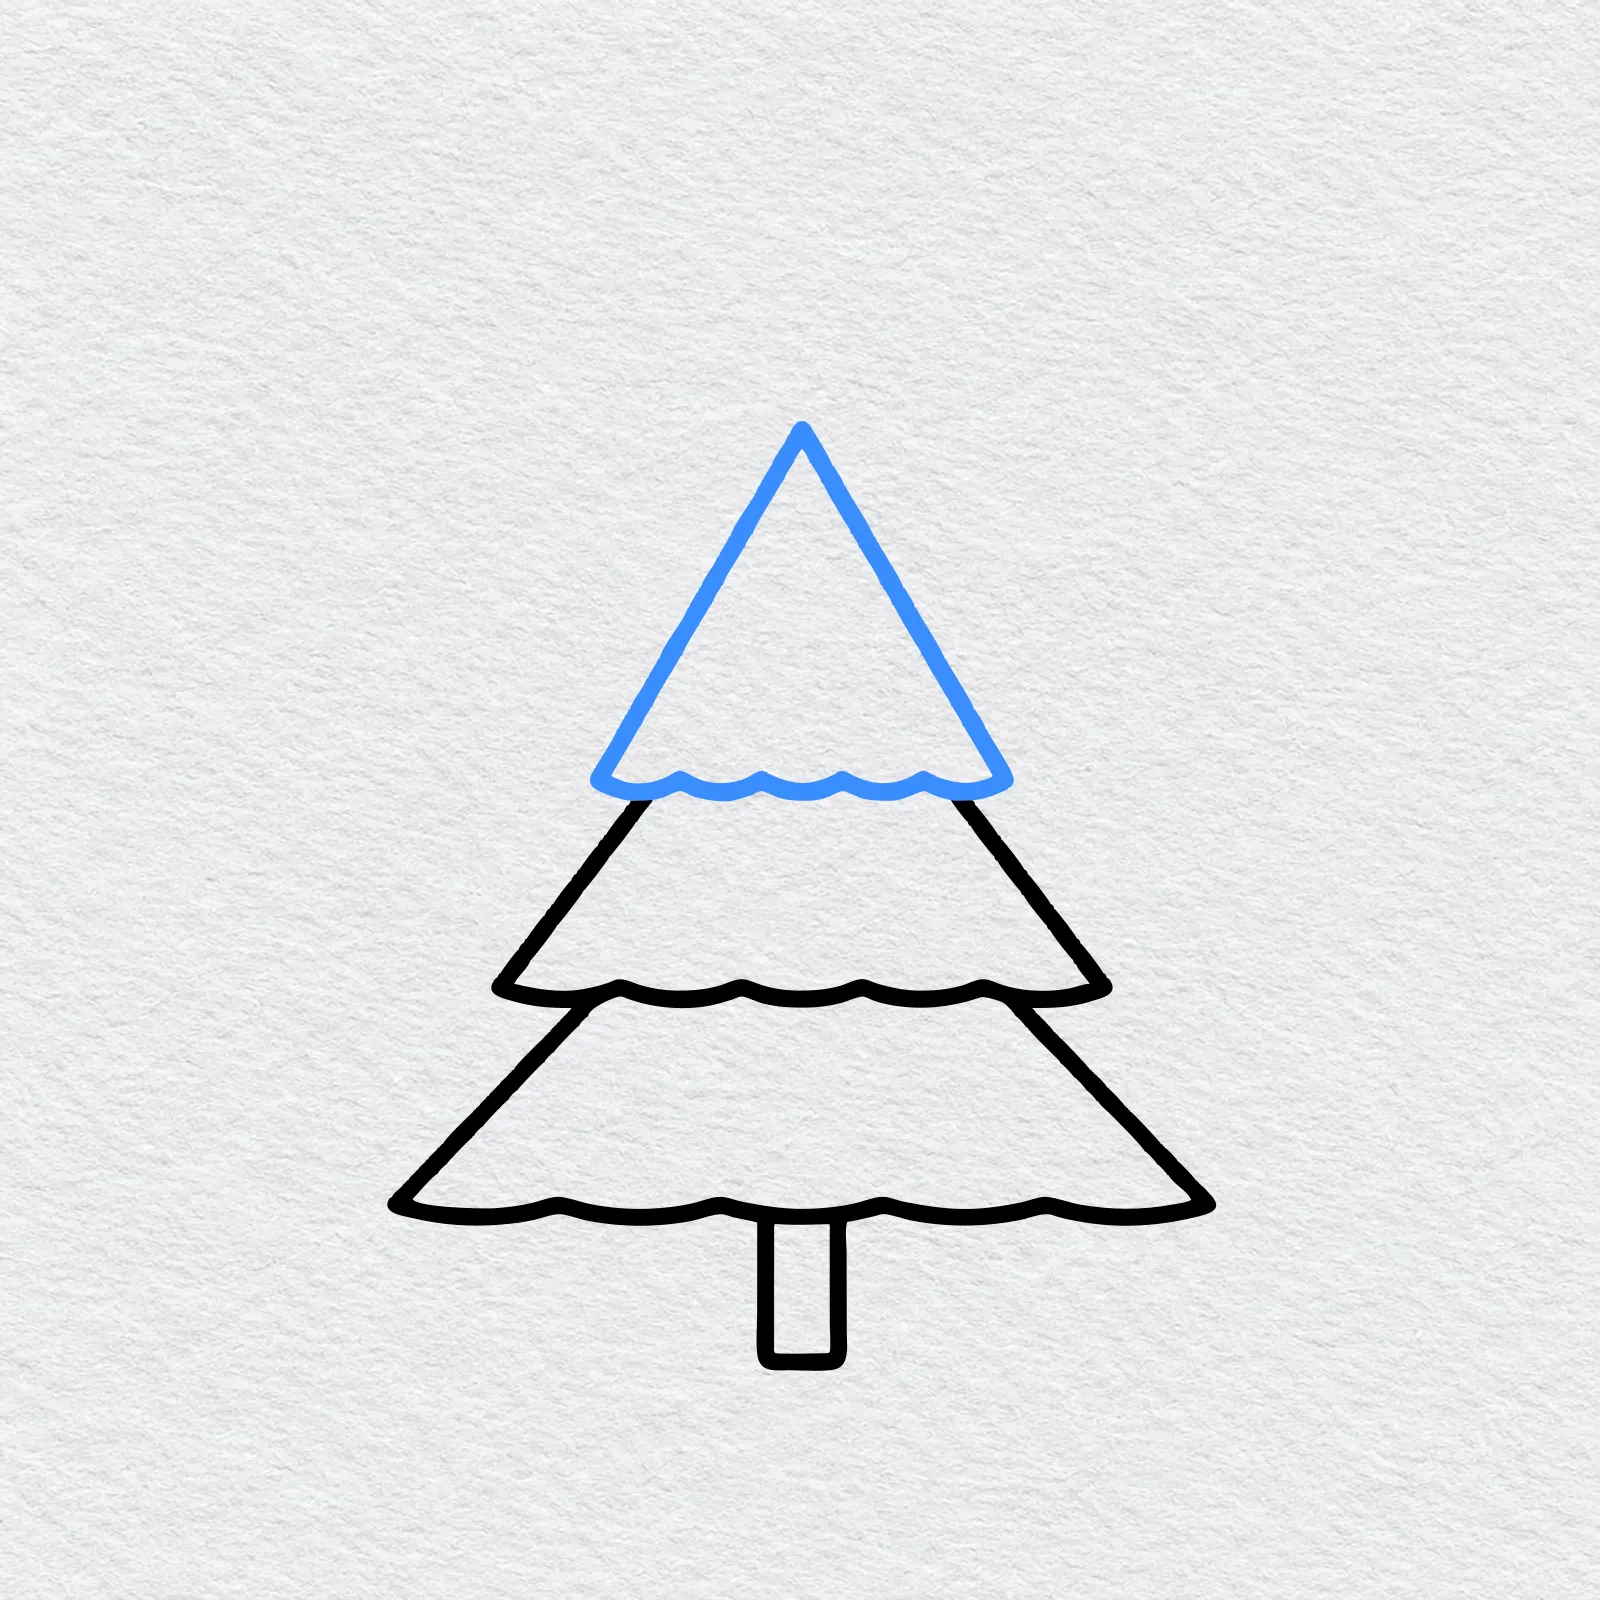
Draw a smaller scalloped layer above the middle one. Keep it narrower than the layer below and leave a little space at the very top for the pointed cap.
-
Step 5 : Draw the pointed top
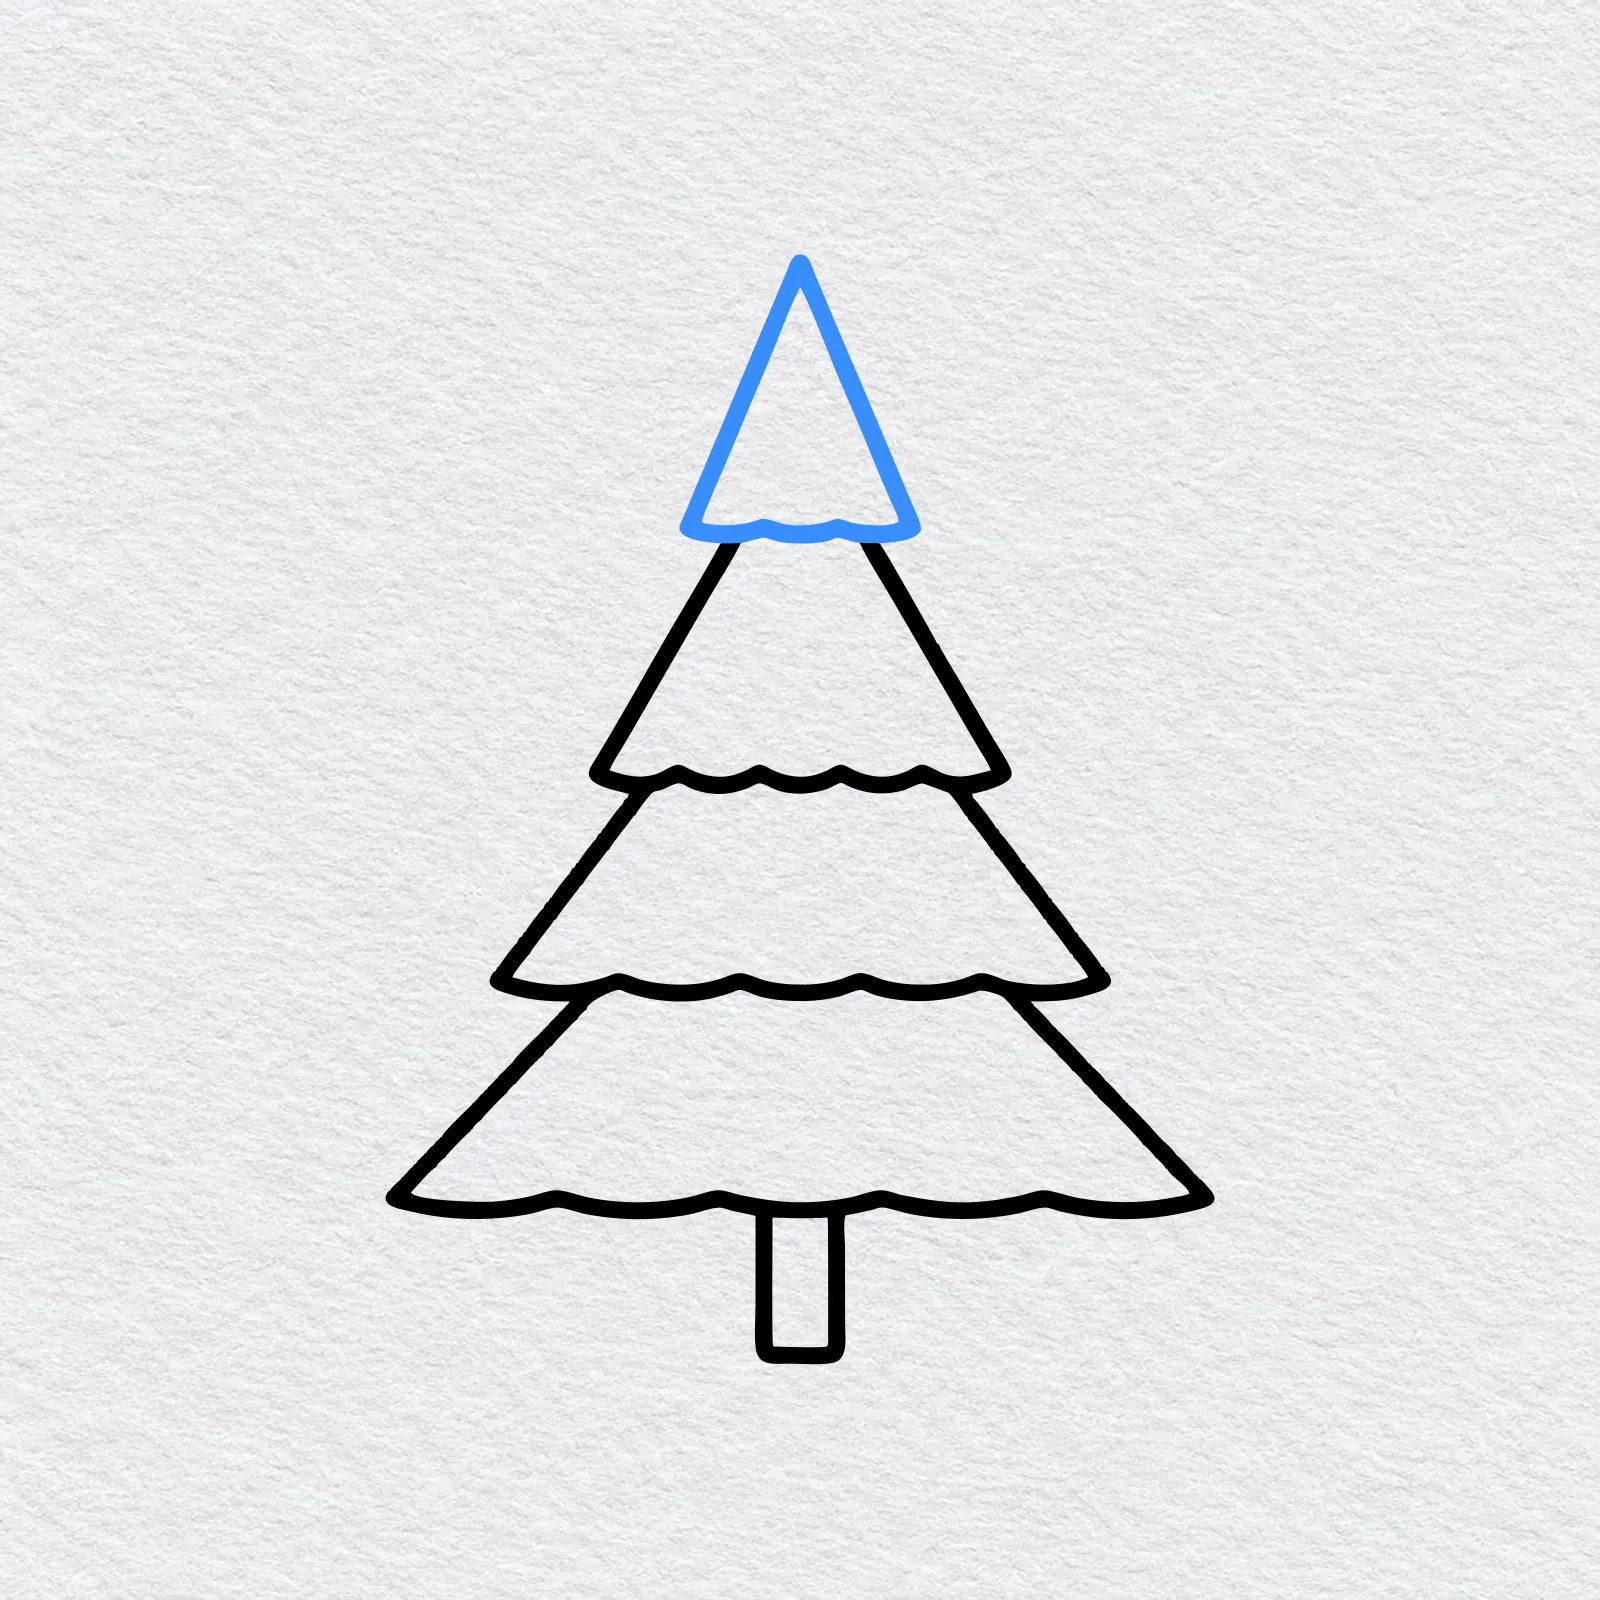
Draw a small pointed cap on the top layer, like a little triangle with a gently wavy bottom. This is the tip of the pine.
-
Step 6 : Add snowflakes and ground
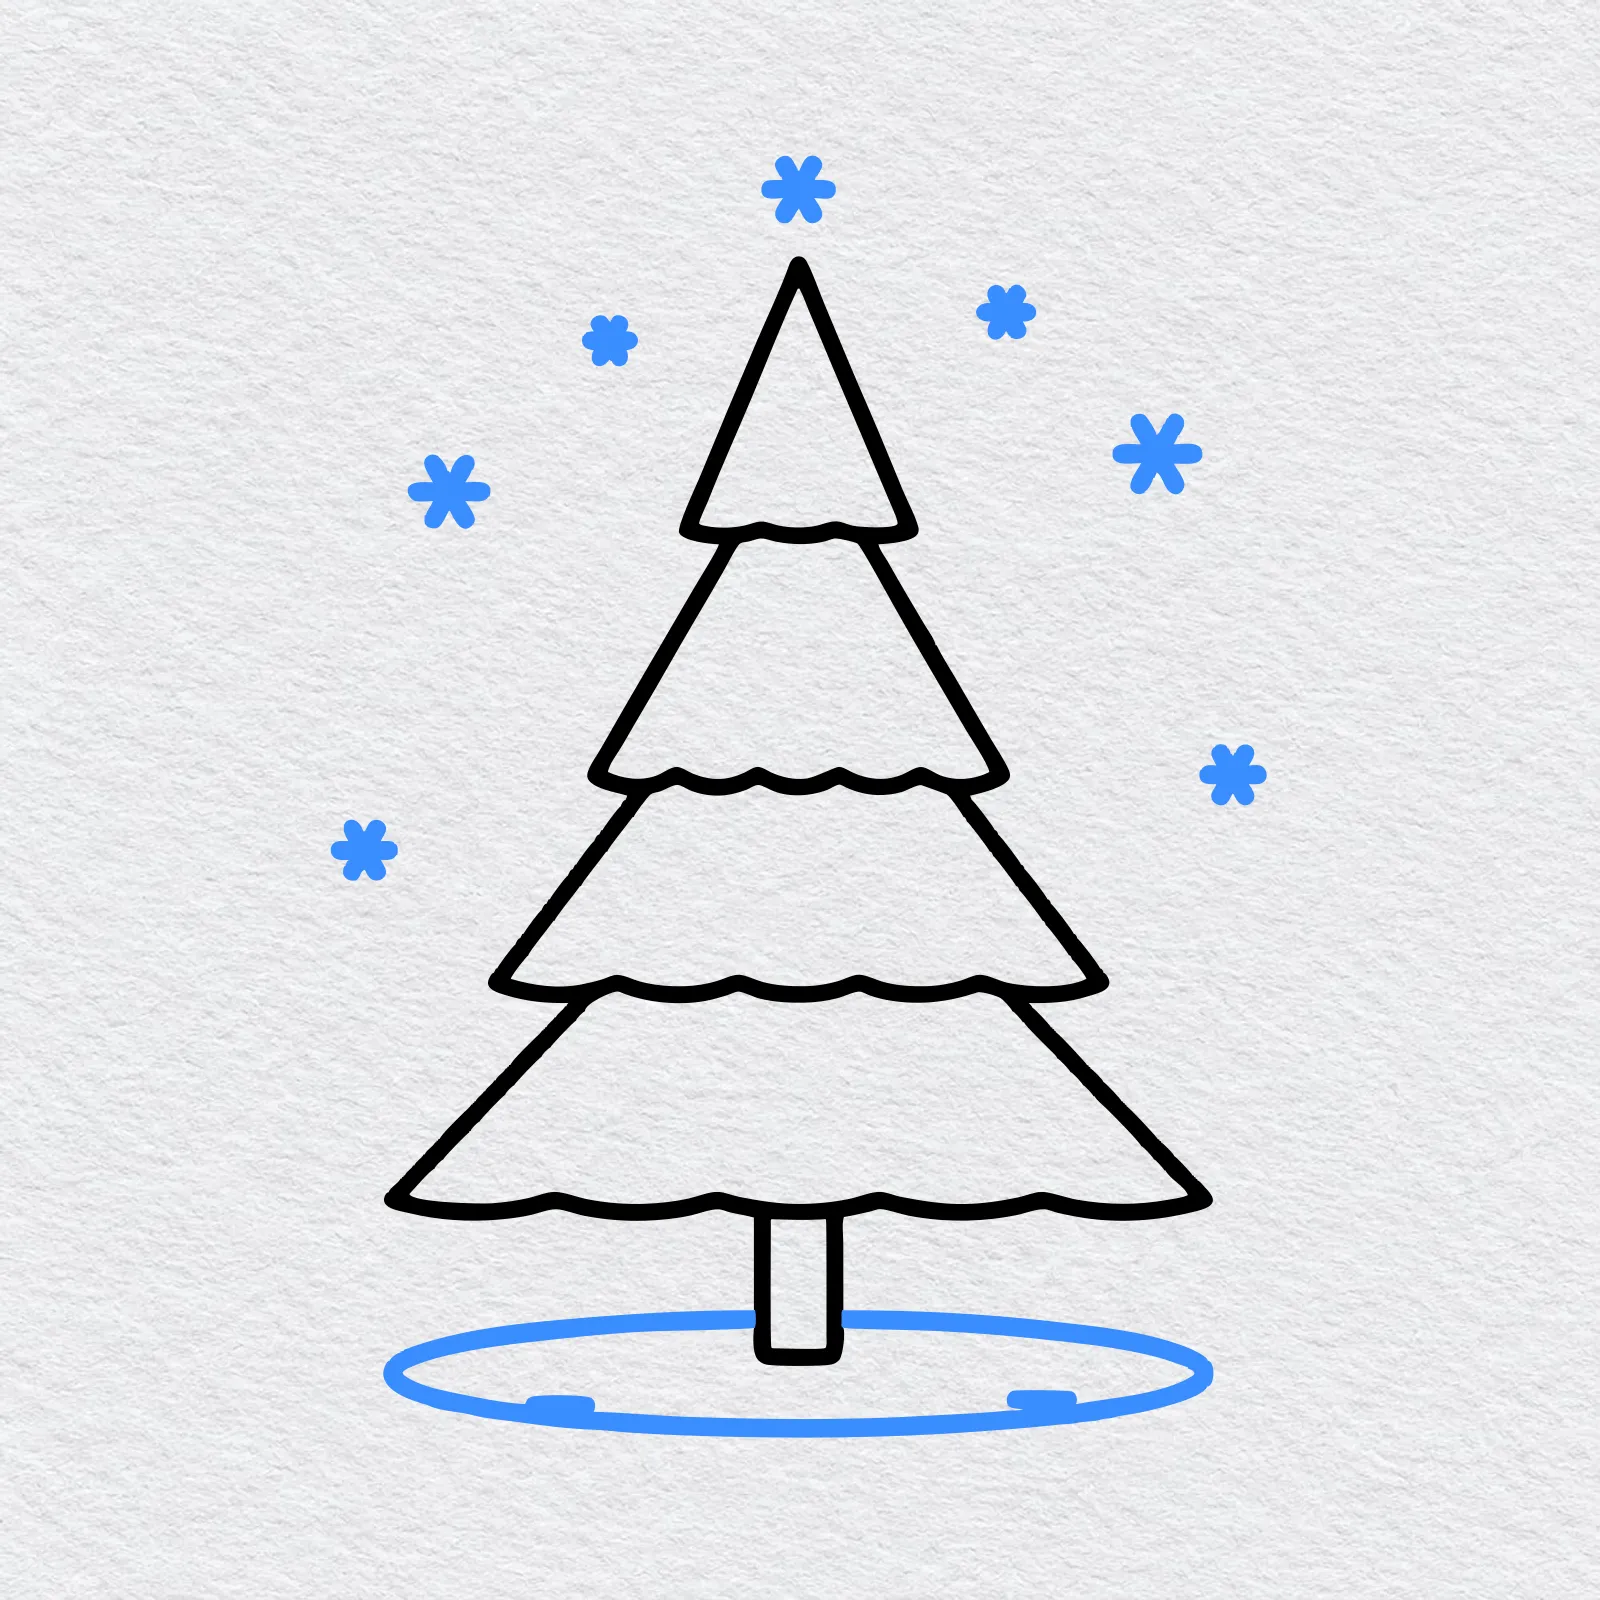
Draw an oval snow patch under the trunk, with two short marks on the snow. Add a few six pointed snowflakes around the tree, leaving a little white space at the edges of the page.
-
Step 7 : Color your pine tree
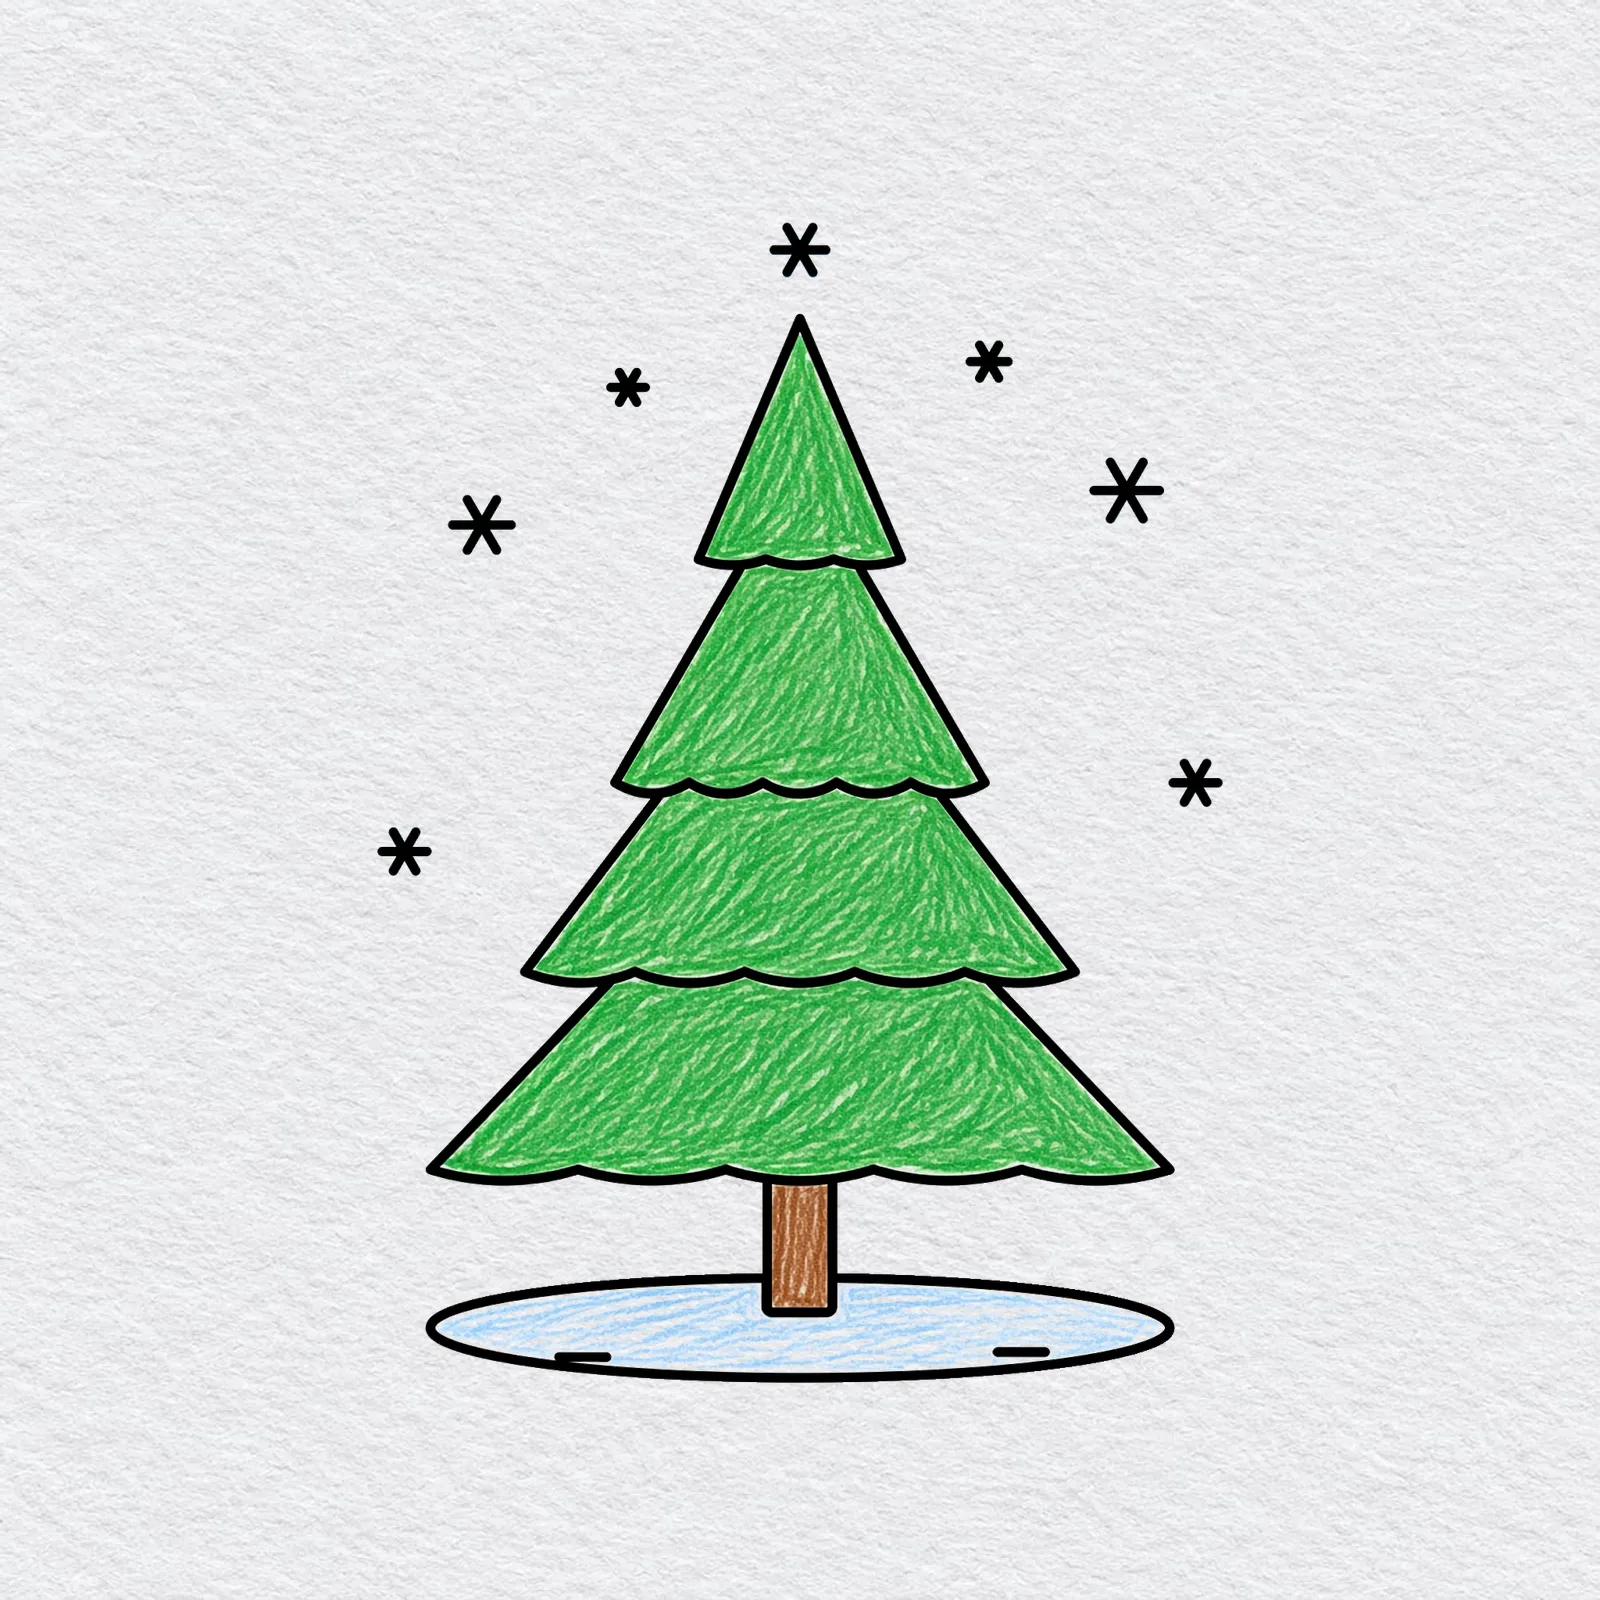
Color the branch layers and the pointed top a medium forest green, with a few darker green strokes so the crayon texture shows. Color the trunk a warm brown.
Leave the snow patch mostly white with a little light blue, and leave the snowflakes as outlines or color them light blue too.
Printable pine tree drawing PDFs
 Save
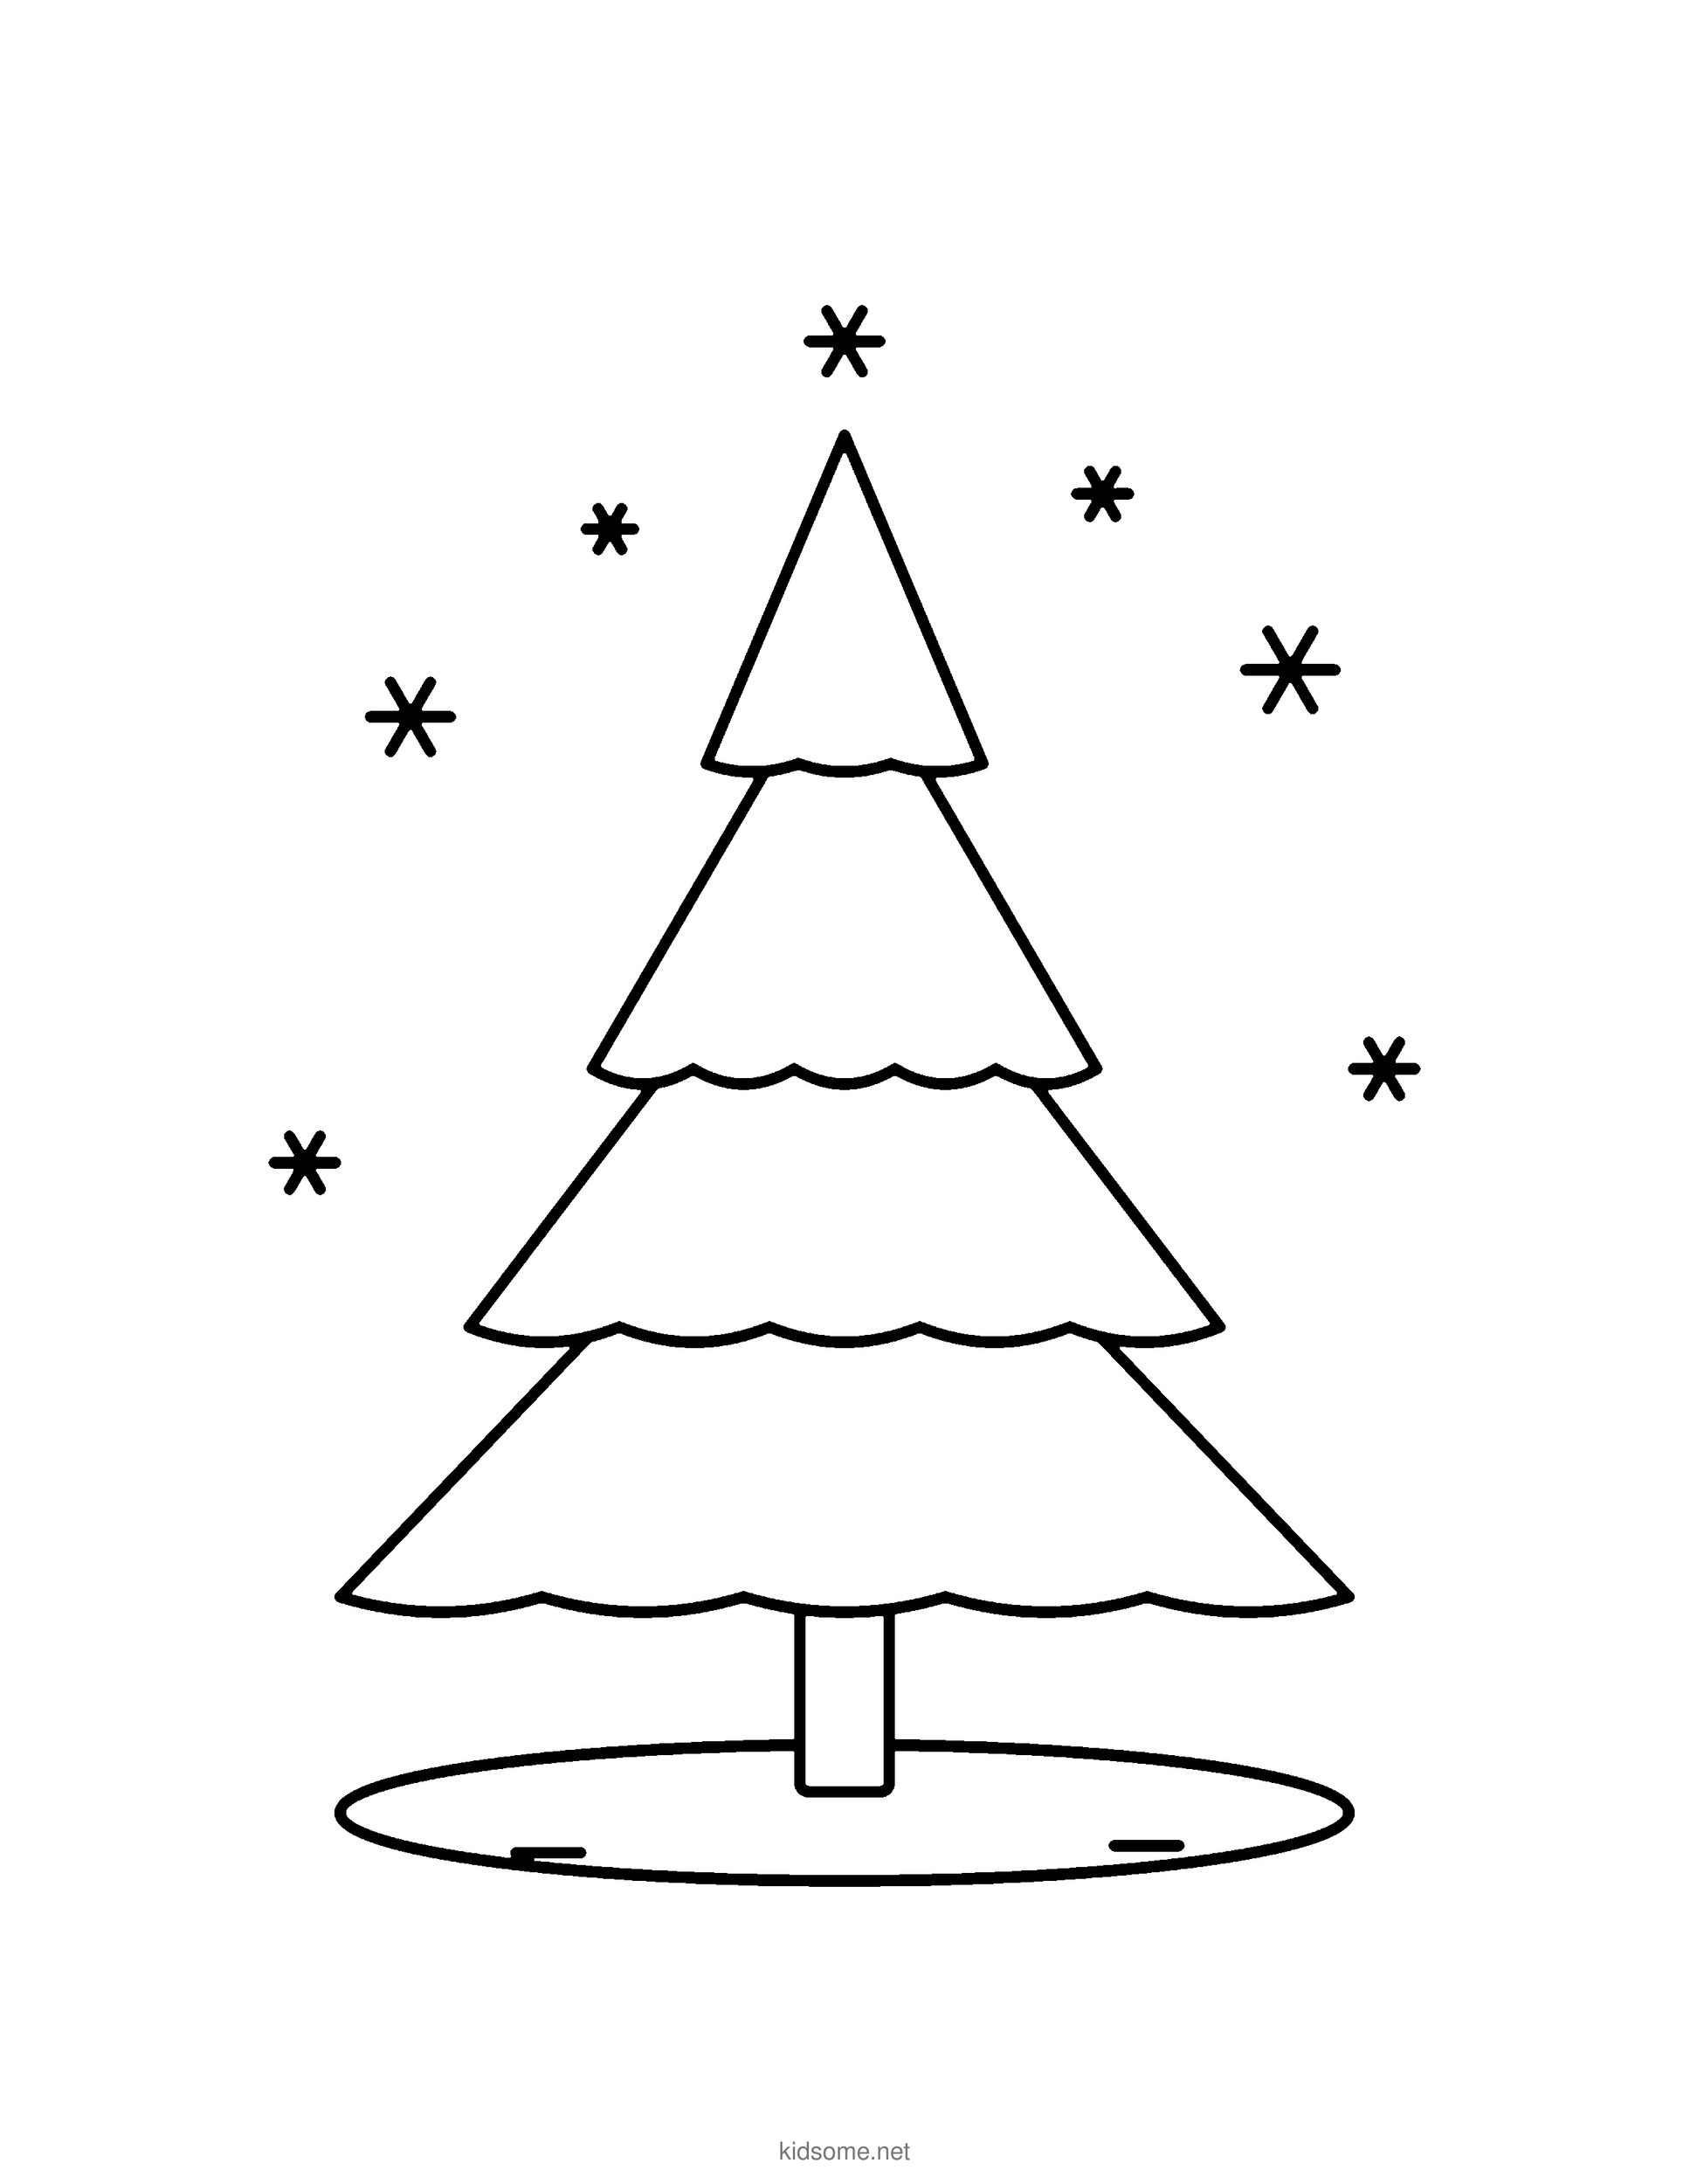
Pine Outline to Color
The finished tall plain pine with layered branches, a pointed top, a snowy patch and snowflakes, as a clean outline to print and color.
Download PDF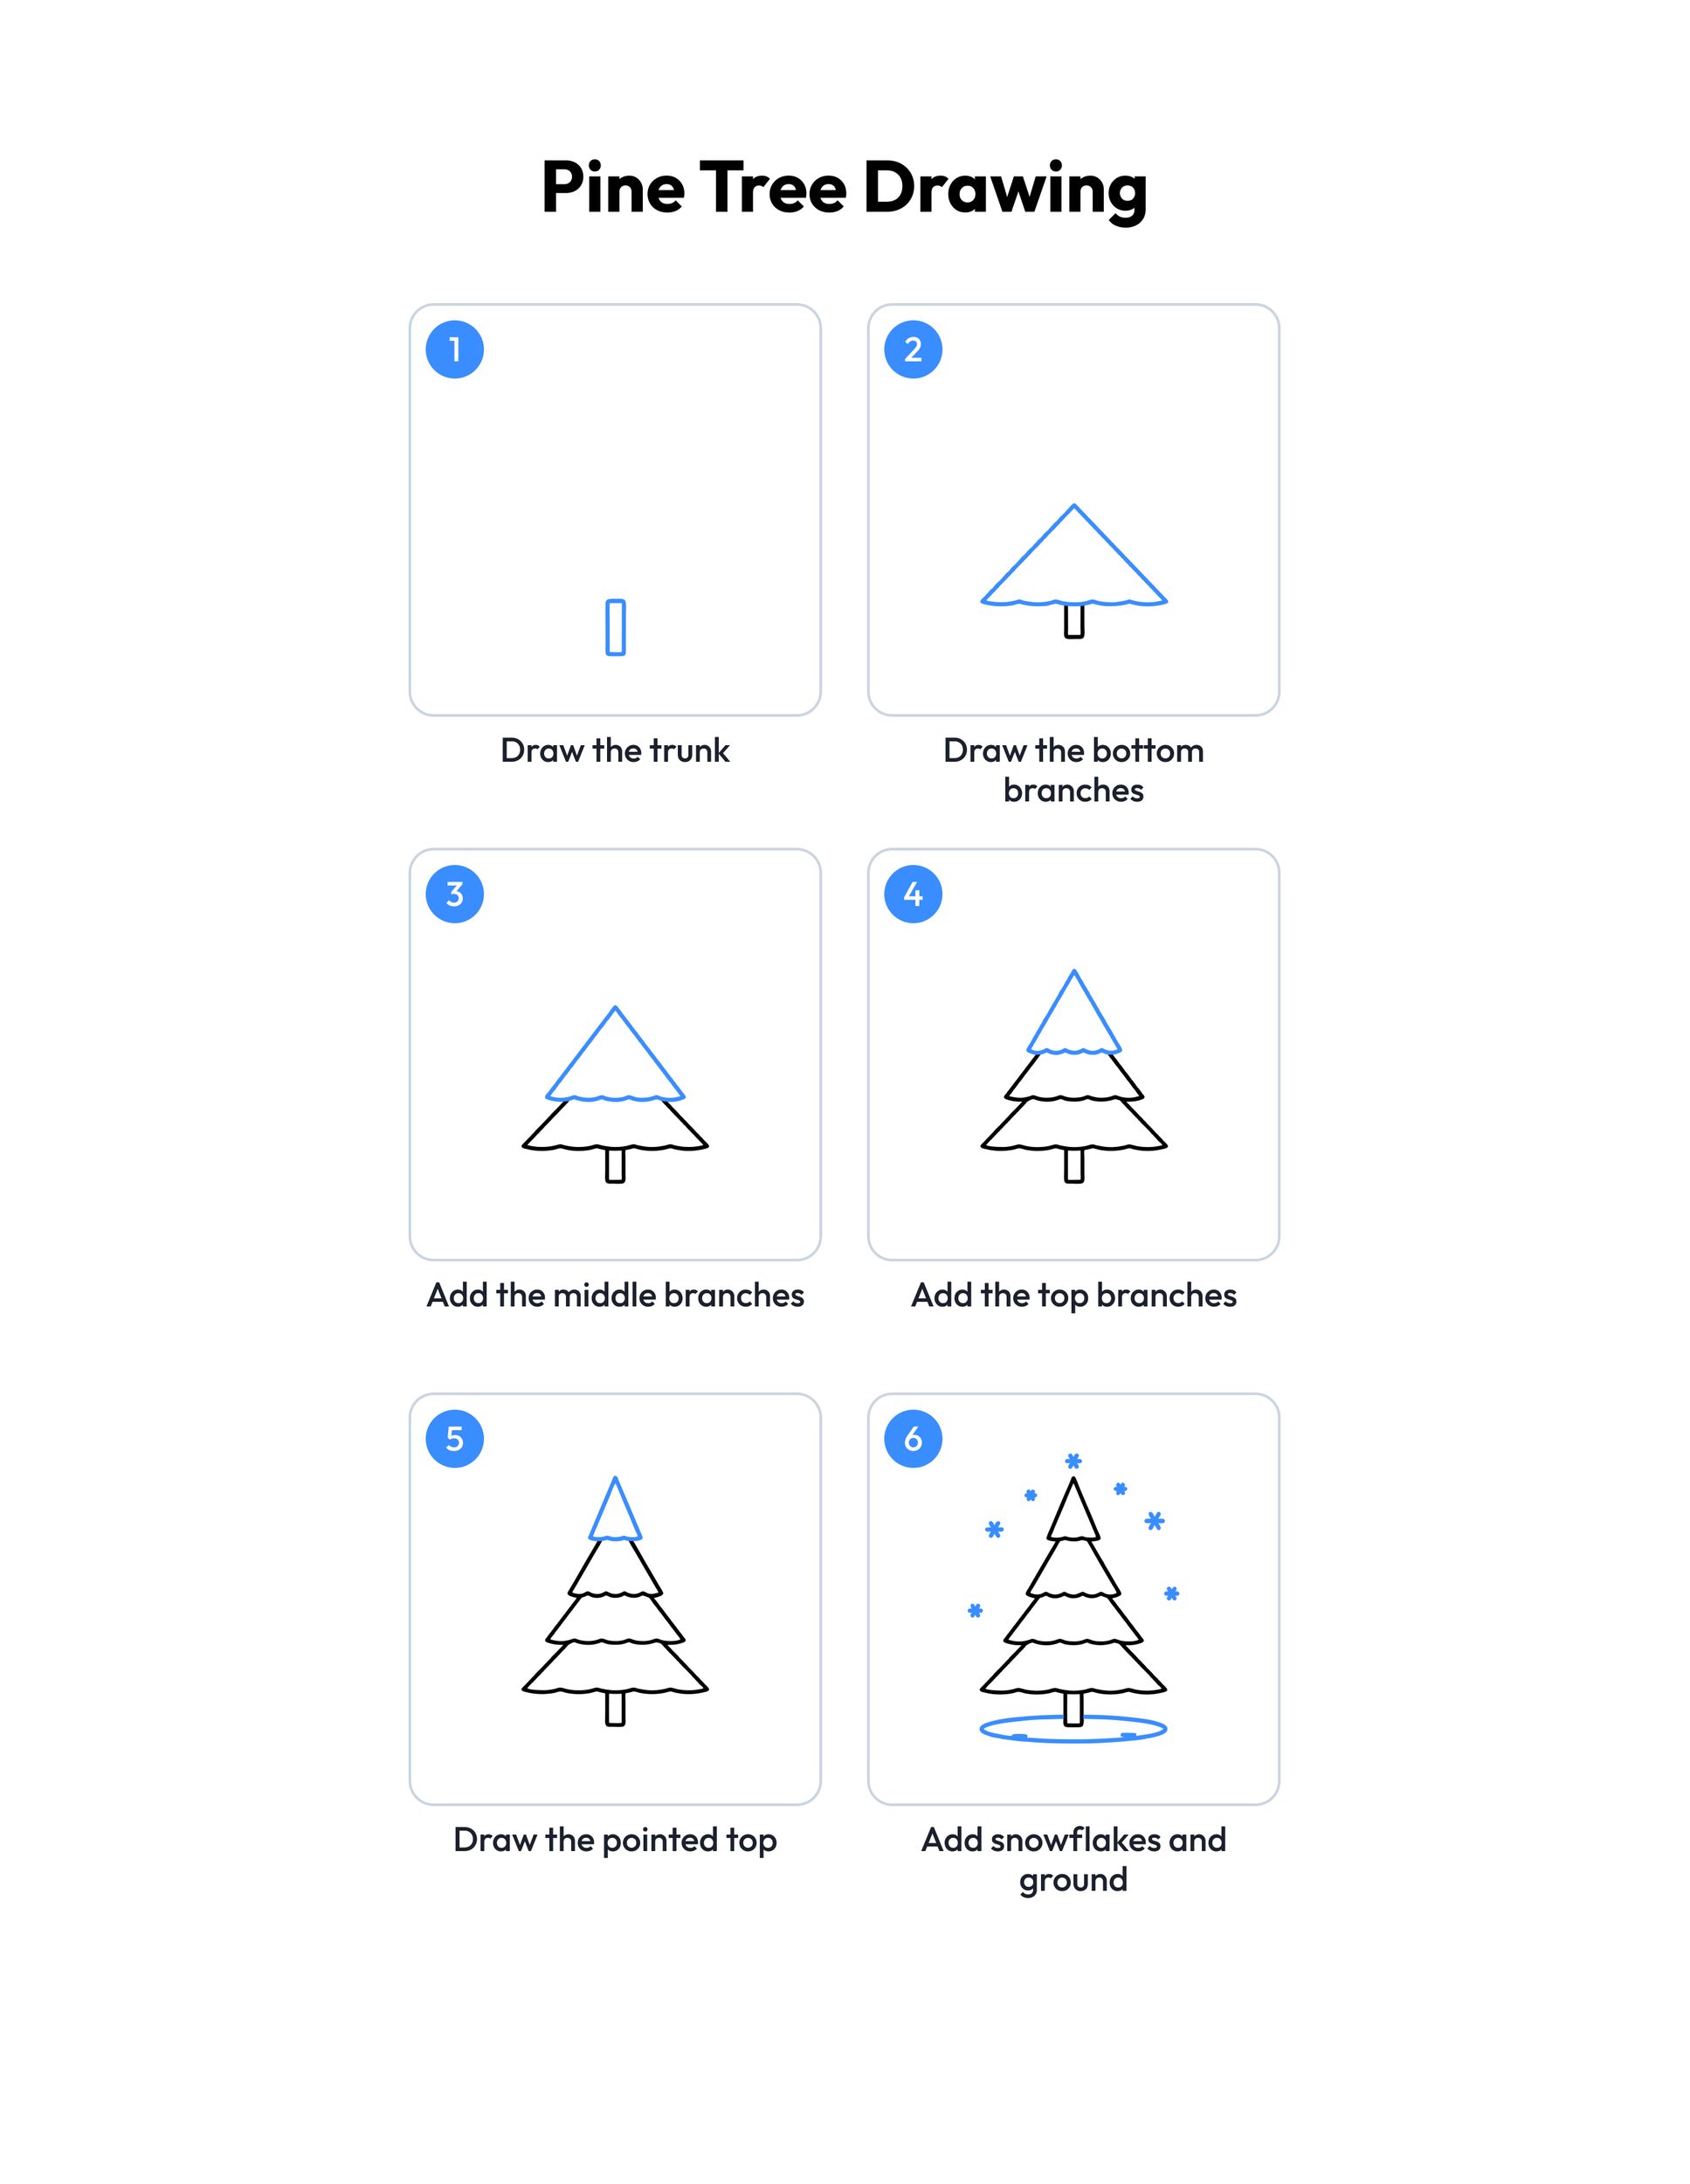 Save
Printable pine tree drawing guide
Every step, two to a row, with the finished pine tree drawing in color at the end.
Download PDFHow to use this guide
Print the outline at 100 percent, or choose Fit to page if your printer asks. The margins fit US Letter and A4, so the whole tree, the snow patch and the snowflakes stay on the sheet. Page one is the outline to color. Page two is the colored example, so print page one alone if you only want the picture to fill in.
For drawing, plain copy paper and a pencil with a good eraser work best. Sketch the trunk and the first branch layer lightly at first, because the sides often need a second try to look even. When the tree looks right, trace over the lines with a marker or a dark crayon and erase the pencil marks underneath. For markers or paint, choose cardstock so the color does not soak through.
Give each step plenty of time. Younger kids can draw the trunk and the wide bottom layer, then take a break before the upper layers and the pointed top. Older kids can draw the whole tree in one go and then add more snowflakes, a little bird on a branch or a second smaller pine beside the first one.
The layered branches are what make it look like a pine instead of a plain triangle tree. Keep each new layer a little narrower than the one below it, and let the bottom edge of each layer sit over the layer underneath. Soft wavy scallops along those bottoms look friendlier than a perfectly straight line, just like real pine branches droop a little under the snow.
Ideas for your pine tree drawing
- Snowflake sky: Fill the sky around the tree with more flakes from our snowflake drawing guide, mixing a few big snowflakes with lots of tiny dots of falling snow.
- Snowman friend: Draw a snowman from our snowman drawing guide beside the tree, with a carrot nose, a scarf and two stick arms waving from the snow.
- Owl in the branches: Add a little bird from our owl drawing guide sitting on one of the middle branches, with big round eyes watching the falling snow.
- Tiny snow globe: Draw a round glass globe from our snow globe drawing guide around a smaller version of the same pine, with a simple stand underneath.
- Palm tree compare: After this pine, try our palm tree drawing guide and talk about how a winter pine and a beach palm both start with a trunk and simple layers.
- Forest of pines: Draw two or three more pines of different sizes behind the first one, smaller in the back, to make a quiet snowy forest on the page.
- Night pine: Color the sky a soft dark blue, leave the snow patch very light, and add a round moon and a few stars above the pointed top.
- Winter coloring time: After the drawing, print a page from our winter coloring pages and color the pine and a cozy winter scene in the same sitting.
- Pine fact: Share a fact while drawing: pine trees keep their green needles all winter, which is why they still look bright when other trees have lost their leaves. Find more winter printables in our winter worksheets.
What age is this pine tree drawing guide for?
It is made for ages 4 to 8. Younger children can draw the trunk and the wide bottom layer with a grown-up nearby, and older kids can draw the whole tree alone, layers and all. Every step uses simple lines and shapes, so no step is too hard.
How do I draw a pine tree that looks tall?
Start with a straight trunk, then stack three branch layers that get narrower as they go up, and finish with a small pointed top. Leave a little room above the tip for snowflakes and a little room below the trunk for the snow patch, so the tree has space to stand tall on the page.
What colors should I use for the pine?
Medium green with a few darker green strokes makes the branches look full, and a warm brown works well for the trunk. Leave the snow patch mostly white with a touch of light blue, and you can leave the snowflakes as black outlines or color them light blue too.
Can I use the guide in my classroom?
Yes. The outline and the step guide are free for personal and classroom use, so teachers can print one for every child for a winter, trees or seasons lesson. Please share a link to this page instead of the files, and do not sell the pages or post them on other websites.
What can we draw after the pine tree?
Other winter drawings make a great next step. Try the snowman, the snowflake or the snow globe next, then put them together in one big snowy picture with the pine in the middle and flakes falling all around it too.